How To Draw A Bow On A Present
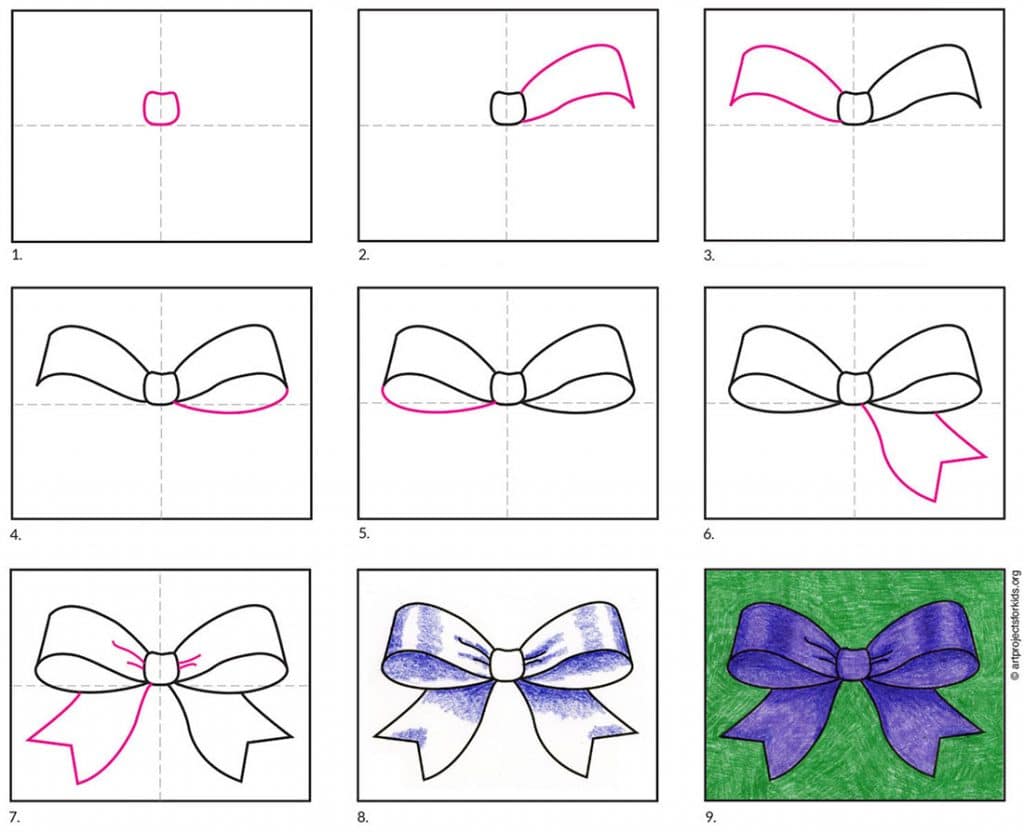
How To Draw A Bow On A Present - Web this lesson is going to be simple, and it only consists of eight steps. Draw her on a gift or anything that needs a cute accessory. Depict these parts being the same on the right and left sides. It is a best alternate item of tie. Step 2 now draw 2 vertical lines on both sides of the arrow.
Add the top outline of the bow loops. Or sticking a cute little bow on the top of a teddy bear’s head. Once you’ve completed the first. Web complete the drawing of the middle of the bow. To imitate the folds on the tape, we make lines on the triangles, reaching like rays from a knot. This line will serve as the base of your bow. These gifts are perfect for putting under a christmas tree!

23 Simple Drawing HOW TO DRAW A RIBBON? Bow, present, gift. YouTube
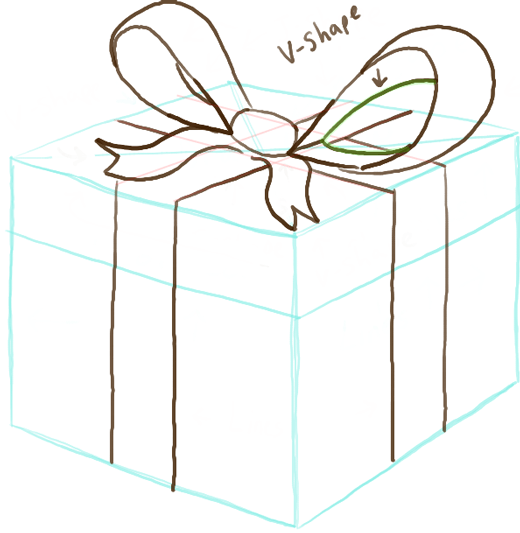
Outline the center of the bow on top of the box, using a curved line. I highly recommend starting this art piece with a pencil sketch that can be erased, because a gift box has.
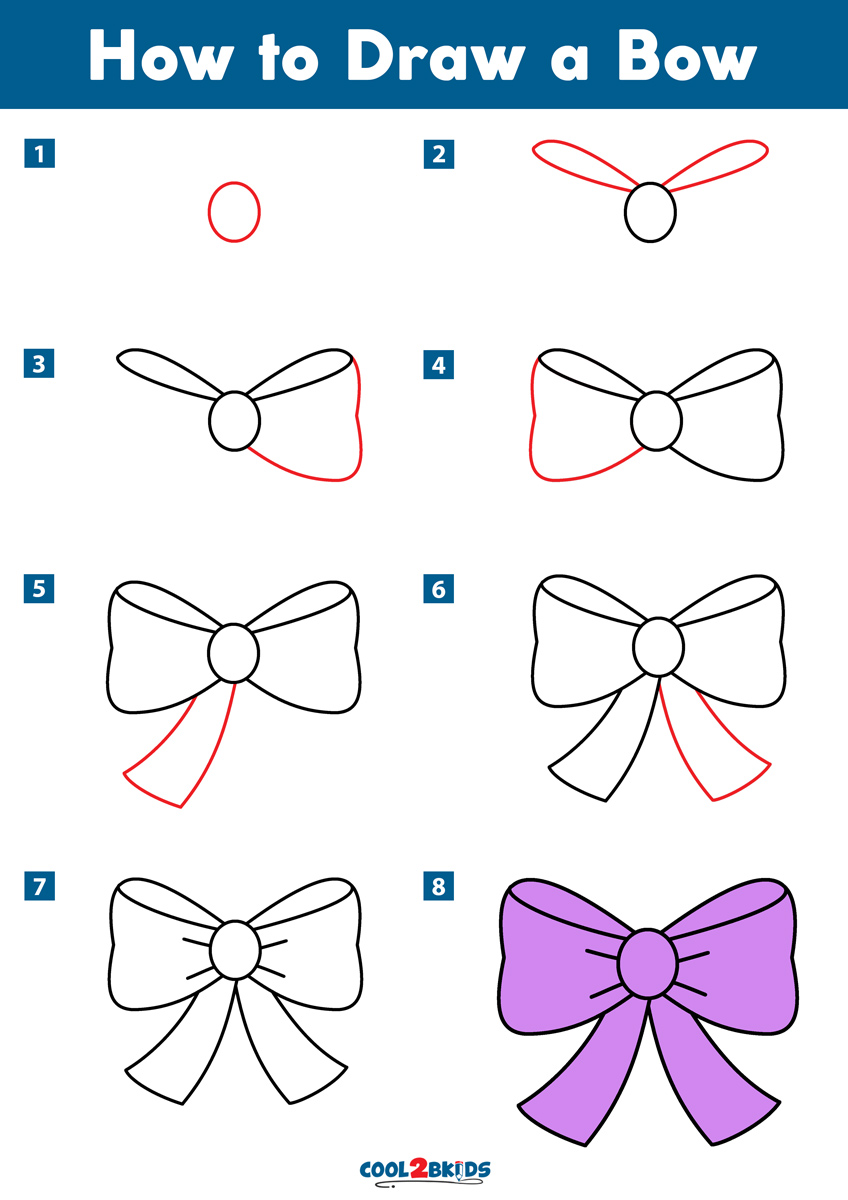
How to Draw a Bow Cool2bKids
Start by drawing a horizontal line near the top of the paper. Draw the left side of the bow. Web speed drawing a gift bow using colored pencils!instagram: Add another tail on the left step.
How to Draw a Wrapped Gift or Present with Ribbon and Bow How to Draw
Start by drawing a horizontal line near the top of the paper. Add another raindrop shape step 5: Web there are many different ways to draw a bow on a present. Easy bows and boxes.
How to Draw a Present Bow Easy Drawing Tutorial For Kids
This super easy drawing lesson is perfect for kids of all ages to follow along. It is a best alternate item of tie. Follow along with us and learn how to draw a christmas present!.
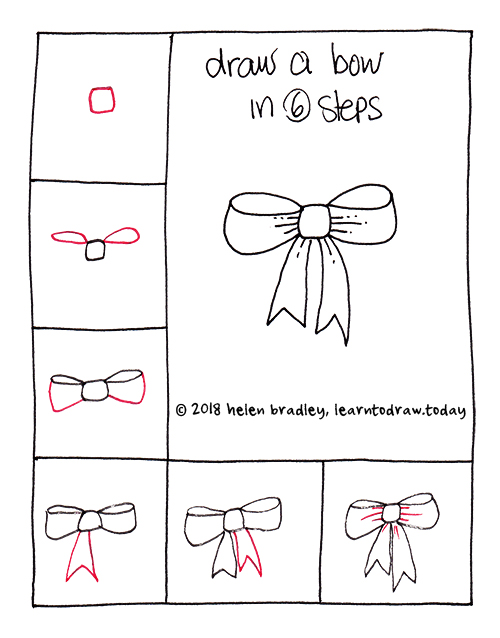
Learn to Draw a Bow in Six Steps Learn To Draw
From the left end of the horizontal line, draw a diagonal line pointing upwards and to the right. These present drawings could be modified for birthdays or christmas gifts. Start by drawing a horizontal line.
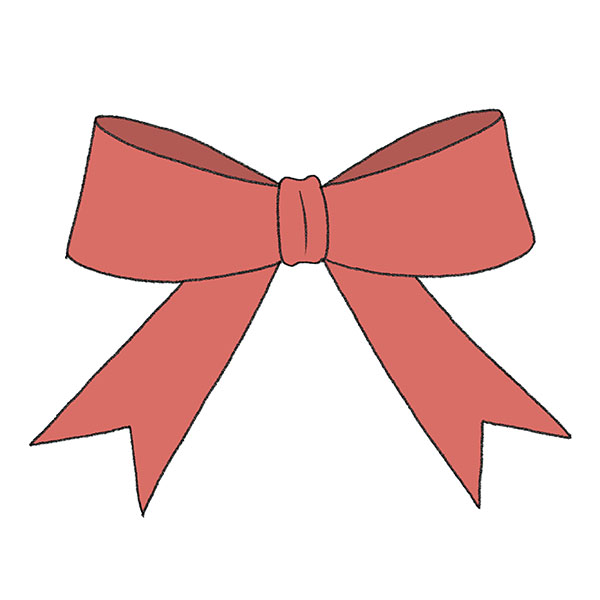
Easy How to Draw a Bow Tutorial and Bow Coloring Page
Repeat the above instructions on the left side. Web start drawing the bow. Add the ends of the ribbon. Next, fold the top and. Easy bows and boxes draw.

How to Draw a Wrapped Gift or Present with Ribbon and Bow How to Draw
Web how to draw a gift or present with a bow watch on step 1 start off your gift by drawing a straight vertical line. This will be the center of the bow you’re about.
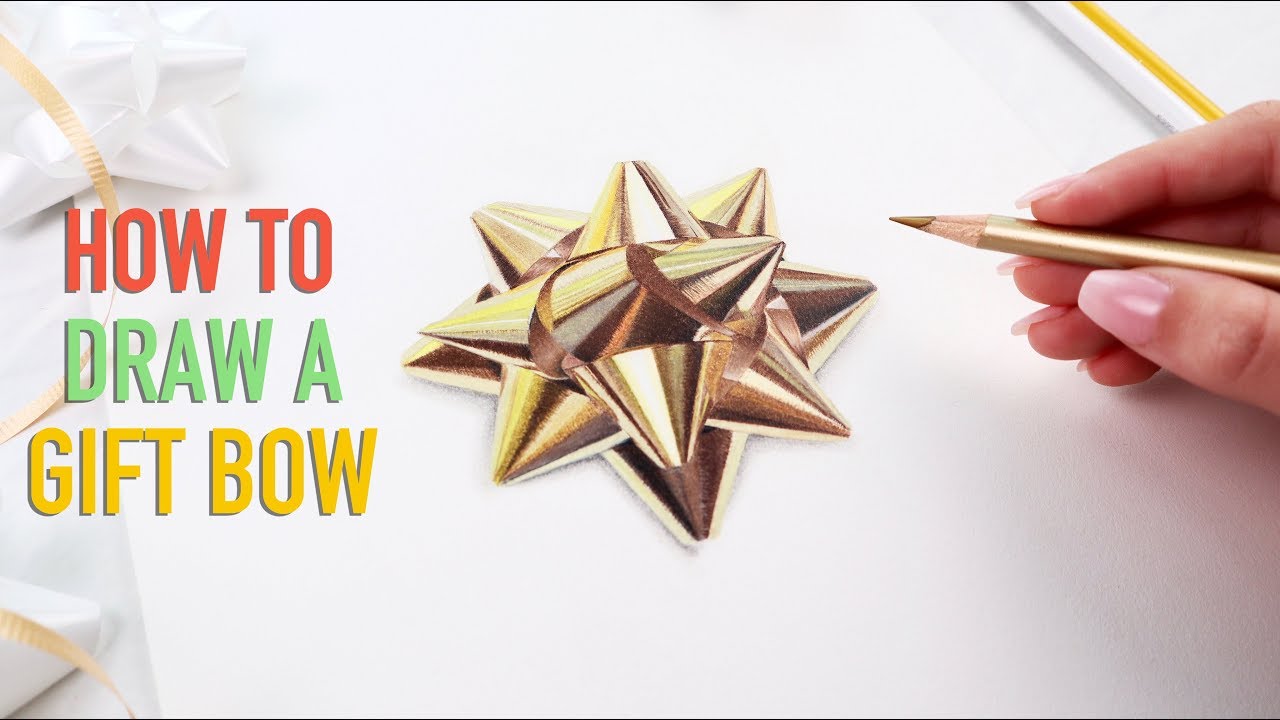
DRAWING A GIFT BOW USING COLORED PENCILS YouTube
Web speed drawing a gift bow using colored pencils!instagram: Outline the center of the bow on top of the box, using a curved line. Connect the ends of the previously drawn lines with curved lines,.

How to Draw a Christmas Bow Step by Step Super Easy! YouTube
Step 2 now draw 2 vertical lines on both sides of the arrow. Ribbon, bow, objects, gifts, bow tie, how to draw everyday objects. From the left end of the horizontal line, draw a diagonal.

How to draw a bow Step by step Drawing tutorials Drawing tutorial
On the right, connect both lines with a single outwardly rounded line. Add a raindrop shape step 3: Draw the left side of the bow. Now, twist the ends of the ribbon together to form.
How To Draw A Bow On A Present Web start drawing the bow. Web draw so cute. Web on top of the present’s lid, draw the small bow’s knot, following the shape shown in my example. Step 3 now connect the tops together with lines. Web this lesson is going to be simple, and it only consists of eight steps.