Intro
Discover the Excel Autofit Column Width Shortcut Mac to easily adjust column sizes, improve spreadsheet readability, and boost productivity with quick keyboard shortcuts and formatting tips.
When working with Excel on a Mac, managing column widths efficiently is crucial for clear data presentation and navigation. One of the most useful features in Excel for adjusting column widths is the Autofit feature, which automatically adjusts the column width to fit the contents of the cells. Knowing the shortcut for Autofit column width on a Mac can significantly enhance your productivity.
Excel's Autofit feature is not just about making your data visible; it's also about presenting your data in a way that's easy to read and understand. Whether you're working on financial reports, data analysis, or any other type of spreadsheet, the ability to quickly adjust column widths is indispensable. The Autofit feature saves you the hassle of manually adjusting each column, which can be particularly tedious when dealing with large spreadsheets.
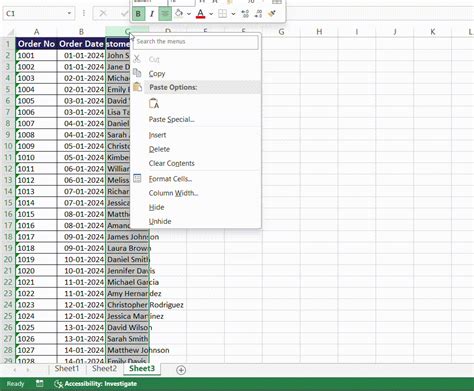
For Mac users, the Autofit column width shortcut is a bit different from the Windows version. While Windows users can use Alt + O + C + A to autofit a column, Mac users have a simpler and more intuitive approach. To autofit a column in Excel on a Mac, you can use the shortcut Command (⌘) + Spacebar after selecting the column(s) you want to autofit. This method is straightforward and works for most versions of Excel for Mac.
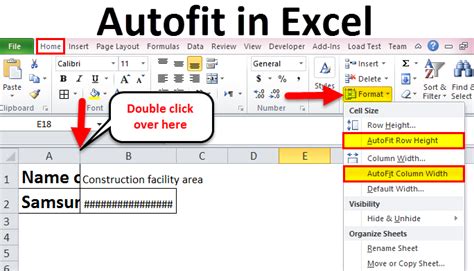
However, it's worth noting that Excel's behavior and shortcuts can sometimes vary between versions or due to specific settings. If you find that the Command + Spacebar shortcut doesn't work as expected, there's an alternative method you can try. By double-clicking on the right border of the column header, Excel will automatically adjust the column width to fit the content. This method is universal and works across different versions and platforms, including Mac.
Understanding Excel Autofit

Understanding how Autofit works in Excel can help you use it more effectively. Autofit adjusts the column width based on the longest entry in the column, including the header. This means if you have a column with a mix of short and long entries, Autofit will widen the column enough to display the longest entry fully, without wrapping text or truncating it. This feature is particularly useful when you're working with data that has varying lengths, such as descriptions or comments.
Benefits of Using Autofit
The benefits of using the Autofit feature in Excel are numerous. It saves time by eliminating the need to manually adjust each column, which can be especially beneficial when working with large datasets. Autofit also ensures that your data is presented clearly, reducing the risk of errors due to truncated or wrapped text. Moreover, Autofit helps in making your spreadsheet look more professional and organized, which is essential for reports and presentations.Using Autofit in Different Scenarios

Autofit is not limited to adjusting single columns; it can also be applied to multiple columns or even an entire worksheet. This flexibility makes Autofit a powerful tool for managing the layout of your spreadsheet. Whether you're preparing a budget, tracking inventory, or analyzing sales data, Autofit can help you present your data in a clear and concise manner.
Autofit for Multiple Columns
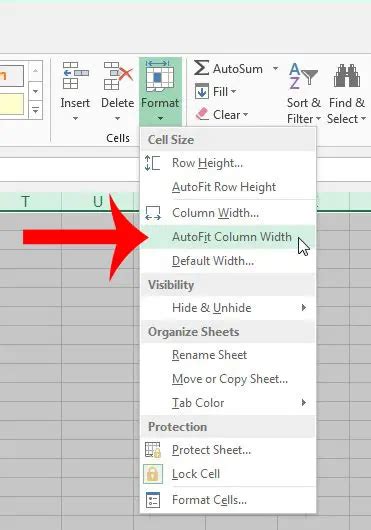
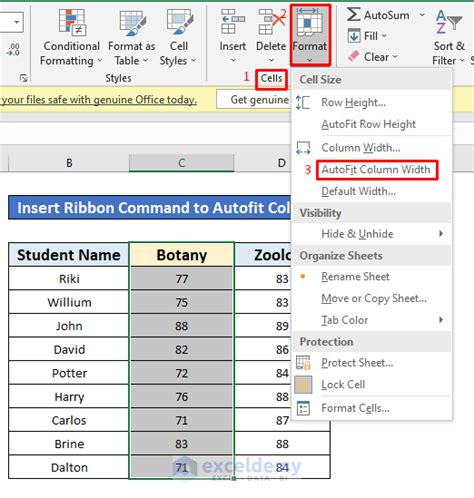
To autofit multiple columns at once, you can select all the columns you wish to adjust by holding down the Command key while selecting the column headers. Once all the desired columns are selected, you can use the Command + Spacebar shortcut to autofit all of them simultaneously. This approach is particularly useful when you have a spreadsheet with many columns that need adjustment.Alternatives to Autofit
While Autofit is a convenient feature, there are scenarios where you might prefer more control over your column widths. Excel offers several alternatives to Autofit that allow for more manual control. You can adjust column widths manually by dragging the border of the column header. This method gives you precise control over the width, allowing you to tailor the column size to your specific needs.
Manual Adjustment
Manual adjustment of column widths can be useful when you want to ensure that all columns have a uniform width, regardless of their content. This can enhance the visual appeal of your spreadsheet and make it easier to read. To manually adjust a column width, simply place your cursor on the right border of the column header until it changes to a double-headed arrow, then click and drag to the desired width.Best Practices for Using Autofit

Using Autofit effectively involves understanding its limitations and best practices. One key practice is to use Autofit judiciously, especially in spreadsheets with a large number of columns or rows. Overuse of Autofit can sometimes lead to columns that are too wide, making the spreadsheet difficult to navigate. It's also important to review your spreadsheet after using Autofit to ensure that all data is properly displayed and that the column widths contribute to a clear and organized presentation.
Combining Autofit with Other Features
Autofit can be even more powerful when combined with other Excel features. For example, using Autofit in conjunction with text wrapping can help ensure that long entries are both fully visible and well-formatted within the cell. This combination is particularly useful for cells containing descriptive text or comments.Common Issues with Autofit

Despite its usefulness, Autofit can sometimes present issues, such as columns becoming too wide or not adjusting as expected. These issues can often be resolved by checking the cell formatting for any overridden width settings or by ensuring that the column headers are properly selected before applying Autofit.
Troubleshooting Autofit Issues
Troubleshooting Autofit issues typically involves a few simple steps. First, ensure that the column you're trying to autofit is not frozen or protected, as these settings can prevent Autofit from working correctly. Next, check if there are any hidden characters or unnecessary spaces in the cells that could be affecting the Autofit calculation. Finally, try restarting Excel or checking for any updates, as sometimes software glitches can interfere with Autofit's functionality.Excel Autofit Column Width Gallery


What is the Autofit shortcut in Excel for Mac?
+The Autofit shortcut in Excel for Mac is Command (⌘) + Spacebar.
How do I autofit multiple columns in Excel on a Mac?
+To autofit multiple columns, select all the columns you wish to adjust by holding down the Command key while selecting the column headers, then use the Command + Spacebar shortcut.
What if the Autofit feature is not working as expected?
+Check if the column is frozen or protected, ensure there are no hidden characters affecting the Autofit calculation, and try restarting Excel or checking for updates.
In conclusion, mastering the Autofit feature in Excel on a Mac can significantly enhance your productivity and the presentation of your spreadsheets. Whether you're a beginner or an advanced user, understanding how to use Autofit effectively can make a substantial difference in how you work with Excel. By following the best practices and troubleshooting tips outlined above, you can ensure that your spreadsheets are always well-organized and easy to navigate. If you have any further questions about using Autofit in Excel or other Excel-related topics, feel free to comment below or share this article with others who might find it useful.