Intro
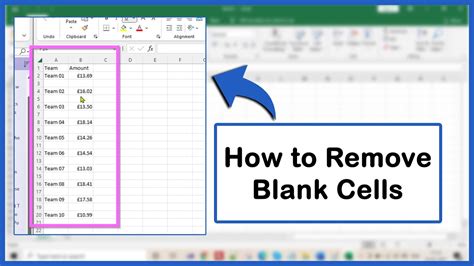
Removing blank cells from a column in Excel can greatly improve the organization and usability of your data. Whether you're working with a small dataset or a large spreadsheet, blank cells can sometimes get in the way of analysis, formatting, and even data entry. Here's how you can efficiently remove blank cells from a column in Excel.
First, let's consider why you might want to remove blank cells. Blank cells can occur for various reasons, such as data not being available, errors in data import, or simply because the data was never entered. Regardless of the reason, removing these blank cells can make your data more compact and easier to analyze.
To start, select the column from which you want to remove the blank cells. You can do this by clicking on the column header, which will highlight the entire column. Next, go to the "Data" tab in the Ribbon. Here, you'll find a variety of tools for managing and analyzing your data, including the "Filter" button. However, for removing blank cells, you'll want to use the "Sort & Filter" group, but more specifically, the "Go To Special" feature after selecting your data range.
Here are the steps in more detail:
-
Select Your Data Range: Click on the column header to select the entire column. If you only want to remove blank cells from a specific range within the column, select that range instead.
-
Go to Home Tab: Navigate to the "Home" tab in the Ribbon.
-
Find & Select: In the "Editing" group, click on "Find & Select", then choose "Go To Special".
-
Select Blank Cells: In the "Go To Special" dialog box, select "Blanks" and click "OK". This will select all the blank cells in your selected range.
-
Delete Blank Cells: With the blank cells selected, right-click on any of the selected cells and choose "Delete". In the "Delete" dialog box, make sure "Shift cells up" is selected to move the data up and remove the blank cells. Click "OK".
Alternatively, you can use filtering to remove blank cells, although this method doesn't actually delete the cells but hides them:
-
Select Your Data Range: Click on the column header to select the entire column.
-
Go to Data Tab: Navigate to the "Data" tab in the Ribbon.
-
Filter: Click on the "Filter" button in the "Data Tools" group. This will add filter arrows to the headers of your selected column.
-
Select Filter Arrow: Click on the filter arrow in the column header, then uncheck "Blanks" to hide the blank cells.
-
Copy and Paste: If you want to remove the blank cells permanently using this method, select the filtered data (excluding headers), copy it, then paste it into a new location. Be cautious with this method as it doesn't actually remove the original blank cells but creates a copy of your data without them.
Remember, the first method directly removes blank cells by shifting data up, while the filtering method hides blank cells. Choose the method that best suits your needs, considering whether you want to permanently remove the blank cells or just hide them for analysis purposes.
Benefits of Removing Blank Cells
- Improved Data Analysis: Blank cells can interfere with formulas and statistical analyses. Removing them ensures your calculations are accurate and reliable.
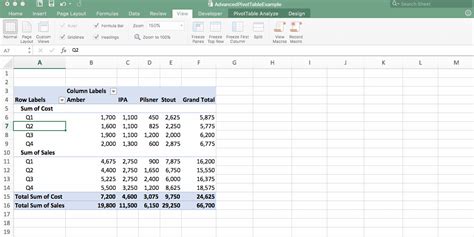
- Enhanced Data Visualization: For charts and graphs, blank cells can create unnecessary gaps or skew the scale. Removing them helps in creating more accurate and visually appealing representations of your data.
- Better Data Management: It makes your spreadsheet look more organized and easier to navigate, especially when working with large datasets.
Common Challenges
- Data Loss: Be cautious when deleting rows or shifting cells, as this can lead to loss of data in adjacent columns if not done carefully.
- Formula References: If your spreadsheet contains formulas that reference the blank cells or the cells around them, removing these cells can cause formula errors.
Alternatives and Additional Tips
- Using VBA Macros: For repetitive tasks or more complex data manipulation, consider using VBA macros. Macros can automate the process of finding and removing blank cells, saving you time.
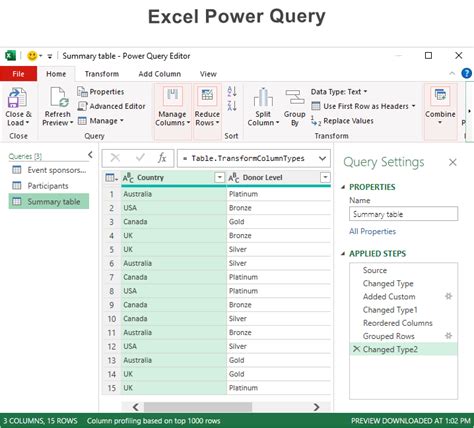
- Power Query: If you're working with Excel 2010 or later, Power Query (now known as Get & Transform Data) offers powerful data manipulation capabilities, including removing blank rows, directly within the query editor.
In summary, removing blank cells from a column in Excel is a straightforward process that can significantly improve the quality and usability of your data. Whether you choose to use the "Go To Special" feature, filtering, or explore more advanced methods like VBA or Power Query, the key is to select the method that best fits your specific needs and the nature of your data.
Advanced Techniques for Handling Blank Cells
For more complex datasets or specific requirements, such as removing blank cells based on conditions or handling blank cells in formulas, Excel offers several advanced techniques.
Using Formulas to Identify Blank Cells
You can use formulas like ISBLANK(A1) to check if a cell is blank. This formula returns TRUE if the cell is blank and FALSE otherwise. Such formulas can be useful in conditional formatting or in combination with other functions to perform actions based on whether a cell is blank.
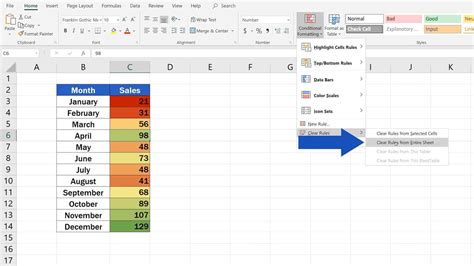
Conditional Formatting
Conditional formatting can highlight blank cells, making them easier to identify. To apply conditional formatting:
- Select the range you want to format.
- Go to the "Home" tab.
- Click on "Conditional Formatting".
- Choose "New Rule".
- Select "Use a formula to determine which cells to format".
- Enter a formula like
=ISBLANK(A1). - Click "Format" to choose how you want to highlight the blank cells.
- Click "OK" to apply the rule.
Handling Blank Cells in Formulas
When working with formulas, blank cells can sometimes cause issues. For example, if you're summing a range of cells, blank cells are ignored, but if you're using a formula that references a blank cell, it might return an error. Functions like IFERROR or IFBLANK can help manage these situations.
Gallery of Excel Data Cleaning
Excel Data Cleaning Image Gallery


Frequently Asked Questions
How do I remove blank cells in Excel?
+To remove blank cells in Excel, select the range, go to "Home" > "Find & Select" > "Go To Special", choose "Blanks", and then delete them or use filtering to hide them.
What is the difference between deleting and hiding blank cells?
+Deleting blank cells removes them permanently, shifting data up, while hiding them through filtering keeps the cells but makes them invisible for analysis purposes.
Can I use formulas to identify and handle blank cells?
+Yes, formulas like ISBLANK can identify blank cells, and functions such as IFERROR or IFBLANK can help manage errors or blank values in calculations.
In conclusion, managing blank cells is an essential part of data cleaning and preparation in Excel. By understanding the different methods to remove or handle blank cells, you can make your data more accurate, reliable, and easier to analyze. Whether you're a beginner or an advanced user, mastering these techniques can significantly improve your productivity and the quality of your work in Excel. Feel free to share your experiences or tips on handling blank cells in the comments below, and don't forget to share this article with anyone who might benefit from learning more about Excel data cleaning techniques.