Intro
Removing duplicates in Excel can be a crucial step in data cleaning and analysis. Excel provides several methods to remove duplicates, and understanding these methods can help you work more efficiently with your data. In this article, we will delve into the process of removing duplicates, including non-duplicates, in Excel, exploring the various techniques and tools available.
When working with data in Excel, duplicates can arise from various sources, including data entry errors, import from other sources, or simply because the data set is too large to manually manage. Removing these duplicates is essential to ensure data accuracy, reduce data redundancy, and improve analysis outcomes. However, the focus here is slightly different; instead of directly removing duplicates, we're looking at how to remove non-duplicates, which essentially means we want to keep only the duplicate values and eliminate any unique entries.
Understanding Duplicates and Non-Duplicates
Before diving into the methods, it's crucial to understand what duplicates and non-duplicates are. Duplicates refer to rows or values that appear more than once in your dataset. Non-duplicates, on the other hand, are unique values that appear only once. The task of removing non-duplicates involves identifying and deleting these unique values, leaving you with a dataset that contains only the duplicate entries.
Methods to Remove Non-Duplicates
There are several approaches to remove non-duplicates in Excel, each with its own advantages and best use cases.
Using Conditional Formatting and Filtering
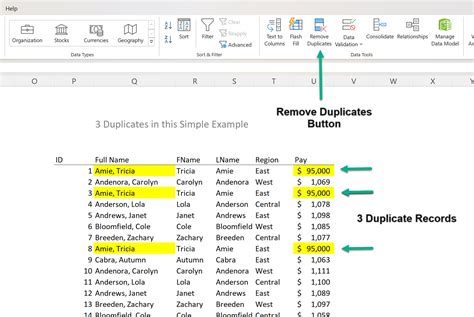
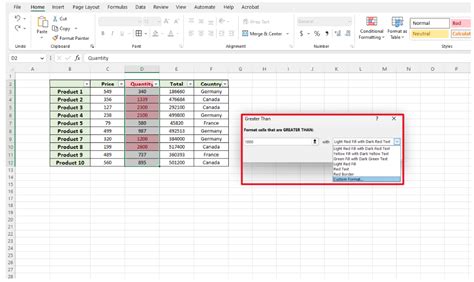
- Highlight Duplicates: Use conditional formatting to highlight cells that appear more than once. Go to Home > Conditional Formatting > Highlight Cells Rules > Duplicate Values. This will color the duplicate values, making them easy to identify.
- Filter Out Non-Duplicates: After highlighting duplicates, you can filter your data to show only the duplicate rows. However, this method doesn't directly remove non-duplicates but helps in identifying them.
Using Formulas
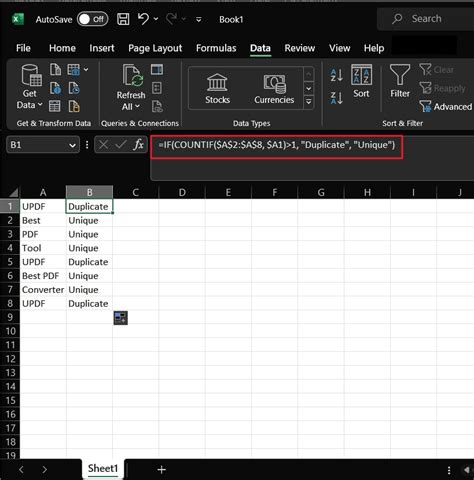
You can use formulas to identify and remove non-duplicates. For example, the COUNTIF function can count the occurrences of each value. If the count is greater than 1, it's a duplicate; otherwise, it's a non-duplicate.
- COUNTIF Formula: In a new column, enter the formula
=COUNTIF(range, cell) > 1, whererangeis the range of cells you're checking, andcellis the individual cell you're evaluating. This formula returns TRUE for duplicates and FALSE for non-duplicates. - Filter and Delete: Filter the data based on the formula results (TRUE for duplicates), and then manually delete the rows marked as non-duplicates (FALSE).
Using PivotTables
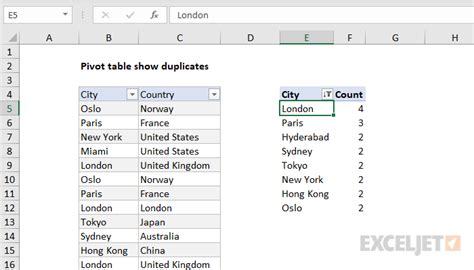
PivotTables can also be used to identify and remove non-duplicates by counting the occurrences of each value.
- Create a PivotTable: Insert a PivotTable based on your data range.
- Count Values: Drag the field you want to check for duplicates into the Row Labels area and into the Values area. Right-click on the field in the Values area and select "Value Field Settings" to change the summary type to Count.
- Filter Duplicates: You can then filter the PivotTable to show only the rows with a count greater than 1, effectively showing only the duplicates.
Removing Non-Duplicates Directly
To directly remove non-duplicates, you can use a combination of filtering and deletion based on the methods described above. However, it's essential to be cautious when deleting data to avoid losing important information.
Steps to Remove Non-Duplicates:
- Identify Non-Duplicates: Use one of the methods above to identify non-duplicates.
- Select Non-Duplicate Rows: Based on your identification method, select all the rows that are non-duplicates.
- Delete Selected Rows: Right-click on the selection and choose "Delete Row" to remove the non-duplicate rows.
Best Practices and Considerations

When removing non-duplicates, it's crucial to follow best practices to ensure data integrity:
- Backup Your Data: Always make a backup of your original dataset before making significant changes.
- Test on a Sample: Apply your method to a small sample of your data first to ensure it works as expected.
- Verify Results: After removing non-duplicates, verify that the remaining data is accurate and complete.
Common Challenges and Solutions
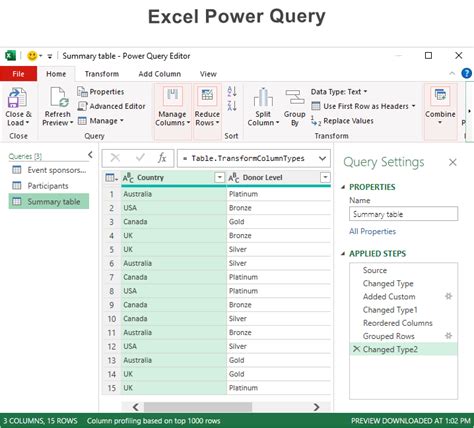
Removing non-duplicates can sometimes present challenges, such as dealing with large datasets or handling data with multiple criteria for duplicates. Solutions include using more advanced Excel functions, leveraging Power Query for data manipulation, or even utilizing VBA scripts for complex operations.
Gallery of Excel Remove Non-Duplicates
Excel Remove Non-Duplicates Image Gallery

What is the easiest way to remove non-duplicates in Excel?
+The easiest way often involves using conditional formatting to highlight duplicates, followed by filtering to select and delete non-duplicate rows.
Can I use formulas to remove non-duplicates in Excel?
+Yes, formulas like COUNTIF can help identify non-duplicates by counting the occurrences of each value. You can then filter based on the formula results to remove non-duplicates.
How do I ensure data integrity when removing non-duplicates?
+Always backup your data before making changes, test your method on a small sample, and verify the results after removal to ensure data integrity.
In conclusion, removing non-duplicates in Excel is a task that requires careful consideration and the right approach. By understanding the methods and best practices outlined in this article, you can efficiently manage your data, ensuring it is accurate, complete, and ready for analysis. Whether you're using conditional formatting, formulas, or PivotTables, the key to success lies in carefully planning and executing your data manipulation tasks. If you have any further questions or need more detailed guidance on any of the steps, don't hesitate to ask. Share your experiences or tips on removing non-duplicates in the comments below, and consider sharing this article with others who might benefit from learning more about data management in Excel.