Intro
Learn to overlay graphs in Excel with ease. Master data visualization by combining charts, customizing layouts, and enhancing presentations with Excel graph overlay techniques and tools.
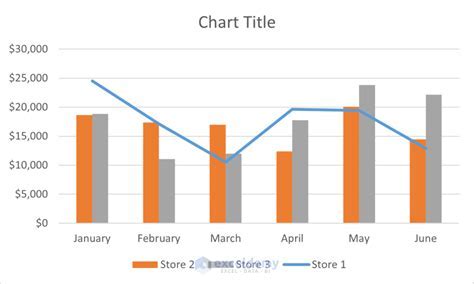
The ability to overlay graphs in Excel is a powerful tool for data analysis and visualization. By combining multiple datasets into a single graph, users can easily compare and contrast trends, patterns, and relationships between different variables. This technique is particularly useful for identifying correlations, tracking changes over time, and making informed decisions based on data-driven insights. In this article, we will explore the importance of overlaying graphs in Excel and provide a step-by-step guide on how to do it effectively.
Overlaying graphs in Excel allows users to create complex and informative visualizations that can help to reveal hidden patterns and trends in the data. By layering multiple datasets onto a single graph, users can create a more comprehensive and nuanced understanding of the relationships between different variables. This can be particularly useful for identifying areas of correlation or divergence between different datasets, and for tracking changes over time. Additionally, overlaying graphs can help to simplify complex data and make it easier to communicate insights and findings to others.
One of the key benefits of overlaying graphs in Excel is that it allows users to create customized and flexible visualizations that can be tailored to specific needs and goals. By choosing the right type of graph and customizing the layout, colors, and other elements, users can create a visualization that effectively communicates their message and insights. Furthermore, overlaying graphs can help to reduce the complexity of large datasets and make it easier to identify key trends and patterns. This can be particularly useful for data analysts and business professionals who need to make informed decisions based on data-driven insights.
Benefits Of Overlaying Graphs In Excel
The benefits of overlaying graphs in Excel are numerous and significant. By combining multiple datasets into a single graph, users can create a more comprehensive and nuanced understanding of the relationships between different variables. This can help to identify areas of correlation or divergence between different datasets, and track changes over time. Additionally, overlaying graphs can help to simplify complex data and make it easier to communicate insights and findings to others. Some of the key benefits of overlaying graphs in Excel include:
- Improved data visualization and communication
- Enhanced ability to identify trends and patterns
- Simplified analysis of complex datasets
- Increased flexibility and customization options
- Better decision-making based on data-driven insights
Types Of Graphs That Can Be Overlaid
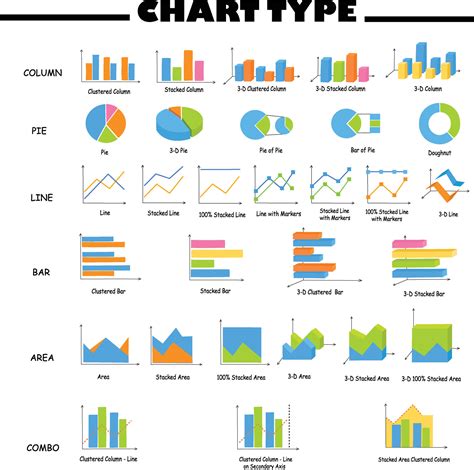
There are several types of graphs that can be overlaid in Excel, including:
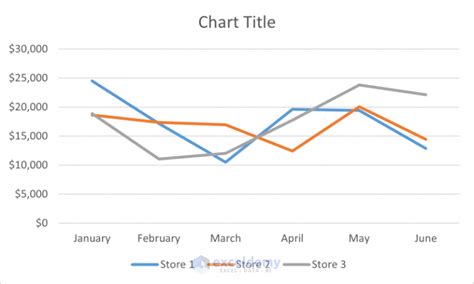
- Line graphs
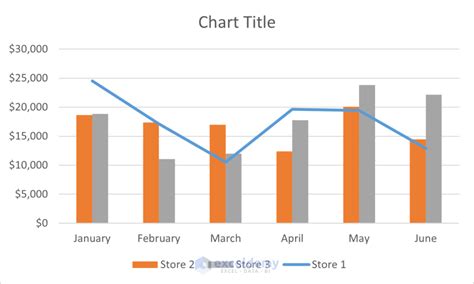
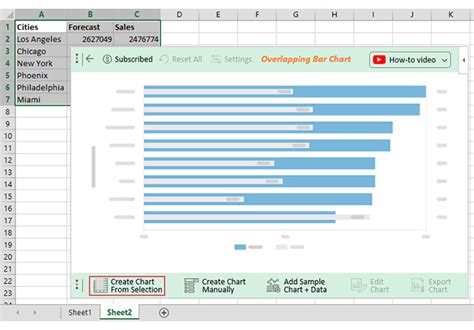
- Bar graphs
- Column graphs
- Scatter plots
- Area charts
- Radar charts
Each type of graph has its own unique characteristics and uses, and the choice of graph will depend on the specific needs and goals of the analysis. For example, line graphs are often used to track changes over time, while bar graphs are used to compare categorical data. Scatter plots are used to identify correlations and relationships between variables, while area charts are used to show cumulative totals over time.
Step-By-Step Guide To Overlaying Graphs In Excel

Overlaying graphs in Excel is a relatively straightforward process that involves several steps. Here is a step-by-step guide to overlaying graphs in Excel:
- Select the data range that you want to graph, including the headers and labels.
- Go to the "Insert" tab in the ribbon and click on the "Chart" button.
- Choose the type of graph that you want to create, such as a line graph or bar graph.
- Click on the "OK" button to create the graph.
- To overlay another dataset onto the graph, select the new data range and go to the "Chart" tab in the ribbon.
- Click on the "Add Chart" button and choose the type of graph that you want to add.
- Select the data range that you want to add to the graph and click on the "OK" button.
- Repeat steps 5-7 for each additional dataset that you want to overlay onto the graph.
- Use the "Chart Tools" tab in the ribbon to customize the layout, colors, and other elements of the graph.
Customizing The Overlay Graph
Once you have created the overlay graph, you can customize it to suit your needs and goals. Here are some tips for customizing the overlay graph:
- Use different colors and symbols to distinguish between different datasets.
- Add labels and annotations to the graph to provide context and explanation.
- Use the "Chart Tools" tab in the ribbon to adjust the layout and formatting of the graph.
- Experiment with different types of graphs and chart styles to find the one that works best for your data.
- Use the "Data" tab in the ribbon to filter and manipulate the data, and to add or remove datasets from the graph.
Best Practices For Overlaying Graphs In Excel
Here are some best practices to keep in mind when overlaying graphs in Excel:
- Keep the graph simple and easy to read.
- Use clear and concise labels and annotations.
- Avoid clutter and overload on the graph.
- Use different colors and symbols to distinguish between different datasets.
- Experiment with different types of graphs and chart styles to find the one that works best for your data.
- Use the "Chart Tools" tab in the ribbon to customize the layout and formatting of the graph.
Troubleshooting Common Issues

Here are some common issues that you may encounter when overlaying graphs in Excel, along with some troubleshooting tips:
- The graph is too cluttered or overloaded: Try simplifying the graph by removing unnecessary datasets or using different colors and symbols to distinguish between different datasets.
- The graph is not displaying correctly: Check that the data range is selected correctly and that the graph is formatted correctly.
- The graph is not updating when new data is added: Check that the data range is dynamic and that the graph is set to update automatically when new data is added.
Overlay Graphs In Excel Image Gallery


What is overlaying graphs in Excel?
+Overlaying graphs in Excel is a technique used to combine multiple datasets into a single graph, allowing for easy comparison and analysis of trends and patterns.
What are the benefits of overlaying graphs in Excel?
+The benefits of overlaying graphs in Excel include improved data visualization, enhanced ability to identify trends and patterns, and simplified analysis of complex datasets.
How do I overlay graphs in Excel?
+To overlay graphs in Excel, select the data range, go to the "Insert" tab, click on the "Chart" button, and choose the type of graph you want to create. Then, select the new data range and add it to the graph using the "Add Chart" button.
We hope this article has provided you with a comprehensive guide to overlaying graphs in Excel. By following the steps and tips outlined in this article, you can create powerful and informative visualizations that help to reveal hidden patterns and trends in your data. Remember to keep your graph simple and easy to read, and to experiment with different types of graphs and chart styles to find the one that works best for your data. If you have any questions or need further assistance, don't hesitate to ask. Share your experiences and tips for overlaying graphs in Excel in the comments below, and don't forget to share this article with your friends and colleagues who may benefit from it.