Intro
When working with Excel, one of the most common issues users face is the wrap text not expanding the cell as expected. This feature is crucial for making data more readable, especially when dealing with long strings of text or descriptions that need to be fully visible within a cell. Understanding how to properly use the wrap text feature and troubleshoot common issues can significantly improve your workflow and data presentation in Excel.
The importance of proper text handling in Excel cannot be overstated. It's not just about aesthetics; it's also about ensuring that all relevant information is easily accessible and understandable. When text is cut off or not fully visible, it can lead to misunderstandings, errors, and inefficiencies. Therefore, mastering the wrap text feature is essential for any Excel user, from beginners to advanced users.
Excel's wrap text feature is designed to automatically adjust the row height to fit the text within a cell, allowing you to view the entire content without having to manually adjust the cell size. However, there are instances where this feature might not work as expected. For example, if the column width is too narrow, the text might still appear cut off even with wrap text enabled. Similarly, if the row height is manually set, enabling wrap text won't automatically adjust the row height to fit the content.
Understanding Wrap Text in Excel
To effectively use the wrap text feature, you first need to understand its basics. Wrap text is a formatting option in Excel that allows you to display text on multiple lines within a cell. This is particularly useful for cells containing long text strings where you want to keep the column width consistent but still view the entire text.
Enabling Wrap Text
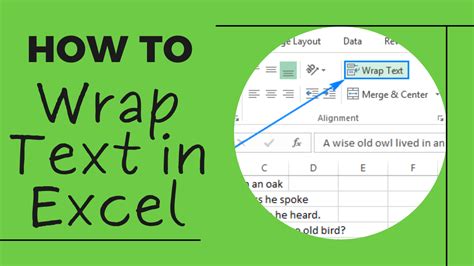
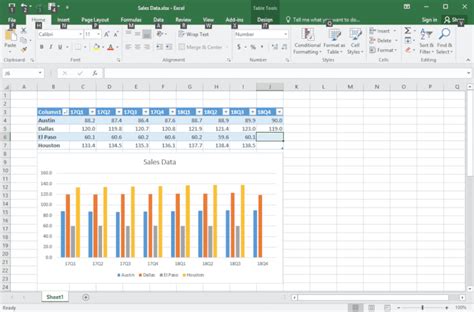
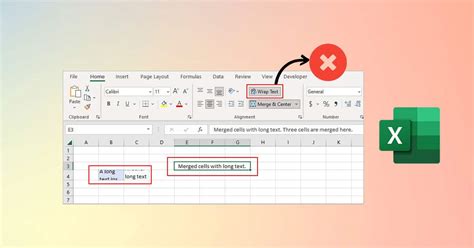
Enabling wrap text in Excel is straightforward. You can do this by selecting the cell(s) you want to apply the wrap text feature to, then going to the "Home" tab on the Ribbon, finding the "Alignment" group, and clicking on the "Wrap Text" button. Alternatively, you can use the keyboard shortcut Alt + H + W.Why Wrap Text Might Not Be Expanding the Cell
There are several reasons why the wrap text feature might not be expanding the cell as expected. One common reason is that the row height has been manually adjusted. When you manually set the row height, Excel does not automatically adjust it, even if you enable wrap text. Another reason could be that the column width is too narrow. If the column is not wide enough, the text will still appear cut off, regardless of whether wrap text is enabled.
Troubleshooting Wrap Text Issues
To troubleshoot issues with wrap text not expanding the cell, you should first check if the row height has been manually set. If so, you will need to adjust the row height manually to fit the content. You can do this by selecting the row, going to the "Home" tab, finding the "Cells" group, and clicking on "Format" > "AutoFit Row Height." This will automatically adjust the row height to fit the content.Another step is to ensure that the column width is sufficient. You can adjust the column width by selecting the column, going to the "Home" tab, finding the "Cells" group, and clicking on "Format" > "AutoFit Column Width." This will adjust the column width to fit the widest content in the column.
Best Practices for Using Wrap Text in Excel

To get the most out of the wrap text feature and avoid common issues, follow these best practices:
- Always check the column width before enabling wrap text. Ensure it's wide enough to accommodate the text.
- Use the "AutoFit" options for both row height and column width to ensure that the cell adjusts properly to fit the content.
- Be mindful of manually adjusted row heights and column widths, as these can override the automatic adjustments made by the wrap text feature.
- Consider using the "Shrink to Fit" feature for cells where the text needs to fit within a specific cell size without adjusting the cell dimensions.
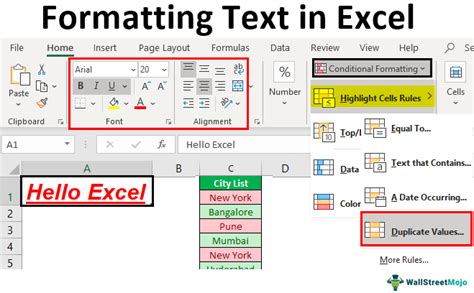
Advanced Text Formatting in Excel
Beyond the basic wrap text feature, Excel offers advanced text formatting options that can further enhance your data presentation. These include changing font styles, colors, and sizes, as well as using conditional formatting to highlight important information. Mastering these features can help you create more engaging and informative spreadsheets.Common Mistakes to Avoid When Using Wrap Text

One of the most common mistakes users make when using wrap text is not adjusting the column width appropriately. This can lead to text still appearing cut off, even with wrap text enabled. Another mistake is manually setting the row height without considering the wrap text feature. This can prevent the cell from automatically adjusting to fit the content.
Wrap Text and Data Analysis
When it comes to data analysis, proper text handling is crucial. Wrap text can play a significant role in making data more readable and understandable, which is essential for accurate analysis. By ensuring that all text is fully visible and easy to read, you can reduce errors and improve the overall quality of your analysis.Conclusion and Next Steps

In conclusion, mastering the wrap text feature in Excel is vital for effective data presentation and analysis. By understanding how to properly use this feature and avoiding common mistakes, you can create more readable and engaging spreadsheets. Remember to always consider the column width and row height when using wrap text, and don't hesitate to explore advanced text formatting options to take your Excel skills to the next level.
Final Thoughts on Excel Wrap Text
As you continue to work with Excel and explore its many features, keep in mind the importance of text formatting in making your data stand out. Whether you're working on a personal project or a professional report, the ability to effectively use wrap text and other formatting tools can make a significant difference in the clarity and impact of your work.Wrap Text Image Gallery


How do I enable wrap text in Excel?
+To enable wrap text, select the cell, go to the "Home" tab, find the "Alignment" group, and click on the "Wrap Text" button.
Why doesn't wrap text automatically adjust the row height?
+Wrap text doesn't automatically adjust the row height if it has been manually set. You need to use "AutoFit Row Height" to adjust it.
How can I troubleshoot wrap text issues in Excel?
+Check if the row height has been manually set and if the column width is sufficient. Use "AutoFit" options for row height and column width to resolve issues.
We hope this comprehensive guide to Excel's wrap text feature has been informative and helpful. Whether you're a beginner or an advanced Excel user, mastering text formatting can significantly enhance your productivity and the quality of your work. Feel free to share your experiences or tips on using wrap text in Excel in the comments below.