Intro
Learn to fill blanks in Excel with the cell above using formulas and functions, including AutoFill, IF statements, and VLOOKUP, to efficiently manage data and automate tasks.
Filling in blanks in Excel with the cell above is a common task that can be accomplished in several ways. Whether you're dealing with a small dataset or a large spreadsheet, Excel provides various methods to achieve this, including using formulas, shortcuts, and the built-in fill feature. Understanding these methods can significantly improve your productivity and data management skills in Excel.
The importance of filling blanks with the cell above cannot be overstated, especially in data analysis and reporting. Gaps in data can lead to inaccuracies in calculations and misunderstandings in data interpretation. By filling these blanks appropriately, you ensure that your data is consistent, and your analyses are reliable. Moreover, this task is fundamental in preparing data for further analysis, such as filtering, sorting, and pivoting.
In many scenarios, data might be missing or not properly aligned, leading to blank cells that need to be filled based on the information available in adjacent cells. This could be due to the nature of the data import process, human error during data entry, or the structure of the dataset itself. Whatever the reason, Excel's versatile features allow users to efficiently handle such issues.
Using the Fill Handle to Fill Blanks
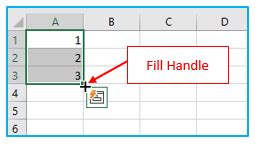
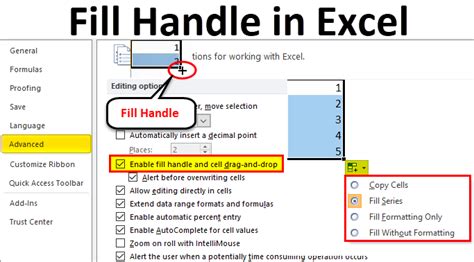
One of the quickest ways to fill blanks in Excel with the cell above is by using the fill handle. The fill handle is a small square at the bottom-right corner of the cell or range of cells you've selected. To use it, follow these steps:
- Select the cell or range of cells that includes the blank you want to fill and the cell above it.
- Move your cursor to the fill handle until it changes into a cross.
- Click and drag the fill handle down through the blank cells.
This method is intuitive and works well for small datasets or when you need to fill a few blank cells quickly. However, for larger datasets or more complex filling tasks, other methods might be more efficient.
Using Formulas to Fill Blanks
Excel formulas offer a powerful way to fill blanks based on the cell above. One common formula used for this purpose is the IF and IFBLANK functions, or simply referencing the cell above. Here's how you can do it:
- In the blank cell, type
=IF(ISBLANK(A1),A2,A1)assuming A1 is the cell above and you're filling A2. This formula checks if A1 is blank; if it is, it uses the value from the cell above A1 (which would be A2 in a normal sequence but since we're considering A1 as the reference, we actually look at the cell above A1, thus you might need to adjust based on your actual scenario). - Alternatively, if you simply want to fill the blank cell with the value from the cell above without any condition, you can just use
=A1in cell A2, assuming A1 is the cell with the value you want to replicate.
Formulas are particularly useful when you need to apply specific conditions or when dealing with larger datasets where manual filling might be impractical.
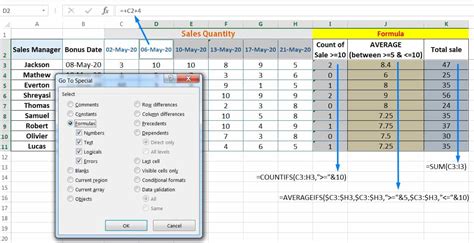
Using the Go To Special Feature

Excel's "Go To Special" feature allows you to select only the blank cells in a range and then fill them with a value or formula. Here’s how to use it:
- Select the range of cells that includes the blanks you want to fill.
- Press
Ctrl + Gto open the "Go To" dialog box. - Click on "Special" and then check "Blanks" and click "OK".
- With only the blank cells selected, type
=A1(assuming A1 is the cell above the first blank cell) and pressCtrl + Enterinstead of just Enter. This will fill all selected blank cells with the formula.
This method is efficient for filling multiple blank cells scattered throughout a range with the value from the cell above each blank.
Using VBA Macros
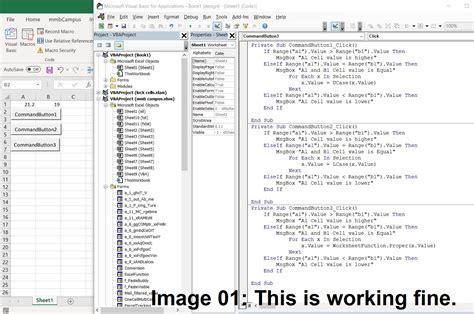
For those comfortable with programming, VBA (Visual Basic for Applications) macros can automate the task of filling blanks. Here’s a basic example of how to create a macro for this purpose:
- Open the Visual Basic Editor by pressing
Alt + F11or navigating to Developer > Visual Basic. - In the Editor, insert a new module by right-clicking on any of the objects for your workbook in the "Project" window and choosing "Insert" > "Module".
- Paste the following code into the module window:
Sub FillBlanks()
    Dim rng As Range
    For Each rng In Selection
        If IsEmpty(rng) Then
            rng.Value = rng.Offset(-1, 0).Value
        End If
    Next rng
End Sub
- Close the VBA Editor and select the range of cells you want to work on.
- Press
Alt + F8to open the Macro dialog, selectFillBlanks, and click "Run".
Using VBA macros can be particularly useful for repetitive tasks or when working with very large datasets.
Gallery of Excel Fill Features
Excel Fill Features Image Gallery


Frequently Asked Questions
How do I fill blanks in Excel with the cell above using formulas?
+You can use the formula `=A1` in the blank cell, assuming A1 is the cell above. Alternatively, for conditional filling based on whether a cell is blank, you can use `=IF(ISBLANK(A1),A2,A1)` and adjust according to your scenario.
What is the fastest way to fill blanks in Excel?
+The fastest way often involves using the fill handle or the "Go To Special" feature to select blank cells and then filling them with the desired value or formula.
Can I automate filling blanks in Excel?
+Yes, you can automate the process using VBA macros. This involves writing a script that iterates through selected cells, checks for blanks, and fills them according to your specifications.
How do I fill blanks with a specific value in Excel?
+Select the range of cells, go to "Home" > "Find & Select" > "Go To Special", check "Blanks", and then type the specific value you want to fill the blanks with and press `Ctrl + Enter`.
What are some common errors to avoid when filling blanks in Excel?
+Common errors include incorrectly referencing cells in formulas, not selecting the entire range of cells you wish to fill, and not using absolute references when necessary.
In conclusion, filling blanks in Excel with the cell above is a versatile task that can be accomplished through various methods, each suited to different scenarios and user preferences. Whether you're a beginner looking for a simple solution or an advanced user seeking to automate tasks, Excel's features and functionalities have you covered. By mastering these techniques, you can significantly enhance your data management skills, ensuring your spreadsheets are accurate, consistent, and ready for analysis. Feel free to share your experiences or ask questions about filling blanks in Excel in the comments below, and don't forget to share this article with others who might find it helpful.