Intro
Learn to lock cells in Excel Mac, protecting data with formulas and formats, using cell locking techniques and password protection for secure spreadsheets.
Locking cells in Excel for Mac is a crucial feature that helps protect your data from accidental changes or unauthorized edits. Whether you're working on a personal budget, a business report, or a collaborative project, locking cells can ensure the integrity and security of your spreadsheet. In this article, we'll explore the importance of locking cells, the benefits of using this feature, and provide a step-by-step guide on how to lock cells in Excel for Mac.
Locking cells is essential when you want to prevent others from modifying specific data or formulas in your spreadsheet. This feature is particularly useful when you're sharing your workbook with others, and you want to maintain control over certain aspects of the data. By locking cells, you can prevent accidental deletions, changes, or formatting issues that can compromise the accuracy and reliability of your data. Moreover, locking cells can help you protect sensitive information, such as passwords, financial data, or confidential business information.
The benefits of locking cells in Excel for Mac are numerous. For instance, locking cells can help you maintain data consistency and accuracy, prevent errors and mistakes, and protect sensitive information from unauthorized access. Additionally, locking cells can help you collaborate with others more effectively, as you can control who can edit specific parts of the spreadsheet. By locking cells, you can also prevent others from changing formulas or formatting, which can help maintain the integrity of your data and prevent errors.
Why Lock Cells in Excel for Mac?
Locking cells in Excel for Mac is a simple yet effective way to protect your data and maintain control over your spreadsheet. By locking cells, you can prevent accidental changes, protect sensitive information, and maintain data consistency and accuracy. Whether you're working on a personal or business project, locking cells is an essential feature that can help you achieve your goals and ensure the success of your project.
Benefits of Locking Cells
The benefits of locking cells in Excel for Mac are numerous and significant. Some of the most important benefits include: * Maintaining data consistency and accuracy * Preventing errors and mistakes * Protecting sensitive information from unauthorized access * Controlling who can edit specific parts of the spreadsheet * Preventing changes to formulas or formatting * Maintaining the integrity of your data and preventing errorsHow to Lock Cells in Excel for Mac

Locking cells in Excel for Mac is a straightforward process that requires a few simple steps. Here's a step-by-step guide on how to lock cells:
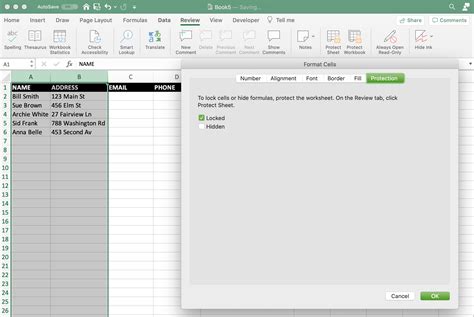
- Select the cells you want to lock: Choose the cells you want to protect from changes or edits.
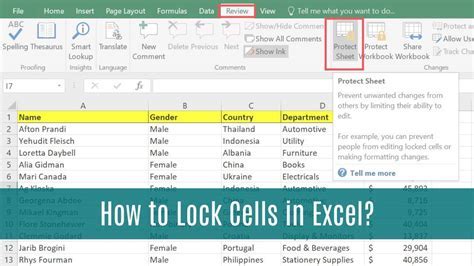
- Go to the "Review" tab: Click on the "Review" tab in the ribbon.
- Click on "Protect Sheet": Click on the "Protect Sheet" button in the "Protect" group.
- Select the protection options: Choose the protection options you want to apply, such as "Select locked cells" or "Select unlocked cells".
- Enter a password: Enter a password to protect the sheet and prevent others from unlocking the cells.
- Confirm the password: Re-enter the password to confirm.
Unlocking Cells
If you need to unlock cells in Excel for Mac, you can follow these steps: 1. Go to the "Review" tab: Click on the "Review" tab in the ribbon. 2. Click on "Protect Sheet": Click on the "Protect Sheet" button in the "Protect" group. 3. Enter the password: Enter the password you used to lock the cells. 4. Select the cells to unlock: Choose the cells you want to unlock. 5. Click "OK": Click "OK" to unlock the cells.Best Practices for Locking Cells
When locking cells in Excel for Mac, it's essential to follow best practices to ensure the security and integrity of your data. Here are some tips to keep in mind:
- Use strong passwords: Choose passwords that are difficult to guess and unique to each sheet.
- Lock cells consistently: Lock cells consistently throughout your spreadsheet to maintain data consistency and accuracy.
- Use protection options: Use protection options, such as "Select locked cells" or "Select unlocked cells", to control who can edit specific parts of the spreadsheet.
- Test your protection: Test your protection to ensure it's working correctly and preventing unauthorized changes.
Common Mistakes to Avoid
When locking cells in Excel for Mac, there are common mistakes to avoid. Here are some of the most common mistakes: * Forgetting to lock cells: Forgetting to lock cells can leave your data vulnerable to changes or edits. * Using weak passwords: Using weak passwords can compromise the security of your data and allow unauthorized access. * Not testing protection: Not testing protection can lead to errors or mistakes that can compromise the integrity of your data.Advanced Locking Cell Techniques

In addition to basic locking cell techniques, there are advanced techniques you can use to further protect your data. Here are some advanced techniques:
- Using VBA macros: Using VBA macros can help you automate tasks and protect your data from changes or edits.
- Creating custom protection: Creating custom protection can help you control who can edit specific parts of the spreadsheet and maintain data consistency and accuracy.
- Using Excel add-ins: Using Excel add-ins can help you extend the functionality of Excel and protect your data from changes or edits.
Using VBA Macros
VBA macros can help you automate tasks and protect your data from changes or edits. Here's an example of how to use VBA macros to lock cells: 1. Open the Visual Basic Editor: Press "Alt + F11" to open the Visual Basic Editor. 2. Create a new module: Click "Insert" > "Module" to create a new module. 3. Write the code: Write the code to lock cells, such as "Range("A1:A10").Lock = True". 4. Run the code: Run the code to lock the cells.Locking Cells in Excel Mac Image Gallery


How do I lock cells in Excel for Mac?
+To lock cells in Excel for Mac, select the cells you want to lock, go to the "Review" tab, click on "Protect Sheet", select the protection options, enter a password, and confirm the password.
Why should I lock cells in Excel for Mac?
+Locking cells in Excel for Mac helps protect your data from accidental changes or unauthorized edits, maintains data consistency and accuracy, and prevents errors and mistakes.
How do I unlock cells in Excel for Mac?
+To unlock cells in Excel for Mac, go to the "Review" tab, click on "Protect Sheet", enter the password, select the cells to unlock, and click "OK".
In conclusion, locking cells in Excel for Mac is a crucial feature that helps protect your data and maintain control over your spreadsheet. By following the steps outlined in this article, you can lock cells and prevent accidental changes or unauthorized edits. Remember to use strong passwords, lock cells consistently, and test your protection to ensure the security and integrity of your data. If you have any further questions or need more information, please don't hesitate to comment below. Share this article with your friends and colleagues to help them learn how to lock cells in Excel for Mac and protect their data.