Intro
Microsoft Outlook is a powerful email client that offers a wide range of features to manage emails, contacts, and tasks. One of the useful features of Outlook is the ability to create a distribution list, which allows users to send emails to a group of people with just a few clicks. However, creating a distribution list from scratch can be time-consuming, especially if you have a large list of contacts. Fortunately, you can create a distribution list from Excel, which makes the process much easier and more efficient.
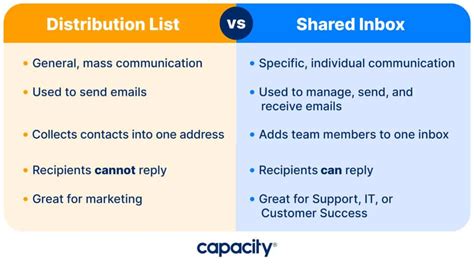
In today's digital age, email marketing and communication are crucial for businesses, organizations, and individuals. A distribution list is an essential tool for sending targeted emails to a specific group of people, such as customers, employees, or subscribers. By creating a distribution list from Excel, you can save time and effort, and ensure that your emails reach the right people. In this article, we will explore the benefits and steps to create a distribution list from Excel in Outlook.
Benefits of Creating a Distribution List from Excel

Creating a distribution list from Excel offers several benefits, including:
- Time-saving: Importing contacts from Excel saves time and effort compared to manually adding each contact to the distribution list.
- Accuracy: Excel ensures that the contact information is accurate and up-to-date, reducing errors and typos.
- Flexibility: Excel allows you to easily manage and update your contact list, making it simple to add or remove contacts as needed.
- Efficiency: With a distribution list, you can send emails to a large group of people with just a few clicks, saving time and increasing productivity.
Steps to Create a Distribution List from Excel
To create a distribution list from Excel, follow these steps:
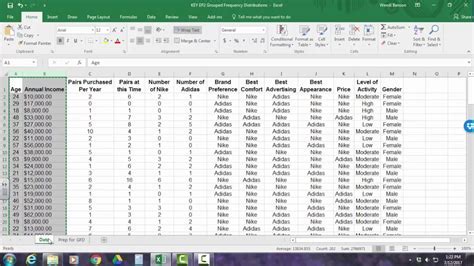
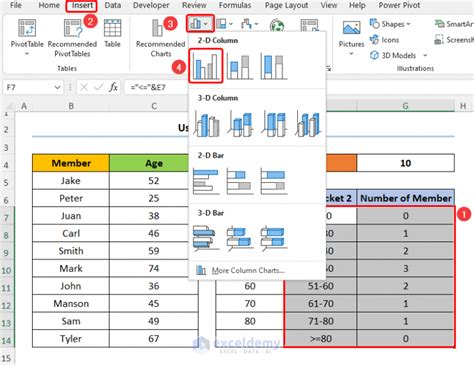
- Prepare your Excel spreadsheet: Ensure that your Excel spreadsheet contains the contact information you want to include in the distribution list, such as names and email addresses.
- Save the spreadsheet as a CSV file: Save the Excel spreadsheet as a CSV (Comma Separated Values) file, which can be easily imported into Outlook.
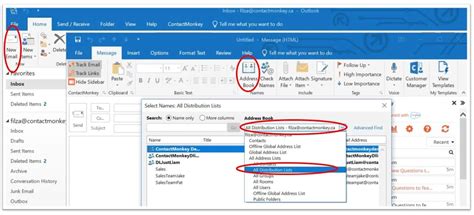
- Open Outlook: Launch Outlook and navigate to the "Contacts" section.
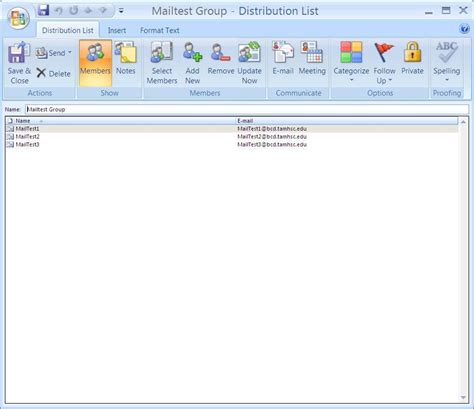
- Click on "New Contact Group": In the "Contacts" section, click on "New Contact Group" to create a new distribution list.
- Click on "Select Members": In the "Contact Group" window, click on "Select Members" and then choose "From File".
- Import the CSV file: Browse to the location of your CSV file and select it to import the contacts into the distribution list.
- Verify the contacts: Verify that the contacts have been imported correctly and make any necessary adjustments.
Tips and Tricks for Managing Distribution Lists
Here are some tips and tricks for managing distribution lists:
- Use clear and concise names for your distribution lists to ensure that you can easily identify them.
- Use folders to organize your distribution lists and keep them tidy.
- Regularly update your distribution lists to ensure that they remain accurate and up-to-date.
- Use the "BCC" field to send emails to large groups of people without revealing their email addresses.
Common Issues and Solutions
Here are some common issues and solutions when creating a distribution list from Excel:
- Issue: The CSV file is not importing correctly. Solution: Check that the CSV file is in the correct format and that the contacts are separated by commas.
- Issue: The distribution list is not sending emails correctly. Solution: Check that the email addresses are correct and that the distribution list is set up correctly.
Best Practices for Using Distribution Lists
Here are some best practices for using distribution lists:
- Use distribution lists for targeted email campaigns to ensure that your emails reach the right people.
- Use clear and concise subject lines and email content to ensure that your emails are effective.
- Use the "Unsubscribe" feature to allow recipients to opt-out of future emails.
Gallery of Distribution List Examples
Distribution List Image Gallery


What is a distribution list in Outlook?
+A distribution list in Outlook is a group of email addresses that can be sent emails with just a few clicks.
How do I create a distribution list from Excel?
+To create a distribution list from Excel, save your Excel spreadsheet as a CSV file and then import it into Outlook.
What are the benefits of using distribution lists?
+The benefits of using distribution lists include time-saving, accuracy, flexibility, and efficiency.
We hope this article has provided you with a comprehensive guide on how to create a distribution list from Excel in Outlook. By following these steps and tips, you can save time and effort, and ensure that your emails reach the right people. If you have any further questions or need more information, please don't hesitate to comment below. Share this article with your friends and colleagues to help them learn how to create a distribution list from Excel.