Intro
Discover 5 ways to create Excel histograms, enhancing data analysis with frequency distribution, charting, and visualization techniques, using Excel tools and functions for insightful data representation.
Creating histograms in Excel is a powerful way to visualize and understand the distribution of data. Histograms are graphical representations that organize a group of data points into specified ranges. They are particularly useful for identifying patterns, such as the center, spread, and shape of the data distribution. Excel offers several methods to create histograms, each with its own advantages and suited for different versions of Excel or specific needs. Here, we'll explore five ways to create a histogram in Excel, catering to various user preferences and Excel versions.
Histograms are essential in data analysis because they provide a clear, visual representation of how data is distributed. This can help in identifying outliers, understanding the density of data points within certain ranges, and making informed decisions based on the distribution of data. Whether you're using Excel for academic, professional, or personal projects, knowing how to create and interpret histograms is a valuable skill.
The importance of histograms in data analysis cannot be overstated. They offer a simple, yet effective way to communicate complex data insights. By visually representing data, histograms facilitate a deeper understanding of the data's characteristics, such as its central tendency, variability, and the presence of any skewness or outliers. This visual representation is often more intuitive and easier to grasp than numerical summaries alone.
Understanding the distribution of data is crucial for statistical analysis and decision-making. Histograms are one of the most common and effective graphical tools used for this purpose. They consist of bars of different heights or lengths that represent the frequency of data points within specific intervals, known as bins. The process of creating a histogram involves deciding on the number of bins and the range of each bin, which significantly affects the histogram's appearance and the insights it provides.
Introduction to Histograms in Excel
To begin creating histograms in Excel, it's essential to understand the basics of data distribution and how histograms are used to visualize this distribution. Excel provides built-in tools and functions that make creating histograms relatively straightforward. The methods for creating histograms can vary depending on the version of Excel you're using, with newer versions offering more streamlined and automated processes.
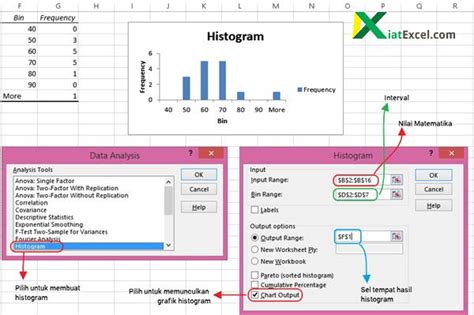
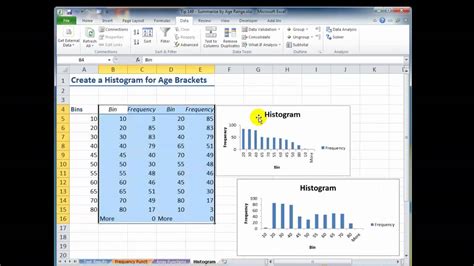
Method 1: Using the Histogram Tool in Excel Analysis ToolPak
One of the traditional methods for creating a histogram in Excel is by using the Analysis ToolPak add-in. This method is particularly useful for those who prefer a more manual approach or are using older versions of Excel. The Analysis ToolPak provides a histogram tool that calculates and displays the distribution of your data. To use this tool, you first need to ensure that the Analysis ToolPak is installed and enabled in your Excel application.
Steps to Enable Analysis ToolPak
- Go to the "File" tab and click on "Options."
- In the Excel Options window, click on "Add-ins."
- At the bottom of the Add-ins window, select "Analysis ToolPak" from the list and click "OK."
Creating a Histogram with Analysis ToolPak
- Select the data range you want to create a histogram for.
- Go to the "Data" tab, click on "Data Analysis," and select "Histogram" from the list.
- In the Histogram dialog box, input the range for your data and the bin range.
- Choose an output range and decide whether to chart the output.
- Click "OK" to generate the histogram.
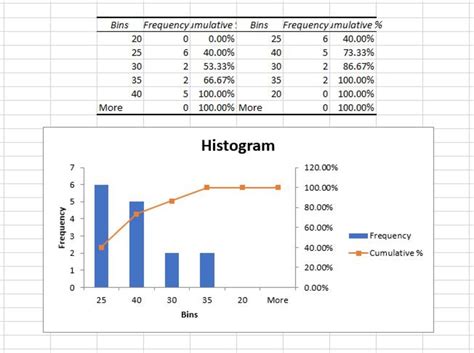
Method 2: Using the FREQUENCY Function
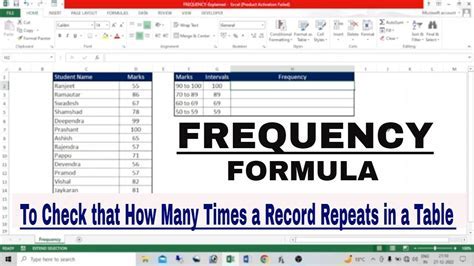
Another method for creating histograms in Excel involves using the FREQUENCY function. This approach is useful when you want more control over the bins and don't mind doing a bit more setup work. The FREQUENCY function calculates how often values occur within a range of bins.
Steps to Use the FREQUENCY Function
- Set up your data and decide on the bins (ranges) you want to use.
- Use the FREQUENCY function to calculate the frequency of data points in each bin.
- The formula for the FREQUENCY function is
FREQUENCY(data_array, bins_array). - After calculating the frequencies, you can create a histogram using a column chart.
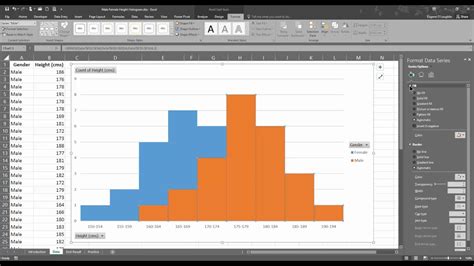
Method 3: Creating a Histogram with PivotTables
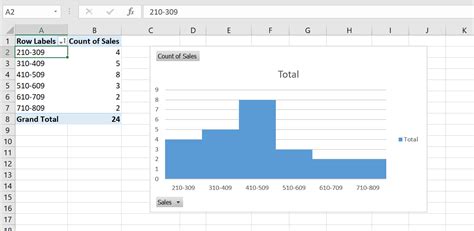
Using PivotTables to create a histogram is a versatile method that allows for dynamic analysis of data. This approach is particularly useful when working with large datasets or when you need to frequently update your histogram based on changing data.
Steps to Create a Histogram with PivotTables
- Select your data range and go to the "Insert" tab to create a PivotTable.
- Drag your data field to the "Row Labels" area and the same field to the "Values" area.
- Right-click on the field in the "Values" area, select "Value Field Settings," and then choose "Count" as the value field.
- To create bins, you can use the "Group" feature in the PivotTable.
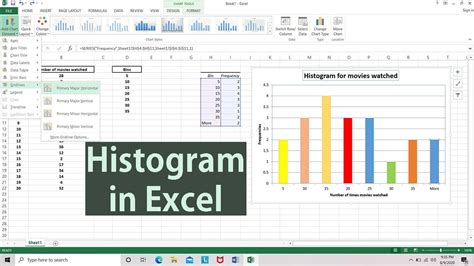
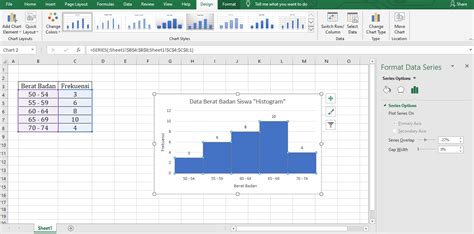
Method 4: Using Excel 2016 and Later Versions - Histogram Tool

For users of Excel 2016 and later versions, creating a histogram is significantly simplified with the built-in Histogram tool under the "Analysis" tab. This method provides a quick and straightforward way to visualize data distributions without needing to install add-ins or use complex functions.
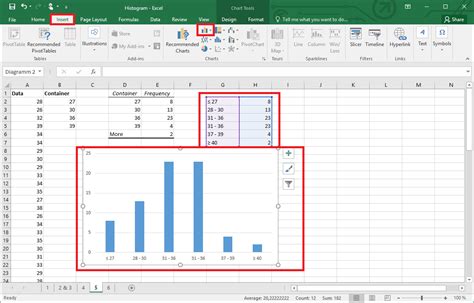
Steps to Use the Histogram Tool in Excel 2016 and Later
- Select the data range you want to analyze.
- Go to the "Insert" tab, click on "Insert Statistic Chart," and select "Histogram."
- Excel will automatically create a histogram based on your data.
Method 5: Creating an Interactive Histogram with Power BI
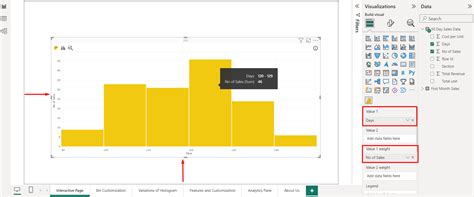
For those looking to create interactive and dynamic visualizations, Power BI offers a powerful platform. While not part of the standard Excel application, Power BI is closely integrated with Excel and provides advanced data visualization capabilities, including the creation of interactive histograms.
Steps to Create a Histogram in Power BI
- Import your data into Power BI.
- Drag the field you want to analyze into the "Values" area of the "Fields" pane.
- Select the "Histogram" visualization from the icons in the "Visualizations" pane.
- Power BI will automatically generate a histogram based on your data.
Excel Histogram Image Gallery


What is a histogram in Excel?
+A histogram in Excel is a graphical representation that organizes a group of data points into specified ranges, showing the distribution of data.
How do I create a histogram in Excel?
+You can create a histogram in Excel using the Analysis ToolPak, the FREQUENCY function, PivotTables, the built-in Histogram tool in Excel 2016 and later, or by using Power BI for more interactive visualizations.
What are the benefits of using histograms in data analysis?
+Histograms provide a clear visual representation of data distribution, helping to identify patterns, outliers, and the central tendency and variability of the data, which are crucial for making informed decisions.
In conclusion, creating histograms in Excel is a versatile and powerful way to visualize and understand data distributions. With various methods available, ranging from traditional approaches like the Analysis ToolPak and FREQUENCY function to more modern and interactive methods using Power BI, there's a histogram creation method suited for every user's needs and skill level. Whether you're analyzing data for academic research, business insights, or personal projects, mastering the art of histogram creation in Excel can significantly enhance your data analysis capabilities. We invite you to explore these methods further, practice creating histograms with your own data, and share your experiences or tips in the comments section below. By doing so, you'll not only improve your proficiency in Excel but also contribute to a community that values data-driven insights and effective communication of complex information.