Intro
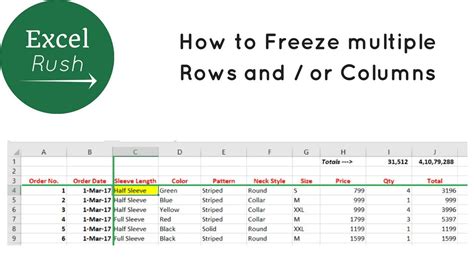
Learn to freeze multiple rows in Excel, locking headers and titles with ease, using simple formulas and spreadsheet management techniques.
Freezing rows in Excel is a useful feature that allows you to keep certain rows visible while scrolling through your worksheet. This can be particularly helpful when working with large datasets or when you want to keep headers or titles visible at all times. Freezing more than one row in Excel is a straightforward process that can be accomplished in a few simple steps.
To begin with, it's essential to understand the importance of freezing rows in Excel. By freezing rows, you can improve the readability and usability of your worksheets, making it easier to analyze and understand your data. Whether you're working with a small dataset or a large one, freezing rows can help you to focus on the data that matters most.
In addition to improving readability, freezing rows can also help to prevent errors and mistakes. By keeping important information, such as headers or titles, visible at all times, you can reduce the risk of misinterpreting or misentering data. This can be especially important when working with financial or numerical data, where small mistakes can have significant consequences.
Now, let's dive into the process of freezing more than one row in Excel. To do this, you'll need to follow these simple steps:
Freezing Multiple Rows in Excel
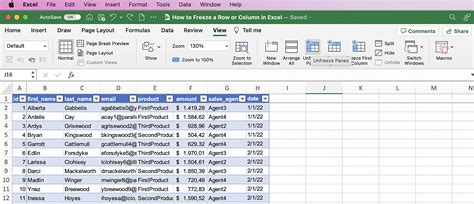
To freeze multiple rows in Excel, select the row below the rows you want to freeze. For example, if you want to freeze the first two rows, select the third row. Then, go to the "View" tab in the ribbon and click on "Freeze Panes." From the dropdown menu, select "Freeze Panes" again, and then choose "Freeze Top Row" or "Freeze Panes" to freeze the selected rows.
Step-by-Step Instructions
Here are the step-by-step instructions for freezing multiple rows in Excel:
- Select the row below the rows you want to freeze.
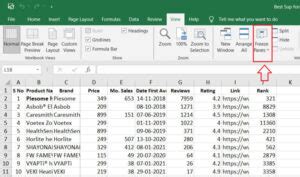
- Go to the "View" tab in the ribbon.
- Click on "Freeze Panes."
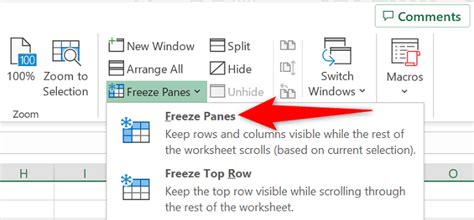
- From the dropdown menu, select "Freeze Panes" again.
- Choose "Freeze Top Row" or "Freeze Panes" to freeze the selected rows.
Benefits of Freezing Rows in Excel

Freezing rows in Excel offers several benefits, including improved readability, reduced errors, and increased productivity. By keeping important information visible at all times, you can focus on the data that matters most and avoid mistakes. Additionally, freezing rows can help you to analyze and understand your data more efficiently, making it easier to identify trends and patterns.
Common Uses of Freezing Rows
Freezing rows is commonly used in a variety of scenarios, including:
- Keeping headers or titles visible while scrolling through a large dataset.
- Freezing summary rows or formulas to keep them visible while analyzing data.
- Keeping important information, such as dates or categories, visible while working with a large dataset.
Freezing Columns in Excel

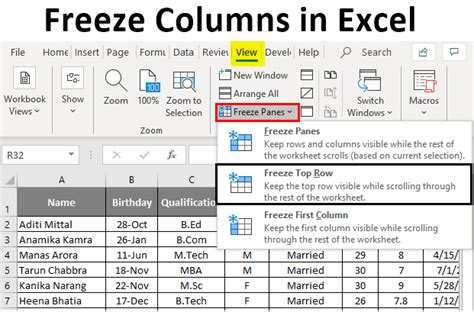
In addition to freezing rows, you can also freeze columns in Excel. This can be useful when working with large datasets or when you want to keep certain columns visible while scrolling through your worksheet. To freeze columns, select the column to the right of the columns you want to freeze, go to the "View" tab, and click on "Freeze Panes." Then, select "Freeze Left Column" or "Freeze Panes" to freeze the selected columns.
Step-by-Step Instructions
Here are the step-by-step instructions for freezing columns in Excel:
- Select the column to the right of the columns you want to freeze.
- Go to the "View" tab in the ribbon.
- Click on "Freeze Panes."
- From the dropdown menu, select "Freeze Panes" again.
- Choose "Freeze Left Column" or "Freeze Panes" to freeze the selected columns.
Unfreezing Rows and Columns in Excel
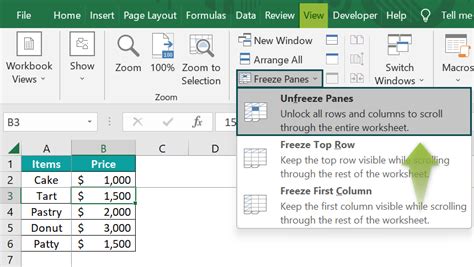
If you need to unfreeze rows or columns in Excel, you can do so by going to the "View" tab and clicking on "Freeze Panes." Then, select "Unfreeze Panes" to unfreeze the selected rows or columns. Alternatively, you can also unfreeze rows and columns by selecting the row or column below the frozen area and going to the "View" tab.
Step-by-Step Instructions
Here are the step-by-step instructions for unfreezing rows and columns in Excel:
- Go to the "View" tab in the ribbon.
- Click on "Freeze Panes."
- From the dropdown menu, select "Unfreeze Panes."
- Alternatively, select the row or column below the frozen area and go to the "View" tab.
Best Practices for Freezing Rows and Columns

When freezing rows and columns in Excel, it's essential to follow best practices to ensure that your worksheets are organized and easy to use. Here are some best practices to keep in mind:
- Freeze rows and columns consistently throughout your worksheet.
- Use clear and descriptive headers and titles.
- Avoid freezing too many rows or columns, as this can make your worksheet difficult to navigate.
Common Mistakes to Avoid
Here are some common mistakes to avoid when freezing rows and columns in Excel:
- Freezing too many rows or columns.
- Not using clear and descriptive headers and titles.
- Not unfreezing rows and columns when necessary.
Freezing Rows and Columns Image Gallery


How do I freeze multiple rows in Excel?
+To freeze multiple rows in Excel, select the row below the rows you want to freeze, go to the "View" tab, and click on "Freeze Panes." Then, select "Freeze Panes" again and choose "Freeze Top Row" or "Freeze Panes" to freeze the selected rows.
How do I unfreeze rows and columns in Excel?
+To unfreeze rows and columns in Excel, go to the "View" tab and click on "Freeze Panes." Then, select "Unfreeze Panes" to unfreeze the selected rows or columns. Alternatively, you can also unfreeze rows and columns by selecting the row or column below the frozen area and going to the "View" tab.
What are the benefits of freezing rows and columns in Excel?
+The benefits of freezing rows and columns in Excel include improved readability, reduced errors, and increased productivity. By keeping important information visible at all times, you can focus on the data that matters most and avoid mistakes.
In conclusion, freezing rows and columns in Excel is a useful feature that can improve the readability and usability of your worksheets. By following the steps outlined in this article, you can freeze multiple rows and columns in Excel and take advantage of the benefits it offers. Whether you're working with large datasets or small ones, freezing rows and columns can help you to analyze and understand your data more efficiently. So why not give it a try and see the difference it can make in your Excel workflow? Share your thoughts and experiences with freezing rows and columns in the comments below, and don't forget to share this article with your friends and colleagues who may find it helpful.