Intro
Discover 5 ways to create an Excel Gaussian curve, utilizing statistical tools, data analysis, and visualization techniques, including bell curve graphs and normal distribution functions.
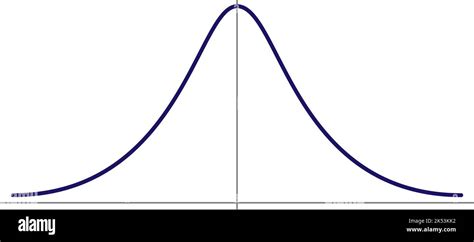
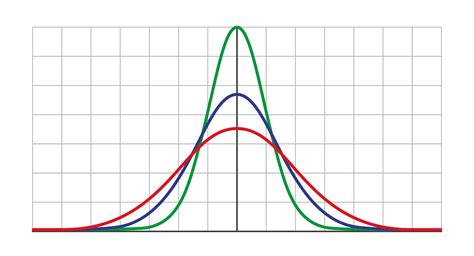
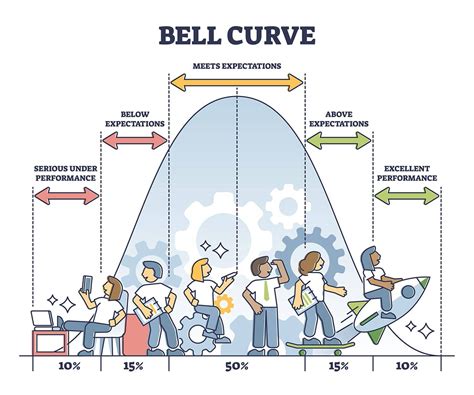
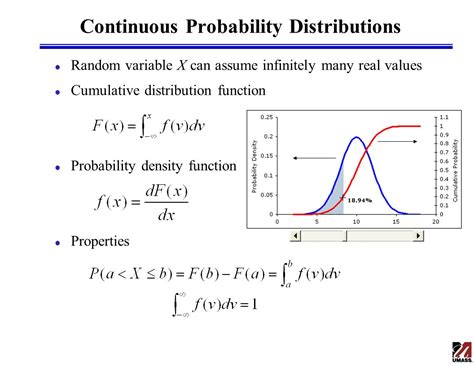
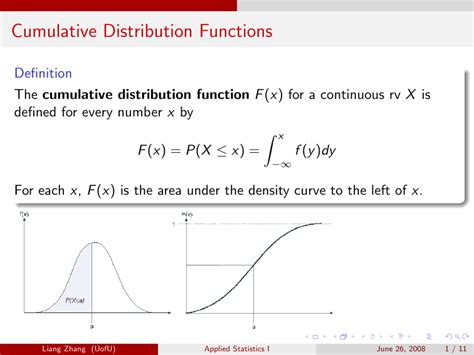
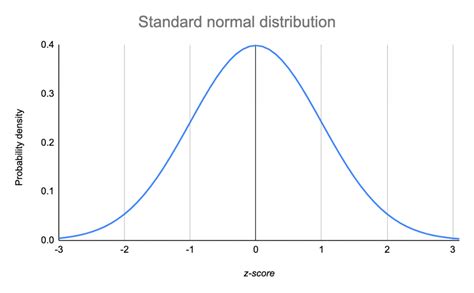
The Gaussian curve, also known as the bell curve, is a fundamental concept in statistics and data analysis. It is a continuous probability distribution that is commonly used to model real-world phenomena, such as the distribution of scores, heights, and weights. In Excel, you can create a Gaussian curve using various methods, which will be discussed in this article.
The importance of understanding the Gaussian curve cannot be overstated. It has numerous applications in fields such as finance, engineering, and social sciences. By mastering the Gaussian curve, you can gain valuable insights into data analysis and make informed decisions. In this article, we will delve into the world of Gaussian curves and explore five ways to create them in Excel.
The Gaussian curve is a powerful tool for data analysis, and Excel provides an ideal platform for working with it. With its intuitive interface and robust functionality, Excel makes it easy to create and manipulate Gaussian curves. Whether you are a student, a researcher, or a professional, understanding how to work with Gaussian curves in Excel can be a valuable skill. So, let's get started and explore the five ways to create a Gaussian curve in Excel.
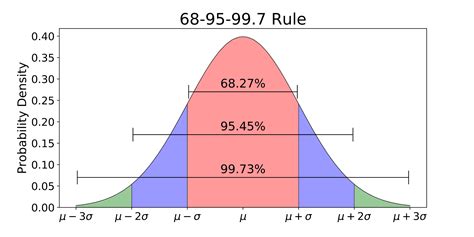
What is a Gaussian Curve?
5 Ways to Create a Gaussian Curve in Excel
- Using the NORM.DIST function
- Using the NORM.S.DIST function
- Using the EXP and SQRT functions
- Using the LOGNORM.DIST function
- Using VBA macros
Each of these methods has its own advantages and disadvantages, and the choice of method will depend on the specific requirements of your project.
Method 1: Using the NORM.DIST Function
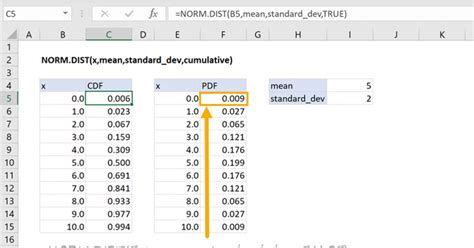
- Enter the mean and standard deviation of the distribution in two separate cells.
- Create a range of x-values that you want to plot on the curve.
- Use the NORM.DIST function to calculate the corresponding y-values for each x-value.
- Plot the x-values and y-values on a graph to create the Gaussian curve.
Method 2: Using the NORM.S.DIST Function
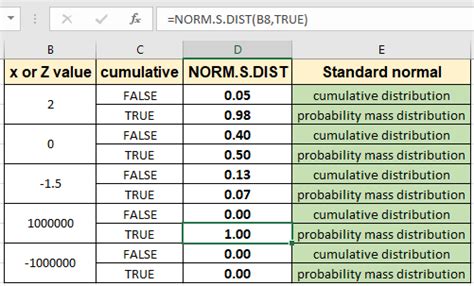
- Enter the mean and standard deviation of the distribution in two separate cells.
- Create a range of x-values that you want to plot on the curve.
- Use the NORM.S.DIST function to calculate the corresponding y-values for each x-value.
- Plot the x-values and y-values on a graph to create the Gaussian curve.
Method 3: Using the EXP and SQRT Functions
- Enter the mean and standard deviation of the distribution in two separate cells.
- Create a range of x-values that you want to plot on the curve.
- Use the EXP and SQRT functions to calculate the corresponding y-values for each x-value.
- Plot the x-values and y-values on a graph to create the Gaussian curve.
Method 4: Using the LOGNORM.DIST Function
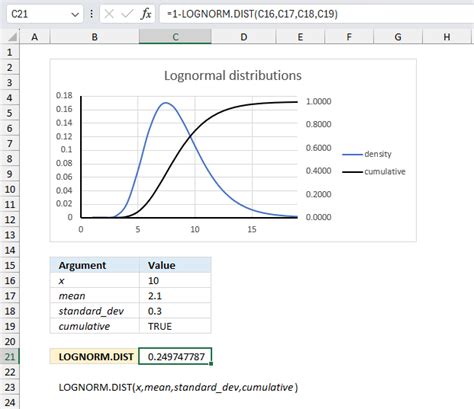
- Enter the mean and standard deviation of the distribution in two separate cells.
- Create a range of x-values that you want to plot on the curve.
- Use the LOGNORM.DIST function to calculate the corresponding y-values for each x-value.
- Plot the x-values and y-values on a graph to create the Gaussian curve.
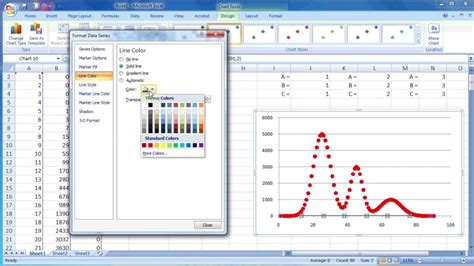
Method 5: Using VBA Macros
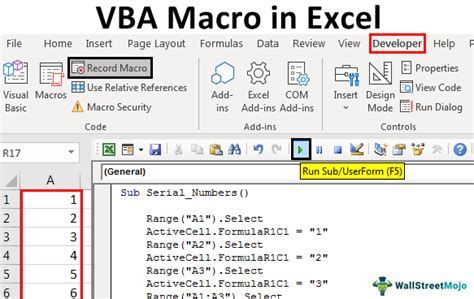
- Open the Visual Basic Editor in Excel.
- Create a new module and insert the code for the Gaussian curve.
- Run the macro to create the Gaussian curve.
Each of these methods has its own advantages and disadvantages, and the choice of method will depend on the specific requirements of your project.
Gaussian Curve Image Gallery

What is a Gaussian curve?
+A Gaussian curve is a continuous probability distribution that is characterized by its bell-shaped curve. It is defined by two parameters: the mean (μ) and the standard deviation (σ).
How do I create a Gaussian curve in Excel?
+There are several ways to create a Gaussian curve in Excel, including using the NORM.DIST function, the NORM.S.DIST function, the EXP and SQRT functions, the LOGNORM.DIST function, and VBA macros.
What are the applications of the Gaussian curve?
+The Gaussian curve has numerous applications in fields such as finance, engineering, and social sciences. It is commonly used to model real-world phenomena, such as the distribution of scores, heights, and weights.
In conclusion, creating a Gaussian curve in Excel can be a valuable skill for anyone working with data analysis. By mastering the five methods discussed in this article, you can create accurate and informative Gaussian curves that will help you make informed decisions. Whether you are a student, a researcher, or a professional, understanding how to work with Gaussian curves in Excel can be a valuable asset. So, take the time to practice and explore the different methods, and you will be well on your way to becoming a proficient Excel user. We hope this article has been informative and helpful, and we encourage you to share your thoughts and experiences with us in the comments section below.