Intro
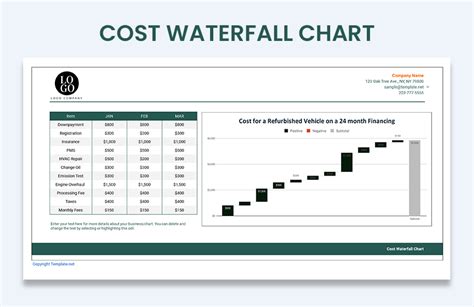
Waterfall charts are a powerful tool in Excel, used to display how an initial value is affected by a series of positive or negative values. They are particularly useful in financial and business applications, such as tracking the cumulative effect of profits and losses over time or analyzing the contribution of various factors to a total value. Here, we'll explore five ways to create and utilize waterfall charts in Excel, enhancing your ability to visualize and understand complex data sets.
The importance of waterfall charts lies in their ability to break down complex data into easily understandable components. This makes them an indispensable tool for data analysis, allowing users to identify key factors contributing to changes in a dataset. By mastering the creation and application of waterfall charts, users can significantly enhance their data analysis capabilities, making more informed decisions based on clear visual representations of their data.
Understanding how to effectively use waterfall charts can revolutionize the way you analyze data. From identifying trends and patterns to understanding the cumulative impact of various factors, these charts provide insights that might be obscured in traditional data presentations. Moreover, with Excel's user-friendly interface and powerful charting tools, creating and customizing waterfall charts is more accessible than ever, making them a valuable addition to any data analyst's toolkit.
Creating a Basic Waterfall Chart in Excel
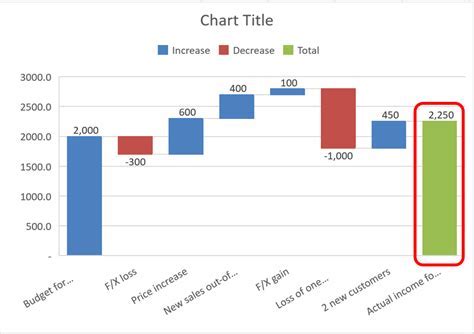
To create a basic waterfall chart in Excel, start by setting up your data. Typically, this involves having one column for categories (e.g., months of the year) and another for values (e.g., profits or losses). Then, select your data range, go to the "Insert" tab, and click on "Waterfall" under the "Charts" group. Excel will automatically generate a waterfall chart based on your selected data. This basic chart can then be customized to better suit your needs, including changing colors, adding data labels, and modifying the axis.
Customizing Your Waterfall Chart
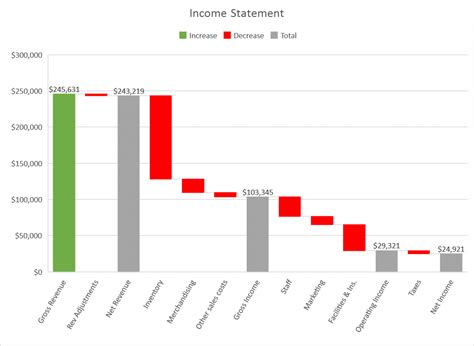
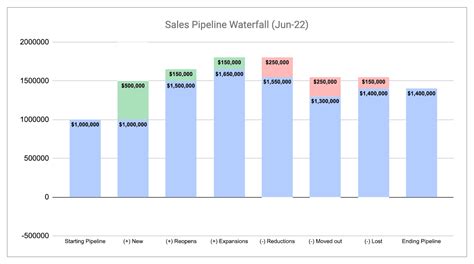
Customization is key to making your waterfall chart effective. Excel provides a range of options to tailor your chart, from changing the colors of the bars to adjusting the scale of the axes. For instance, you might want to use different colors to distinguish between positive and negative values or to highlight specific categories. Additionally, adding data labels can enhance the readability of your chart, allowing viewers to quickly identify the exact values represented by each bar.Using Waterfall Charts for Financial Analysis
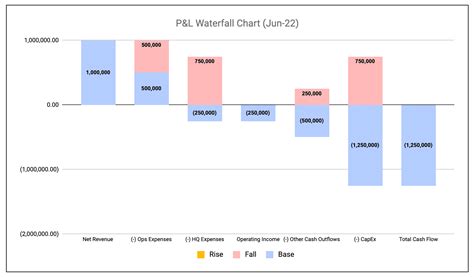
Waterfall charts are particularly useful in financial analysis, where they can be used to show how an initial budget or forecast is affected by various factors such as income, expenses, and investments. By visualizing these changes, analysts can quickly identify areas where costs can be optimized or where additional investments might yield the highest returns. For example, a company might use a waterfall chart to illustrate the impact of different expense categories on its net income, helping management make informed decisions about resource allocation.
Steps to Create a Financial Waterfall Chart
1. **Prepare Your Data**: Ensure your data is organized with categories and corresponding financial values. 2. **Select the Data Range**: Choose the cells containing your data. 3. **Insert the Waterfall Chart**: Go to the "Insert" tab and select "Waterfall" under the "Charts" group. 4. **Customize the Chart**: Adjust colors, add data labels, and modify axes as needed to enhance clarity.Advanced Waterfall Chart Techniques

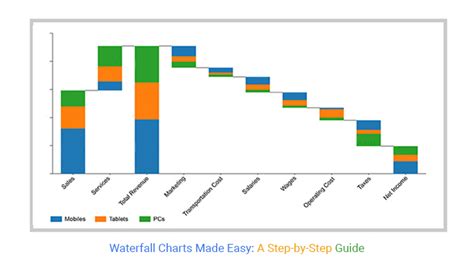
For more complex data analysis, Excel offers advanced waterfall chart techniques. One such technique involves using multiple series to compare different datasets side by side. This can be particularly useful for comparing the financial performance of different departments or projects over time. Another advanced technique is the use of dynamic charts that update automatically as new data is added, ensuring that your analysis remains current and relevant.
Dynamic Waterfall Charts
To create a dynamic waterfall chart, you can use Excel's table feature to organize your data. By converting your data range into a table, you can easily add or remove rows, and your chart will automatically update to reflect these changes. This feature is especially useful for ongoing projects or regular financial analyses, where data is continually being updated.Waterfall Charts for Project Management

In project management, waterfall charts can be used to visualize the progress of tasks or the allocation of resources over time. By tracking the completion of milestones or the consumption of resources, project managers can identify potential bottlenecks or areas where resources might be underutilized. This allows for more efficient allocation of resources and better project outcomes.
Benefits for Project Managers
- **Enhanced Visibility**: Clearly see project progress and resource allocation. - **Identify Bottlenecks**: Early detection of potential issues allows for proactive management. - **Optimize Resources**: Make informed decisions about resource allocation to maximize efficiency.Best Practices for Waterfall Charts
When using waterfall charts, it's essential to follow best practices to ensure your charts are clear, effective, and easy to understand. This includes keeping the design simple, using appropriate colors, and ensuring that the chart is properly labeled. Additionally, it's crucial to select the right data for your chart, focusing on information that is relevant and useful for your analysis.
Design Considerations
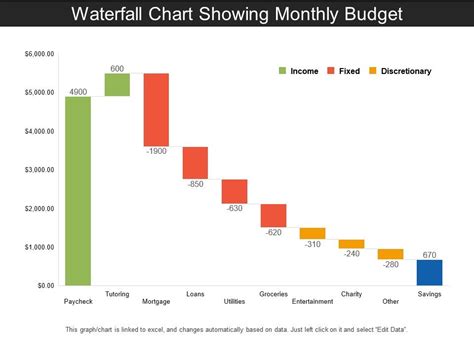
- **Simplicity**: Avoid clutter; focus on key information. - **Color**: Use colors that are distinguishable and meaningful. - **Labels**: Ensure all axes and data points are clearly labeled.Waterfall Chart Examples Gallery


What is a waterfall chart used for?
+A waterfall chart is used to show how an initial value is affected by a series of positive or negative values, making it particularly useful for financial and business applications.
How do I create a waterfall chart in Excel?
+To create a waterfall chart in Excel, select your data range, go to the "Insert" tab, and click on "Waterfall" under the "Charts" group. Excel will automatically generate a waterfall chart based on your selected data.
What are some advanced techniques for using waterfall charts?
+Advanced techniques include using multiple series to compare different datasets, creating dynamic charts that update automatically as new data is added, and customizing the chart's appearance to better suit your analysis needs.
In conclusion, mastering the use of waterfall charts in Excel can significantly enhance your data analysis capabilities, providing clear and insightful visual representations of complex data sets. Whether you're analyzing financial trends, managing projects, or tracking sales, waterfall charts offer a powerful tool to help you understand and communicate your data more effectively. By following the best practices and advanced techniques outlined here, you can unlock the full potential of waterfall charts and take your data analysis to the next level. We invite you to share your experiences with waterfall charts, ask questions, or explore more topics related to Excel and data analysis in the comments below.