Intro
Master dragging months in Excel easily with simple formulas and shortcuts, streamlining date range management and calendar calculations, including auto-fill and date series techniques.
The ability to drag months in Excel can be a highly useful skill for anyone working with date-related data in spreadsheets. This feature can significantly simplify tasks such as filling a series of months, creating calendars, or planning projects over time. Excel provides several methods to achieve this, catering to different user preferences and needs. Understanding these methods can enhance productivity and reduce the time spent on mundane tasks.
Drag months in Excel is particularly beneficial for financial analysts, project managers, and anyone who needs to track data over time. Whether it's for creating budgets, scheduling tasks, or analyzing sales trends, being able to quickly and easily fill in a series of months can save a considerable amount of time and effort. Moreover, mastering this skill can also improve the overall appearance and functionality of Excel worksheets, making them more intuitive and user-friendly.
For those who are new to Excel or have limited experience with its advanced features, learning how to drag months might seem daunting. However, Excel's intuitive interface and robust functionality make it accessible to users of all skill levels. With a little practice, anyone can become proficient in dragging months in Excel, thereby unlocking a more efficient way of working with date-related data.
Understanding the Basics of Dragging Months in Excel
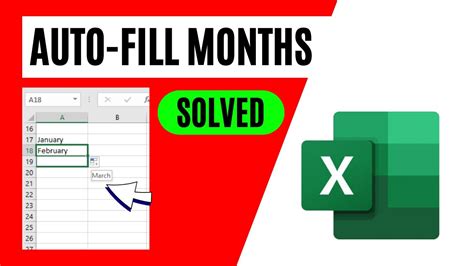
To start dragging months in Excel, it's essential to understand the basic steps involved. The most common method involves using the AutoFill feature, which allows users to fill a series of cells with a specific pattern, including dates. By entering a starting month and then dragging the fill handle (a small square at the bottom-right corner of the selected cell or range), Excel can automatically fill in the subsequent months.
Step-by-Step Guide to Dragging Months
The process of dragging months in Excel is straightforward and can be broken down into a few simple steps: - First, select the cell where you want to start your series of months. - Type in the first month of your series. This could be in a format like "January" or "Jan" depending on your preferences. - Select the cell containing the first month. - Locate the fill handle at the bottom-right corner of the selected cell. - Click and drag the fill handle to the right (for filling months across columns) or down (for filling months down rows). - As you drag, Excel will automatically fill in the subsequent months.Customizing the AutoFill Feature

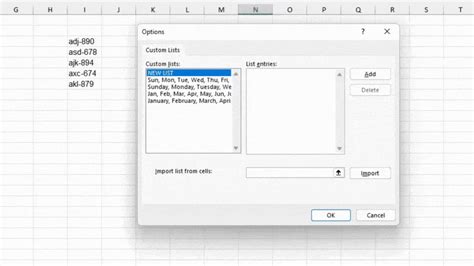
While the default AutoFill feature in Excel is incredibly useful, there are times when you might need more control over how your months are filled. Excel provides options to customize the AutoFill feature, allowing you to specify exactly how you want your series of months to appear.
Using the AutoFill Options Button
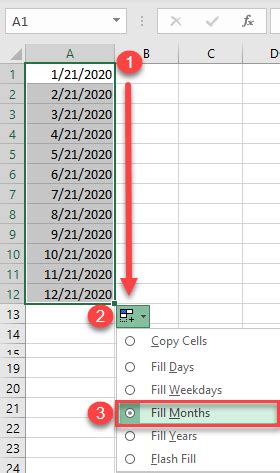
After using the AutoFill feature to fill in your series of months, you'll notice a small AutoFill Options button appears at the bottom-right corner of the filled range. Clicking on this button provides several options: - **Fill Months**: This is the default option and fills the cells with the series of months. - **Fill Years**: Useful if you're working with years instead of months. - **Fill Days**: For filling a series of days. - **Fill Weekdays**: Fills the cells with the days of the week.Advanced Techniques for Dragging Months

For more complex tasks or specific formatting needs, Excel offers advanced techniques that can be employed. These include using formulas to generate a series of months or utilizing the DATE function in combination with other functions to create dynamic date series.
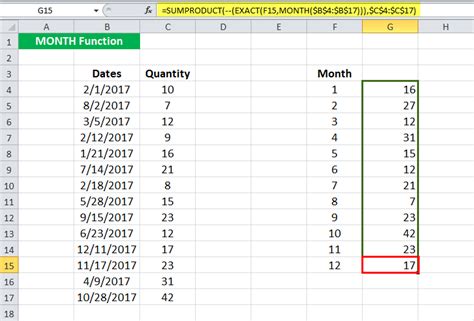
Using Formulas to Generate Months
Formulas can provide a more flexible and dynamic way to generate a series of months. For example, using the DATE function along with the YEAR and MONTH functions can help in creating a custom series of months based on specific criteria.Best Practices for Dragging Months in Excel

To get the most out of the feature to drag months in Excel, it's essential to follow some best practices:
- Consistency is Key: Ensure that your date formats are consistent throughout your spreadsheet to avoid confusion and errors.
- Use Shortcuts: Familiarize yourself with Excel shortcuts, such as using
Ctrl + ;to insert the current date, which can save time when working with dates. - Keep it Simple: Unless necessary, avoid overcomplicating your date series with unnecessary formulas or formatting.
Common Challenges and Solutions

Despite the ease of use of the drag months feature in Excel, users may encounter some challenges. Understanding these common issues and their solutions can help in troubleshooting and improving the overall experience.
Troubleshooting Tips
- **Inconsistent Date Formats**: Ensure that all dates are in the same format to avoid issues with AutoFill. - **AutoFill Not Working**: Check that the fill handle is being dragged correctly and that there are no obstacles (like hidden columns or rows) preventing the fill.Gallery of Dragging Months in Excel
Dragging Months in Excel Image Gallery


What is the easiest way to drag months in Excel?
+The easiest way to drag months in Excel is by using the AutoFill feature. Simply type the first month, select the cell, and then drag the fill handle to the desired cells.
How do I customize the AutoFill feature for dragging months?
+You can customize the AutoFill feature by clicking on the AutoFill Options button that appears after filling a series. This allows you to choose from various fill options, including filling months, years, or days.
What are some common challenges when dragging months in Excel?
+Common challenges include inconsistent date formats and issues with the AutoFill feature not working as expected. Ensuring consistent date formats and checking for any obstacles in the spreadsheet can resolve these issues.
In conclusion, dragging months in Excel is a powerful feature that can significantly enhance productivity and efficiency when working with date-related data. By mastering the AutoFill feature, understanding how to customize it, and being aware of common challenges and solutions, users can unlock a more streamlined and effective way of managing their spreadsheets. Whether you're a seasoned Excel user or just starting out, learning how to drag months can open up new possibilities for data management and analysis. So, take a moment to explore and practice these techniques, and discover how dragging months in Excel can transform your workflow. Feel free to share your experiences, ask questions, or provide tips on how you use this feature in your work or personal projects.