Intro
When working with data in Excel, you often encounter situations where you need to paste comma-separated values into separate rows. This can be particularly useful when dealing with lists of items, data exported from other applications, or even text files that you want to organize in a spreadsheet. Excel offers several methods to achieve this, catering to different user preferences and the specific context of your data. Let's explore the most common and efficient ways to paste comma-separated values into rows in Excel.
Firstly, understanding your data is crucial. If you have a string of comma-separated values like "apple, banana, orange, grape," and you want each fruit to be in its own row, you'll need to use a method that splits text to rows based on a delimiter—in this case, a comma.
Method 1: Using Text to Columns Feature
The Text to Columns feature in Excel is a powerful tool for splitting data based on a specified delimiter. Here's how you can use it:
- Select the cell containing your comma-separated values.
- Go to the Data tab on the ribbon.
- Click on Text to Columns in the Data Tools group.
- In the Text to Columns wizard, select Delimited and click Next.
- Check the box next to Comma under Delimiters (you can uncheck other delimiters if they're selected by default), and then click Next.
- Choose the format for your data in the next step, or just click Finish if the default settings are acceptable.
- Your data should now be split into separate columns based on the commas.
However, this method splits the data into columns. If you specifically need the data in rows, you can either use the Transpose feature after splitting the data into columns or use a different method.
Method 2: Using Power Query
For those with Excel 2010 or later, Power Query (now known as Get & Transform Data in Excel 2016 and later) offers a robust way to manipulate data, including splitting text into rows.
- Select the cell with your comma-separated values.
- Go to the Data tab and click on From Table/Range.
- In the Power Query Editor, go to the Add Column tab.
- Click on Split Column, then select By Delimiter.
- Choose Comma as the delimiter and select Each occurrence of the delimiter. Under Advanced options, you can choose to split into Rows.
- Click OK, and your data will be split into separate rows.
- Finally, click Close & Load to load the transformed data into a new worksheet.
Method 3: Using VBA Macro
If you frequently need to perform this task or prefer automating it, you can use a VBA macro. Here's a simple example:
- Press Alt + F11 to open the VBA Editor.
- In the Editor, go to Insert > Module to insert a new module.
- Paste the following code into the module:
Sub SplitToRows()
    Dim text As String
    Dim i As Integer
    Dim arr() As String
    Dim cell As Range

    For Each cell In Selection
        text = cell.Value
        arr = Split(text, ",")

        cell.Offset(1, 0).Resize(UBound(arr)).Value = Application.Transpose(arr)

        ' Optional: Clear the original cell if desired
        ' cell.ClearContents
    Next cell
End Sub
- Close the VBA Editor and select the cell(s) with your comma-separated data.
- Press Alt + F8, select
SplitToRows, and click Run.
This macro splits the comma-separated values in the selected cell(s) into rows below the original cell.
Method 4: Manual Method
If you're dealing with a small dataset, you might find it quicker to simply use Excel's built-in formula capabilities:
- Assume your comma-separated list is in cell A1.
- In cell A2, enter the formula:
=LEFT(A1,FIND(",",A1)-1) - In cell A3, enter:
=MID(A1,FIND(",",A1)+1,LEN(A1)) - You'll need to adjust these formulas for each subsequent row, using combinations of
LEFT,MID,RIGHT, andFINDfunctions to isolate each value.
However, this method becomes cumbersome with large datasets and isn't as efficient as the other methods mentioned.
Final Thoughts
Each of these methods has its place depending on the size of your dataset, your familiarity with Excel's features, and whether this is a one-time task or something you'll need to do regularly. The Text to Columns feature is great for simple, one-off tasks, while Power Query offers more flexibility and power, especially for larger datasets or when combined with other data manipulation tasks. For those comfortable with VBA, macros can provide a quick and automated solution. Regardless of the method you choose, Excel's versatility ensures that you can efficiently manage and manipulate your data to meet your needs.
Benefits of Using Excel for Data Management
Using Excel for managing and manipulating data offers numerous benefits, including enhanced productivity, improved data analysis capabilities, and better decision-making. With its intuitive interface and powerful features, Excel enables users to efficiently organize, analyze, and visualize data, making it an indispensable tool in today's data-driven world.

Step-by-Step Guide to Excel Data Analysis
Analyzing data in Excel involves several steps, from preparing your data to creating visualizations. Here’s a step-by-step guide to help you get started:
- Prepare Your Data: Ensure your data is clean, organized, and free of errors.
- Use Formulas and Functions: Utilize Excel’s formulas and functions to perform calculations and manipulate data.
- Create Charts and Graphs: Visualize your data using various chart types to identify trends and patterns.
- Apply Conditional Formatting: Highlight important information and trends using conditional formatting.
- PivotTables: Use PivotTables to summarize and analyze large datasets.

Excel Tips and Tricks for Improved Productivity
To get the most out of Excel, it’s helpful to know some tips and tricks that can improve your productivity and efficiency. Here are a few:
- Use Shortcuts: Familiarize yourself with Excel shortcuts to perform tasks quickly.
- Customize Your Ribbon: Tailor your Excel ribbon to include your most frequently used commands.
- Leverage Add-ins: Explore Excel add-ins that can enhance your workflow and productivity.

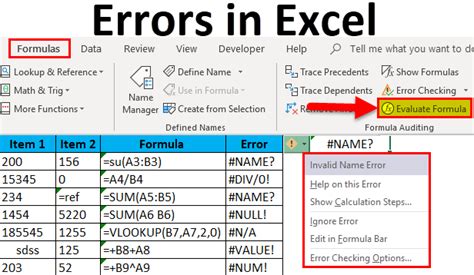
Common Excel Errors and How to Fix Them
Despite its power and flexibility, Excel can sometimes throw errors that hinder your work. Here are some common Excel errors and how to fix them:
- #VALUE! Error: Often occurs when there’s a mismatch in data types. Check your formulas and ensure data consistency.
- #REF! Error: Happens when a reference is invalid. Review your formulas and adjust references as needed.

Gallery of Excel Features and Functions
Excel Features and Functions Gallery


How do I split comma-separated values into rows in Excel?
+You can use the Text to Columns feature, Power Query, or write a VBA macro to achieve this. Each method has its advantages and is suited for different scenarios and user preferences.
What is the Text to Columns feature in Excel, and how does it work?
+The Text to Columns feature is a tool in Excel that allows you to split text in a cell into separate columns or rows based on a specified delimiter. It's particularly useful for organizing and analyzing data that is initially presented in a single cell.
How can I automate the process of splitting comma-separated values into rows using VBA?
+You can write a VBA macro that uses the Split function to divide the string into an array based on the comma delimiter and then outputs each element of the array into separate rows. This method provides a flexible and automated solution, especially for repetitive tasks.
If you've made it this far, you're likely eager to dive into the world of Excel and explore its vast capabilities for managing and analyzing data. Whether you're a beginner looking to understand the basics or an advanced user seeking to refine your skills, Excel offers a wealth of tools and features to help you achieve your goals. Remember, practice makes perfect, so don't hesitate to experiment with different methods and techniques to find what works best for you. Share your experiences, tips, and tricks in the comments below, and let's continue to explore the exciting world of Excel together!