Intro
Master Excel formatting with 5 ways to wrap text using VBA, including macros, codes, and scripting techniques for efficient text manipulation and cell formatting.
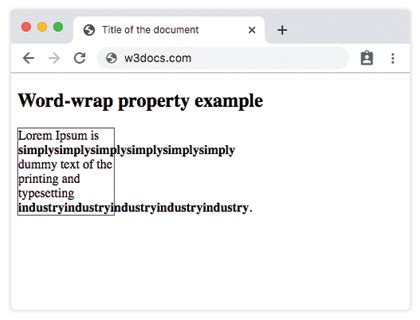
The ability to wrap text in Excel using VBA can be incredibly useful for making your spreadsheets more readable and user-friendly. Wrapping text means that when a cell contains more text than it can display, the text automatically moves to a new line within the cell, rather than overflowing into adjacent cells. This feature is particularly handy for cells containing descriptions, comments, or any form of text that exceeds the cell's width. Here's how you can achieve this using VBA, along with five practical methods to manipulate and apply text wrapping in your spreadsheets.
Wrapping text in Excel VBA involves using the WrapText property of the Range object. This property is a boolean value that, when set to True, enables text wrapping for the specified range of cells. Below are five different scenarios where you might apply text wrapping, along with examples of how to do it.
Understanding the Basics of Text Wrapping in VBA
Before diving into the examples, it's essential to understand the basic syntax for enabling text wrapping in VBA. The general syntax to wrap text in a cell or range of cells is as follows:
Range("A1").WrapText = True
This line of code will enable text wrapping for cell A1. You can replace "A1" with any range you wish to apply text wrapping to.
1. Wrapping Text in a Single Cell
To wrap text in a single cell, you can use the WrapText property directly on that cell. Here's how you can do it:
Sub WrapTextInSingleCell()
    Range("A1").WrapText = True
End Sub
This subroutine will wrap the text in cell A1.
2. Wrapping Text in a Range of Cells
If you want to apply text wrapping to a larger range of cells, you can specify the range instead of a single cell. For example, to wrap text in cells A1 through E10, you can use:
Sub WrapTextInRange()
    Range("A1:E10").WrapText = True
End Sub
This will enable text wrapping for all cells in the specified range.
3. Automatically Wrap Text Based on Cell Content
You can also create a subroutine that checks each cell in a range for content and automatically wraps the text if the cell is not empty. Here's an example:
Sub AutoWrapTextInRange()
    Dim cell As Range
    For Each cell In Range("A1:E10")
        If cell.Value <> "" Then
            cell.WrapText = True
        End If
    Next cell
End Sub
This code loops through each cell in the range A1:E10, checks if the cell contains any value, and if so, enables text wrapping for that cell.
4. Wrapping Text in an Entire Column or Row
If you need to wrap text in an entire column or row, you can use the Columns or Rows properties. For example, to wrap text in the entire first column (Column A), you can use:
Sub WrapTextInColumn()
    Columns("A").WrapText = True
End Sub
And to wrap text in the entire first row (Row 1), you can use:
Sub WrapTextInRow()
    Rows(1).WrapText = True
End Sub
5. Wrapping Text in the Entire Worksheet
Finally, if you want to enable text wrapping for every cell in the active worksheet, you can use the Cells property without specifying any range. Here's how you can do it:
Sub WrapTextInEntireSheet()
    Cells.WrapText = True
End Sub
This subroutine will enable text wrapping for all cells in the active worksheet.



Gallery of Excel VBA Examples
Excel VBA Image Gallery

What is the purpose of text wrapping in Excel VBA?
+Text wrapping in Excel VBA is used to make text in a cell move to a new line when it exceeds the cell's width, improving readability.
How do I enable text wrapping for a cell using VBA?
+To enable text wrapping for a cell, use the code `Range("A1").WrapText = True`, replacing "A1" with your desired cell reference.
Can I apply text wrapping to an entire column or row in Excel VBA?
+Yes, you can apply text wrapping to an entire column or row by using `Columns("A").WrapText = True` for a column or `Rows(1).WrapText = True` for a row.
To further explore the capabilities of Excel VBA and how it can enhance your spreadsheet management and automation tasks, consider experimenting with different VBA scripts and macros. The examples provided above serve as a solid foundation for understanding how to manipulate text wrapping and other cell properties in Excel using VBA. Whether you're looking to automate repetitive tasks, create interactive spreadsheets, or simply make your Excel sheets more visually appealing and user-friendly, VBA offers a powerful set of tools to achieve your goals. Feel free to share your experiences, ask questions, or provide tips on using Excel VBA in the comments below.