Intro
Learn to create a run chart in Excel, a key tool for quality control and process improvement, using simple steps and formulas, with related techniques like control charts and trend analysis.
Creating a run chart in Excel is a straightforward process that helps in visualizing the performance of a process over time. A run chart is particularly useful for detecting trends, shifts, or unusual patterns in data that might not be immediately apparent from looking at the numbers alone. Here's a step-by-step guide to creating a run chart in Excel:
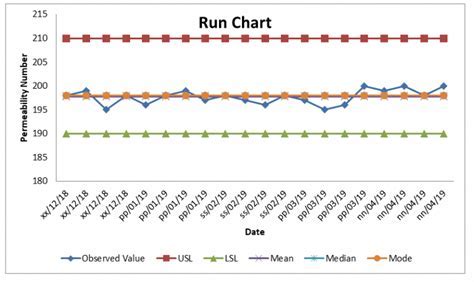
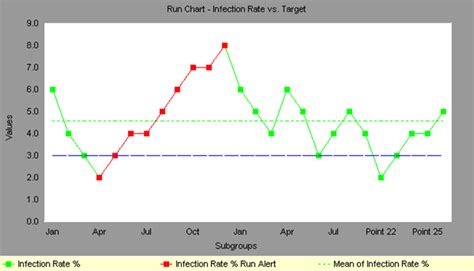
The run chart is an essential tool in quality improvement and statistical process control. It plots the data in a time-ordered sequence, allowing the user to see the trend and patterns in the data. Unlike control charts, run charts do not have control limits, making them simpler to interpret for basic trend analysis.
To create a run chart, you will need a dataset that includes the time or sequence of events and the corresponding values or measurements. Here’s how to proceed:
Step 1: Prepare Your Data
Ensure your data is organized in a table format with two columns: one for the time or sequence (e.g., dates, months, or just a sequence number) and the other for the values or measurements you want to plot.
Step 2: Select the Data Range
Highlight the entire range of your data, including headers. If your data starts from cell A1 (with headers in row 1), and you have data up to row 100, you would select A1:B100.
Step 3: Create the Chart
- Go to the "Insert" tab on the ribbon.
- Click on the "Scatter" button in the "Charts" group. You will see several scatter chart options; choose the "Scatter with only Markers" option.
This type of chart is ideal for creating a run chart because it plots each data point without connecting them with lines, which is useful for viewing individual data points over time.
Step 4: Customize the Chart
- Chart Title: Click on the chart title and type a meaningful title, such as "Run Chart of Sales Over Time".
- Axis Titles: Right-click on the chart and select "Select Data". You can then add titles to your axes by clicking on the "Chart title" and "Axis titles" buttons in the "Chart Tools" -> "Design" tab.
- Data Labels: If you want to show the exact values on the chart, you can add data labels. Right-click on the data series in the chart, select "Format Data Series", then check the box next to "Data Labels" and choose how you want them to appear.
Step 5: Analyze the Chart
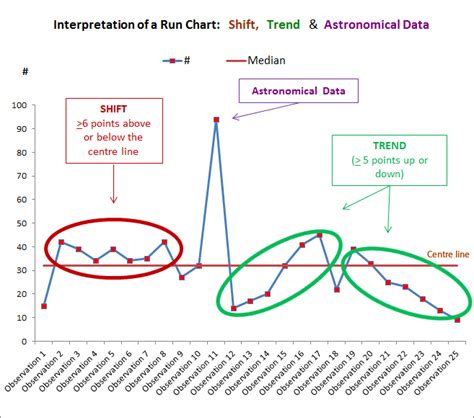
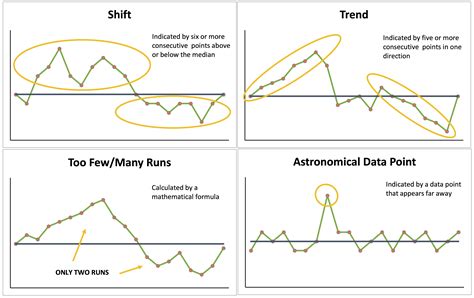
Once your run chart is created, you can start analyzing it for trends, shifts, or runs. A "run" is a sequence of points that are either consistently increasing, decreasing, or alternating. Look for:
- Trends: Are the points generally going up or down?
- Shifts: Are there sudden changes in the level of the process?
- Runs: Are there more runs than would be expected by chance?
Step 6: Interpretation
Interpretation of a run chart involves looking for non-random patterns. Common rules for interpretation include:
- Too few or too many runs: If the number of runs is significantly less than expected (suggesting a trend) or more (suggesting alternation), it may indicate a non-random pattern.
- Too long a run: A run that persists for longer than expected may indicate a shift or trend in the data.
Step 7: Refine Your Chart (Optional)
Based on your analysis, you might want to refine your chart. This could involve filtering out certain data points, changing the scale of the axes, or even creating a different type of chart to better visualize the trends you've identified.
Advanced Customization
For more complex datasets or to perform more sophisticated analysis, you might consider using Excel's built-in statistical tools or add-ins like Analysis ToolPak for more advanced statistical analysis.
Common Applications
Run charts are versatile and can be applied in various fields, including: - **Quality Control**: To monitor the quality of products over time. - **Healthcare**: To track patient outcomes, disease incidence, or treatment efficacy. - **Finance**: To analyze stock prices, sales trends, or economic indicators.
Best Practices
When creating and using run charts, keep the following best practices in mind: - **Keep it simple**: Avoid cluttering the chart with too much information. - **Use it for the right purpose**: Run charts are best for detecting trends and shifts over time, not for detailed statistical analysis. - **Combine with other tools**: For a more comprehensive analysis, use run charts alongside other quality improvement tools.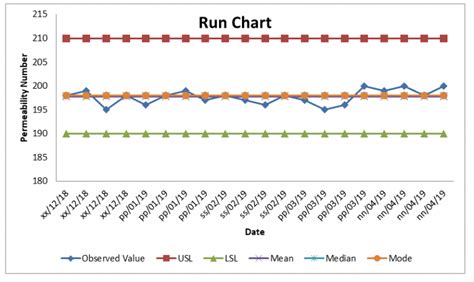
Limitations
While run charts are powerful tools for visualizing trends and patterns, they have limitations. They do not provide statistical proof of significance, and the interpretation can be subjective. For more rigorous analysis, consider using control charts or other statistical process control methods.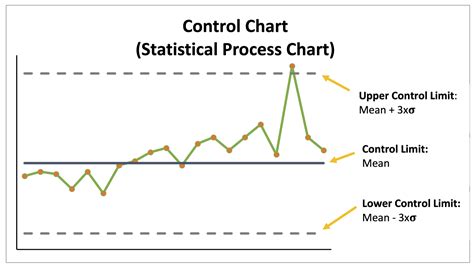
Conclusion and Next Steps
Creating a run chart in Excel is a useful skill for anyone looking to analyze and understand trends in their data. By following the steps outlined above and practicing with your own datasets, you can become proficient in using run charts to inform decision-making and drive improvement in your field.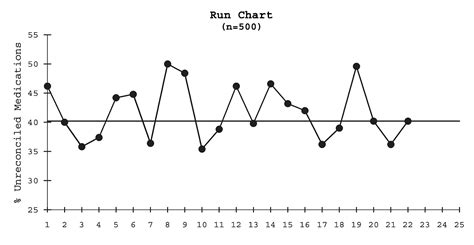
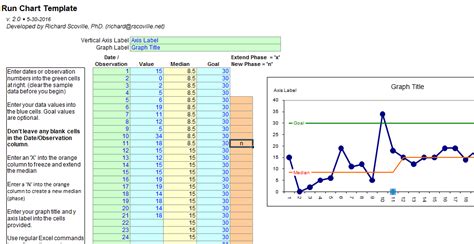
Gallery of Run Charts
Run Chart Image Gallery


What is a run chart used for?
+A run chart is used to track trends and patterns over time, helping in the detection of shifts, trends, or unusual patterns in data.
How do I create a run chart in Excel?
+To create a run chart in Excel, select your data, go to the "Insert" tab, click on "Scatter" and choose "Scatter with only Markers", then customize the chart as needed.
What are the benefits of using a run chart?
+The benefits include easy visualization of trends and shifts, simplicity in creation and interpretation, and applicability across various fields for quality improvement and analysis.
We hope this guide has been informative and helpful in creating and understanding run charts in Excel. Feel free to share your experiences or ask further questions in the comments below.