Intro
Learn how to put 2 dates in one cell in Excel using formulas and formatting, including date concatenation and separation techniques, to efficiently manage dual dates in a single cell.
When working with dates in Excel, it's not uncommon to need to display two dates in a single cell. This could be for a variety of reasons, such as showing a date range, tracking the start and end dates of a project, or simply for organizational purposes. Excel provides several ways to achieve this, depending on your specific needs and how you want the dates to be displayed.
Firstly, it's essential to understand that Excel stores dates as serial numbers, with January 1, 1900, being the first serial number (1). This system allows for easy date calculations but can sometimes make formatting dates more complex. To put two dates in one cell, you can use formatting, formulas, or a combination of both.
Using Formatting to Display Two Dates in One Cell
One straightforward method to display two dates in a single cell is by using text formatting. You can simply type both dates into the cell, separated by a character that makes sense for your context, such as a hyphen, a comma, or the word "to." For example, you could type "2023-01-01 - 2023-01-31" into a cell. This method is quick but doesn't allow for easy date calculations since the cell contents are treated as text.
If you're looking for a more dynamic approach that still allows for calculations, you can use Excel formulas.
Using Formulas to Display Two Dates in One Cell
Excel's concatenation function (&) can be used to combine two dates into a single cell. For example, if you have the start date in cell A1 and the end date in cell B1, you can use the formula =A1&" - "&B1 to display both dates in a new cell, separated by a hyphen and a space. This formula treats the dates as text, so you'll need to ensure the dates are formatted correctly in their original cells.
To make the dates more readable or to perform calculations with them, you might need to adjust the date format or use a different approach, such as using the TEXT function to format the dates within the formula. For instance, =TEXT(A1,"yyyy-mm-dd")&" - "&TEXT(B1,"yyyy-mm-dd") formats both dates as "yyyy-mm-dd" before concatenating them.
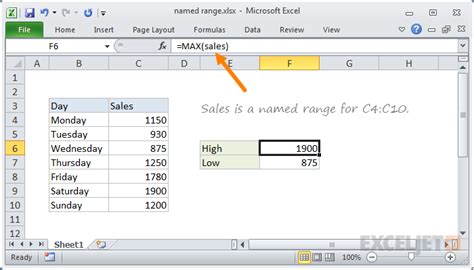
Using Named Ranges for Better Readability

For better readability and to make your formulas more understandable, you can define named ranges for the cells containing your dates. For example, you could name cell A1 as "StartDate" and cell B1 as "EndDate." Then, your formula would look like =StartDate&" - "&EndDate, making it clearer what the formula is intended to do.
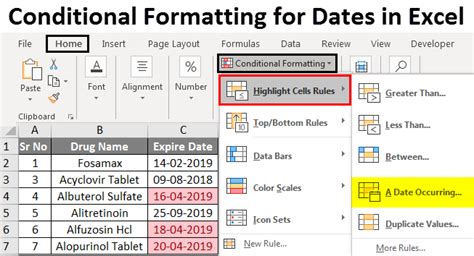
Conditional Formatting for Date Ranges

If you're working with a range of dates and want to highlight cells based on certain conditions (like dates within a specific range), you can use Excel's conditional formatting feature. This doesn't directly display two dates in one cell but can be useful for visually representing date ranges across multiple cells.
Practical Applications and Examples

- Project Management: Displaying start and end dates for projects in a single cell can help in quickly identifying project durations.
- Event Planning: Showing the date range of an event (e.g., a conference or festival) in one cell can be more compact and readable than using separate cells for start and end dates.
- Data Analysis: When analyzing data over time, being able to easily display and manipulate date ranges is crucial.
To further enhance your understanding and application of displaying two dates in one cell, consider the following tips:
- Always ensure your dates are correctly formatted as dates in Excel, not as text, to enable date calculations.
- Use Excel's built-in date functions, such as
DATE,TODAY, andEDATE, to work with dates in your formulas. - For complex date manipulations or conditional logic involving dates, consider using more advanced Excel functions like
IFcombined with date functions.
Gallery of Date Formatting Examples
Date Formatting Gallery


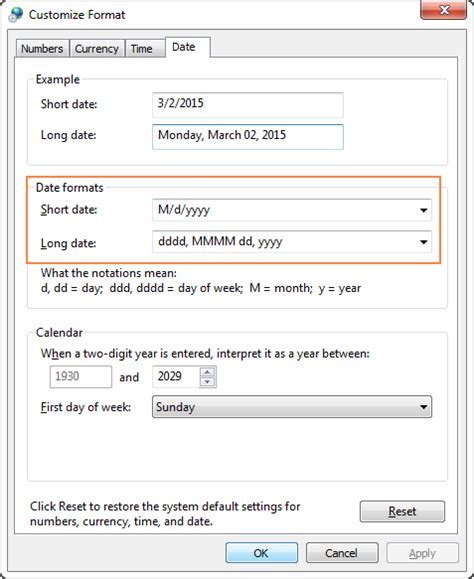


How do I format dates in Excel to display them as I want?
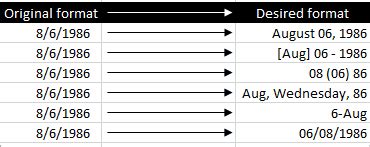
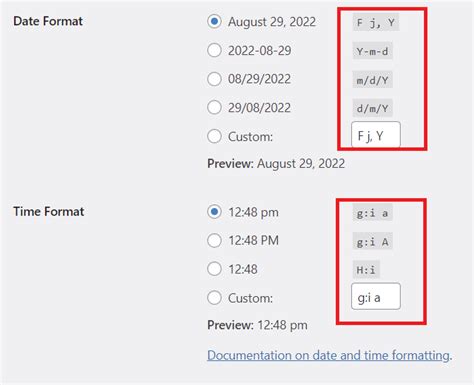
+To format dates in Excel, select the cells containing the dates, go to the Home tab, click on the Number group, and select Custom. Then, type in the desired date format, such as "yyyy-mm-dd" for a four-digit year, two-digit month, and two-digit day, separated by hyphens.
Can I use Excel formulas to automatically calculate date ranges?
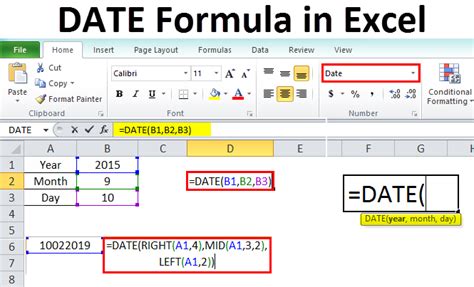
+Yes, Excel provides several functions for working with dates, such as DATE, TODAY, and EDATE, which can be used to calculate date ranges. For example, to calculate the end date of a project given its start date and duration, you can use a formula like `=START_DATE + DAYS_DURATION`.
How do I display two dates in one cell in Excel?
+You can display two dates in one cell by using the concatenation operator (&) in a formula, such as `=A1&" - "&B1`, where A1 and B1 contain the two dates you want to display. Alternatively, you can use the TEXT function to format the dates within the formula, like `=TEXT(A1,"yyyy-mm-dd")&" - "&TEXT(B1,"yyyy-mm-dd")`.
In conclusion, displaying two dates in one cell in Excel can be achieved through various methods, including formatting, formulas, and a combination of both. By understanding how Excel handles dates and using the appropriate functions and formatting techniques, you can efficiently display and work with date ranges in your spreadsheets. Whether you're managing projects, analyzing data, or simply organizing information, being able to effectively work with dates in Excel is a valuable skill. We invite you to share your experiences, tips, or questions about working with dates in Excel in the comments below, and don't forget to share this article with anyone who might find it useful.