Intro
The ability to create a clear button in Excel can greatly enhance the user experience of your spreadsheet by providing a straightforward way to reset or clear data from specific cells or ranges. This can be particularly useful in templates, forms, or any interactive Excel document where users need to input data that may need to be cleared for reuse or updating. In this article, we will delve into the steps and benefits of creating such a button, exploring its applications and the mechanisms behind its functionality.
To start with, understanding the importance of interactive elements in Excel is crucial. Spreadsheets are not just about storing and analyzing data; they can also serve as dynamic tools for data collection, reporting, and even simple applications. A clear button falls into this category of interactive elements, making it easier for users to manage their data without having to manually select and delete it, which can be time-consuming and prone to errors.
Creating a clear button in Excel involves using the "Developer" tab, which is not visible by default in all Excel versions. Therefore, the first step is to ensure that this tab is visible and accessible. If it's not already visible, you can make it appear by going to "File" > "Options" > "Customize Ribbon," checking the "Developer" checkbox, and then clicking "OK." This tab provides access to various tools for creating and managing macros, controls, and other advanced features in Excel.
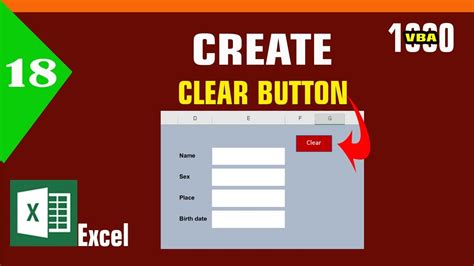
Once the Developer tab is accessible, you can proceed to insert a button into your worksheet. This is done by clicking on the "Insert" button within the Developer tab and then selecting "Button" under the "ActiveX Controls" group. After clicking on the button icon, you will be in design mode, and your cursor will change, allowing you to draw the button on your worksheet. Simply click and drag to create the button of your desired size.
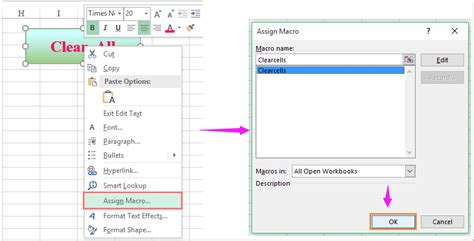
After creating the button, you need to assign a macro to it. A macro is a series of instructions that Excel can execute, and in this case, the macro will contain the code to clear the specified cells or range. To assign a macro, right-click on the button (while still in design mode) and select "View Code." This will open the Visual Basic for Applications (VBA) editor where you can write or paste the necessary code.
For example, to clear the contents of cells A1 through A10, you would use the following VBA code:
Range("A1:A10").ClearContents
This code specifies the range of cells to be cleared. You can adjust the range as needed for your specific application.
After entering the code, you can exit the VBA editor and return to your Excel worksheet. To test the button, you need to exit design mode by clicking on the "Design Mode" button in the Developer tab. Now, when you click on the button, it should clear the contents of the specified cells.
Benefits of Using a Clear Button

The benefits of incorporating a clear button into your Excel worksheets are numerous. Firstly, it enhances user experience by providing a simple and intuitive way to reset data. This can be especially useful in environments where the spreadsheet is used by multiple users or for repetitive tasks, reducing the risk of human error and saving time.
Moreover, clear buttons can be customized to fit specific needs. Depending on the complexity of your spreadsheet and the tasks at hand, you can create multiple buttons, each designed to clear different sets of data or perform other related actions. This level of customization makes Excel more versatile and powerful as a tool for data management and analysis.
Customizing Your Clear Button
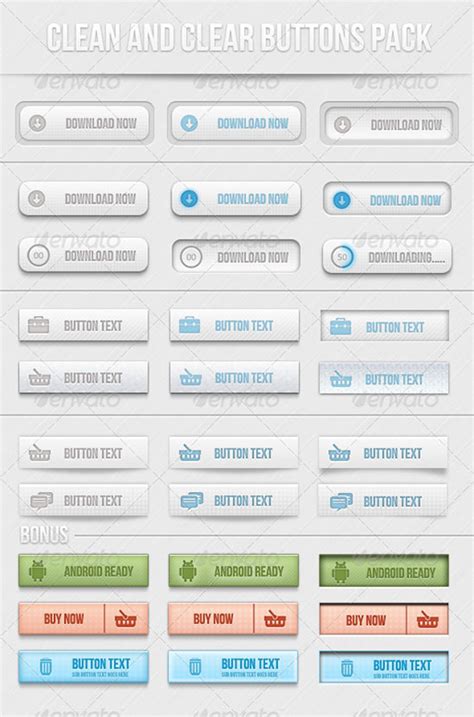
Customizing your clear button involves not just the functionality but also its appearance. You can change the button's text, color, and size to better fit your spreadsheet's layout and design. This can make your spreadsheet more visually appealing and easier to navigate, especially for users who are not familiar with Excel.
To customize the button's appearance, you can use the tools available in the Developer tab or the "Format" tab when the button is selected. For instance, you can change the button's caption by right-clicking on it and selecting "Edit Text." This allows you to enter a more descriptive or user-friendly label for the button.
Advanced Applications of Clear Buttons
Beyond the basic function of clearing data, clear buttons can be integrated into more complex workflows and macros. For example, you can create a button that not only clears data but also resets formulas, formats cells, or even triggers other macros. This advanced functionality can turn your Excel spreadsheet into a sophisticated application tailored to your specific needs or the needs of your organization.
Incorporating clear buttons into forms or templates can also streamline data collection processes. By providing a clear and straightforward way to reset the form, you can ensure that each new entry is made on a clean slate, reducing errors and improving data quality.
Best Practices for Using Clear Buttons
When using clear buttons in your Excel spreadsheets, it's essential to follow best practices to ensure they are used effectively and safely. Firstly, always test your buttons thoroughly to make sure they are clearing the correct data and not causing any unintended consequences, such as deleting formulas or formatting.
Secondly, consider the security implications of using macros. Since macros can potentially contain malicious code, Excel has built-in security features to warn users about macros from unknown sources. To avoid issues, ensure that your macro settings are configured to trust macros from trusted sources, and always be cautious when enabling macros in worksheets from unknown origins.
Lastly, document your buttons and the macros behind them. This is particularly important in shared worksheets or when you're creating templates that will be used by others. Including comments in your VBA code and providing instructions on how to use the clear buttons can make your spreadsheet more user-friendly and maintainable.
Conclusion and Next Steps

In conclusion, creating a clear button in Excel can significantly enhance the functionality and usability of your spreadsheets. By following the steps outlined in this article and exploring the advanced applications of clear buttons, you can create more interactive, efficient, and user-friendly Excel documents.
Whether you're a beginner looking to add simple functionality to your spreadsheets or an advanced user seeking to create complex applications, the clear button is a powerful tool at your disposal. As you continue to explore the capabilities of Excel and VBA, remember to always consider how you can leverage clear buttons and other interactive elements to make your work more effective and enjoyable.
Clear Button Image Gallery


How do I create a clear button in Excel?
+To create a clear button in Excel, go to the Developer tab, click on the "Insert" button, and select "Button" under ActiveX Controls. Draw the button on your worksheet, right-click on it, and select "View Code" to enter the VBA code that will clear the desired cells.
What is the VBA code to clear cells in Excel?
+The basic VBA code to clear the contents of cells A1 through A10 is: Range("A1:A10").ClearContents. You can adjust the range as needed for your specific application.
How do I customize the appearance of my clear button?
+You can customize the button's text, color, and size by using the tools available in the Developer tab or the "Format" tab when the button is selected. Right-click on the button and select "Edit Text" to change its caption.
We hope this comprehensive guide has provided you with the knowledge and inspiration to create and utilize clear buttons in your Excel spreadsheets effectively. Whether you're enhancing existing documents or building new ones, remember that the key to unlocking the full potential of Excel lies in exploring and mastering its various features and tools. Share your experiences, tips, and questions about using clear buttons in Excel in the comments below, and don't hesitate to reach out if you have any further inquiries or need assistance with implementing these solutions in your own projects.