Intro
Equations are a crucial part of data analysis, and being able to visualize them in a graph can help in understanding complex relationships between variables. Excel, being one of the most widely used spreadsheet software, offers a range of tools to create and customize graphs. However, putting an equation into an Excel graph directly requires a bit of creativity and understanding of how Excel handles equations and graphs.
The importance of visualizing equations in graphs cannot be overstated. It helps in identifying trends, patterns, and correlations that might not be immediately apparent from looking at the raw data. For students, researchers, and professionals alike, the ability to graph equations is a fundamental skill that enhances analytical capabilities and communication of findings.
To entice readers to continue reading, it's essential to understand that the process of putting an equation into an Excel graph is straightforward and accessible, even for those with limited experience in Excel. The steps involved are designed to be easy to follow, and by the end of this article, readers will be equipped with the knowledge to create their own equation graphs in Excel.
Introduction to Excel Graphs
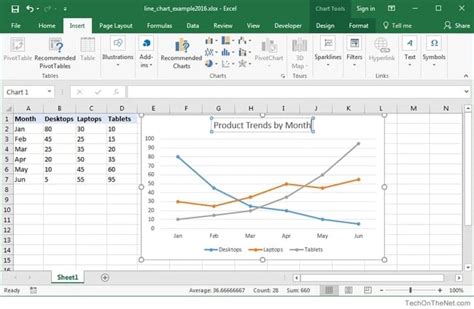
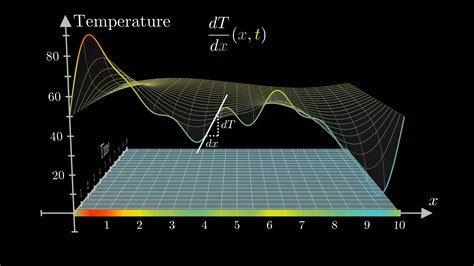
Excel provides a variety of graph types, each suited for different kinds of data and analyses. From simple line graphs and bar charts to more complex scatter plots and surface charts, Excel's graphing capabilities are robust. However, when it comes to equations, the process involves either using the equation to generate data points that are then graphed or using specific Excel tools designed for equation visualization.

Understanding Equations in Excel
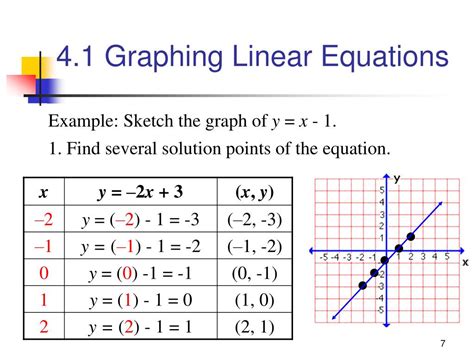
Equations in Excel can be entered into cells using standard mathematical operators and functions. For graphing purposes, the equation needs to be in a form that Excel can interpret and plot. This usually involves creating a series of x-values and then using the equation to calculate corresponding y-values.
Steps to Put an Equation in Excel Graph
To put an equation into an Excel graph, follow these steps:
- Enter x-values: Start by entering a range of x-values into a column. These values will represent the x-coordinates of the points on your graph.
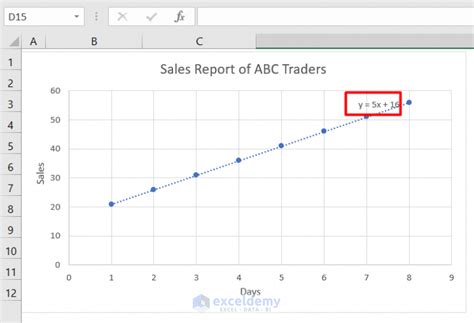
- Enter the equation: In a separate column next to the x-values, enter the equation using Excel's formula syntax. For example, if your equation is y = 2x + 3, you would enter
=2*A1+3in the cell next to the first x-value, assuming the x-value is in cell A1. - Copy the equation down: Use the fill handle (the small square at the bottom right of the cell) to copy the equation down to all the cells corresponding to the x-values. This will generate the y-values based on the equation.
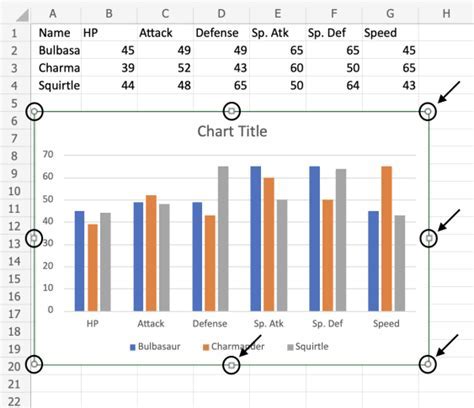
- Select data for graphing: Select the range of cells containing both the x and y values.
- Create the graph: Go to the "Insert" tab, click on "Scatter" (since equations are typically plotted as scatter plots or line graphs), and choose the type of graph you want.
Customizing the Graph
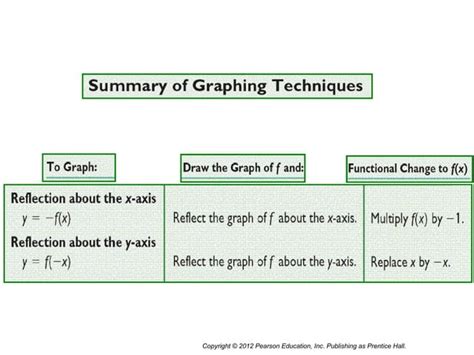
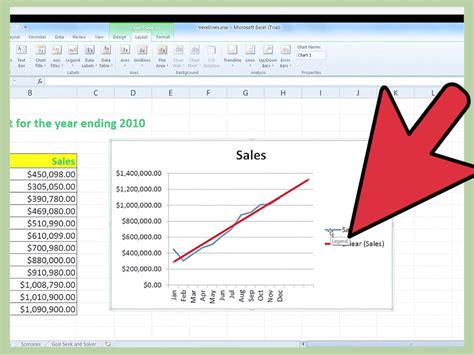
Once the graph is created, Excel offers a wide range of customization options. You can change the title, labels, axis scales, and even add a trendline that represents the equation directly on the graph.
Adding a Trendline
To add a trendline that represents the equation:
- Click on the data series in the graph.
- Go to the "Chart Tools" tab, then to the "Design" tab.
- Click on "Add Chart Element," then select "Trendline."
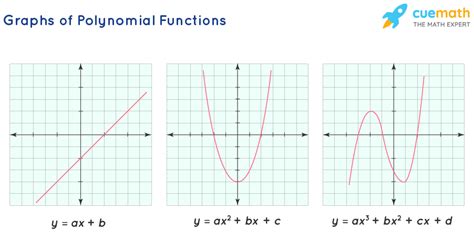
- Choose the type of trendline (linear, polynomial, etc.) that matches your equation.
Advanced Equation Graphing
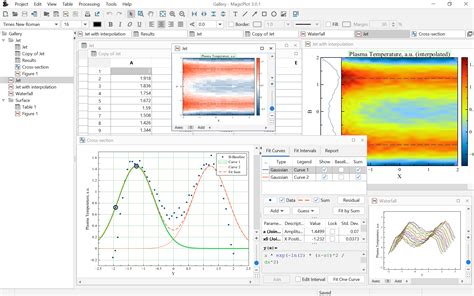
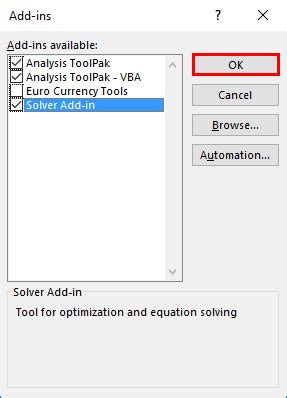
For more complex equations or those that cannot be easily represented by a simple formula in Excel, you might need to use more advanced tools or add-ins. Excel add-ins like Solver can help in solving and graphing complex equations, including nonlinear equations.
Using Solver
Solver is an Excel add-in that can be used to find the solution to a system of equations or to optimize a function. It can be particularly useful for graphing equations that involve multiple variables or constraints.
Practical Applications
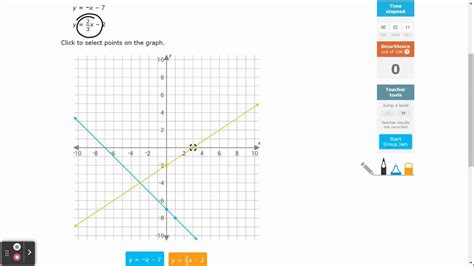
The ability to graph equations in Excel has numerous practical applications across various fields. In physics, equations of motion can be graphed to visualize the trajectory of objects. In economics, supply and demand curves can be plotted to analyze market behavior. In engineering, graphs of stress and strain can help in designing safer and more efficient structures.

Gallery of Equation Graphing
Equation Graphing Image Gallery

FAQs
How do I enter an equation in Excel for graphing?
+Enter the equation using standard mathematical operators and functions in a cell, then copy it down to generate y-values for a range of x-values.
Can I add a trendline to my graph that represents the equation?
+Yes, you can add a trendline by selecting the data series, going to the "Chart Tools" tab, and choosing "Add Chart Element" > "Trendline".
What types of equations can be graphed in Excel?
+Excel can graph linear and nonlinear equations, including polynomial equations. For more complex equations, you may need to use advanced tools or add-ins like Solver.
In conclusion, graphing equations in Excel is a powerful tool for data analysis and visualization. By following the steps outlined and exploring the advanced features and tools available, users can unlock the full potential of Excel for equation graphing. Whether you're a student, researcher, or professional, being able to visualize and analyze equations can significantly enhance your understanding and communication of complex data. We invite you to share your experiences with equation graphing in Excel, ask questions, or explore more topics related to data analysis and visualization.