Intro
Convert XLS to QIF with ease using macros. Learn how to create a macro for XLS to QIF conversion, enabling seamless import into accounting software like Quicken, simplifying financial data transfer and management.
The process of converting Excel files (XLS) to Quicken Interchange Format (QIF) is a common requirement for individuals and businesses that need to import financial data into Quicken or other personal finance software. QIF is a plain text file format used for exchanging financial data between different applications. To achieve this conversion, one can use macros in Excel. Macros are sequences of instructions that can be recorded or written in Visual Basic for Applications (VBA) to automate repetitive tasks.
The importance of converting XLS to QIF lies in the ability to manage financial transactions efficiently. Quicken and similar software rely on standardized file formats like QIF to import data, making it easier to track expenses, create budgets, and analyze financial health. Without a straightforward conversion method, users would have to manually enter each transaction, which can be time-consuming and prone to errors.
Converting XLS to QIF manually can be challenging, especially for those without experience in financial data management. The process involves understanding the structure of both file formats and ensuring that the data is correctly mapped from one to the other. This is where macros come into play, offering a automated solution that can save time and reduce the likelihood of errors.
To create a macro for converting XLS to QIF, one needs to have a basic understanding of VBA and the structure of the QIF file format. The QIF format is relatively simple, with each transaction represented by a series of lines that specify the transaction date, amount, payee, category, and memo. A well-designed macro can read the Excel spreadsheet, parse the financial data, and then write it out in the QIF format.
Here's a basic outline of how to approach creating such a macro:
- Open Excel and Access the Visual Basic Editor: Press
Alt + F11to open the VBA editor. - Insert a New Module: In the VBA editor, right-click on any of the objects for your workbook listed in the "Project" window on the left side. Choose
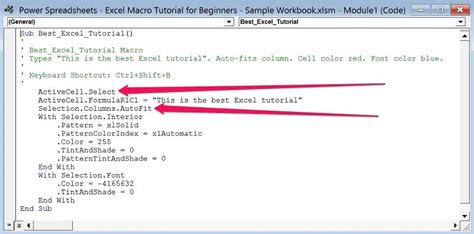
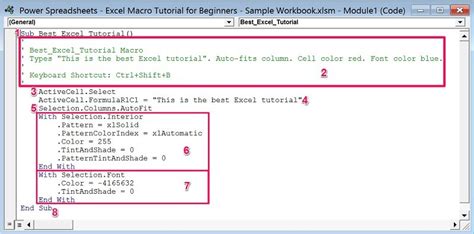
Insert>Moduleto insert a new module. This action creates a new module under "Modules" in your VBA project. - Write the Macro Code: In the module window, you can write your VBA code. The macro needs to loop through each row in your Excel spreadsheet that contains financial data, parse the relevant columns (e.g., date, description, debit, credit), and construct QIF lines based on this data.
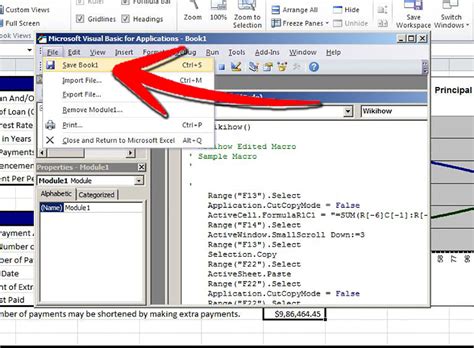
- Save the Macro-Enabled Workbook: After writing your macro, save your workbook as a macro-enabled file (.xlsm) to preserve the VBA code.
Below is a simplified example of VBA code that demonstrates how to convert basic financial transaction data from an Excel sheet to a QIF file. This example assumes that your data is structured with columns for date, payee, and amount, and that you want to export this data to a QIF file.
Sub ConvertToQIF()
    Dim filePath As String
    Dim fileNum As Integer
    Dim lastRow As Long
    Dim i As Long
    Dim dateVal As Date
    Dim payee As String
    Dim amount As Double

    ' Specify the path where you want to save the QIF file
    filePath = "C:\path\to\your\output.qif"

    ' Get the next available file number
    fileNum = FreeFile

    ' Open the file for output
    Open filePath For Output As #fileNum

    ' Find the last row with data in the sheet
    lastRow = Cells(Rows.Count, "A").End(xlUp).Row

    ' Loop through each row
    For i = 2 To lastRow ' Assuming header is in row 1
        dateVal = Cells(i, 1).Value ' Date in column A
        payee = Cells(i, 2).Value ' Payee in column B
        amount = Cells(i, 3).Value ' Amount in column C

        ' Write the QIF transaction
        Print #fileNum, "!Type:Bank" ' Specify the type of account
        Print #fileNum, "D" & Format(dateVal, "MM/DD/YY") ' Date
        Print #fileNum, "T" & amount ' Amount
        Print #fileNum, "P" & payee ' Payee
        Print #fileNum, "L" & "Category" ' Category (you may need to adjust this)
        Print #fileNum, "^" ' End of transaction

    Next i

    ' Close the file
    Close #fileNum

    MsgBox "QIF file has been generated."
End Sub
This example provides a basic framework. Depending on your specific needs, you may need to adjust the column references, the QIF transaction structure, and possibly add error handling.
After writing and saving your macro, you can run it by pressing Alt + F8 in Excel, selecting the macro, and clicking Run.
In conclusion, using a macro to convert XLS to QIF is an efficient way to manage the import of financial data into Quicken or similar software. By automating this process, individuals and businesses can save time and reduce errors, making financial management more streamlined and effective.

Benefits of Using Macros for Financial Data Conversion
Using macros for converting financial data from XLS to QIF offers several benefits, including automation of repetitive tasks, reduction of manual errors, and increased efficiency in financial data management. Macros can be customized to fit the specific needs of the user, including handling different types of financial transactions and generating reports.
Steps to Create a Macro for XLS to QIF Conversion
Creating a macro for XLS to QIF conversion involves several steps, including opening the Visual Basic Editor, inserting a new module, writing the macro code, and saving the macro-enabled workbook. The macro code needs to be written in VBA and should include instructions for looping through each row in the Excel spreadsheet, parsing the relevant columns, and constructing QIF lines based on the data.
Common Issues and Troubleshooting
When creating a macro for XLS to QIF conversion, users may encounter several common issues, including errors in the macro code, issues with file paths, and problems with data formatting. Troubleshooting these issues involves checking the macro code for errors, ensuring that file paths are correct, and verifying that data is formatted correctly.

Best Practices for Macro Creation
To ensure that macros are created efficiently and effectively, users should follow best practices, including commenting code, using descriptive variable names, and testing macros thoroughly. Additionally, users should ensure that macros are saved in a secure location and that access is restricted to authorized personnel.

Conclusion and Future Directions
In conclusion, using macros to convert XLS to QIF is an efficient way to manage financial data. By following best practices and troubleshooting common issues, users can create effective macros that streamline financial data management. Future directions may include integrating macros with other financial management tools and exploring new applications for macro technology.

Gallery of Macro Examples
Macro Examples Image Gallery


What is a macro in Excel?
+A macro in Excel is a sequence of instructions that can be recorded or written in Visual Basic for Applications (VBA) to automate repetitive tasks.
How do I create a macro in Excel?
+To create a macro in Excel, you can record a macro or write one in VBA. To record a macro, go to the Developer tab, click Record Macro, and follow the prompts. To write a macro in VBA, press Alt + F11 to open the VBA editor and insert a new module.
What is the QIF file format?
+The QIF file format is a plain text file format used for exchanging financial data between different applications. It is commonly used to import data into Quicken or other personal finance software.
We hope this article has provided you with a comprehensive understanding of how to use macros to convert XLS to QIF. If you have any further questions or need additional assistance, please don't hesitate to comment below or share this article with others who may find it useful.