Intro
Discover 5 ways to create informative dot plots, enhancing data visualization with scatter plots, graphing, and statistical analysis techniques.
Creating a dot plot is a fundamental skill in data visualization, allowing individuals to effectively communicate and understand the distribution of data points. The process of making a dot plot can vary depending on the tools and software you use, but the core concept remains the same across different methods. Here, we'll explore five ways to make a dot plot, each with its own set of advantages and suitable applications.
The importance of dot plots lies in their simplicity and effectiveness in displaying data. Unlike histograms or box plots, dot plots provide a clear visual representation of each data point, making them particularly useful for smaller datasets or when you need to see the exact values of your data points. Whether you're working with statistical software, spreadsheet programs, or even manual graph paper, creating a dot plot is a straightforward process that can significantly enhance your data analysis and presentation.
For those new to data visualization, understanding how to make a dot plot is a crucial step in developing analytical skills. It's a versatile tool that can be applied in various fields, from science and research to business and education. The ability to visualize data in a simple yet informative way can make complex information more accessible and engaging. As we delve into the different methods of creating a dot plot, you'll see how versatile and adaptable this tool is, regardless of the context or the specific requirements of your project.
Introduction to Dot Plots
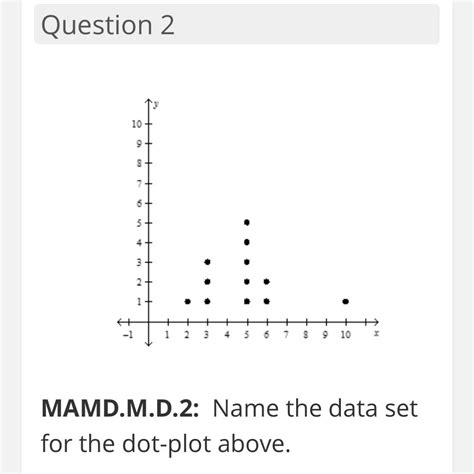
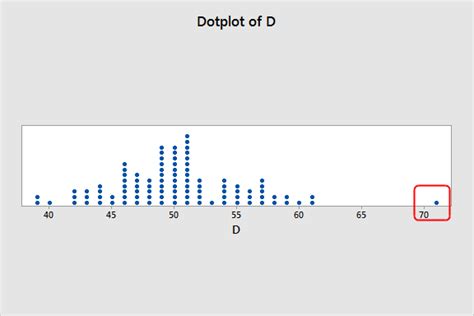
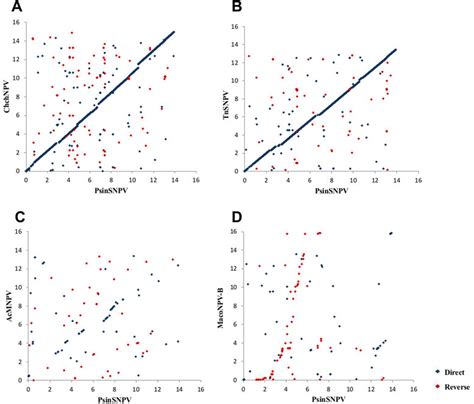
Before we dive into the methods, it's essential to understand what a dot plot is and its basic components. A dot plot, also known as a strip plot or one-dimensional scatter plot, is a simple form of data visualization where each data point in a dataset is represented by a dot on a graph. The dots are typically placed along a single axis, which represents the range of values in the dataset. This visualization technique is especially useful for showing the distribution of data and identifying patterns, such as clusters, gaps, or outliers.
Method 1: Using Graph Paper

One of the most traditional and straightforward ways to create a dot plot is by using graph paper. This method is ideal for small datasets and for educational purposes, as it helps in understanding the manual process of data visualization. To start, you'll need a piece of graph paper and a pencil. Determine the scale of your axis based on the range of your data and mark it on the graph paper. Then, for each data point, place a dot at the corresponding value on the scale. This method, although time-consuming for large datasets, provides a hands-on experience with data visualization.
Step-by-Step Guide to Manual Dot Plot
- Determine the range of your data to set the scale on the graph paper. - Mark the scale on the graph paper, ensuring it covers the entire range of your data. - For each data point, place a dot on the graph paper at the corresponding value on the scale. - Review your dot plot to identify any patterns, such as clusters or outliers.Method 2: Using Spreadsheet Software
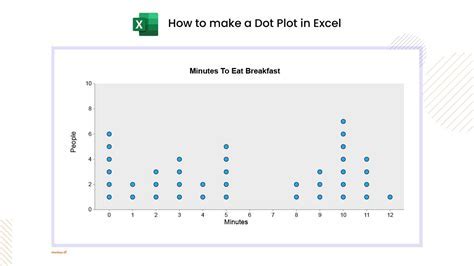
Spreadsheet software like Microsoft Excel or Google Sheets offers a more efficient way to create dot plots, especially for larger datasets. While these programs don't have a built-in dot plot feature, you can use the scatter plot function to achieve a similar visualization. Start by entering your data into a column. Then, use the scatter plot function, but instead of using two variables, use the data column for the x-axis values and a constant (like 1) for the y-axis values. This will create a dot plot where each data point is represented by a dot along the x-axis.
Tips for Customizing Your Dot Plot in Spreadsheets
- Adjust the scale of the x-axis to ensure all data points are visible. - Remove the y-axis or set its scale to a fixed range to emphasize the distribution along the x-axis. - Use different colors or symbols for different categories within your dataset, if applicable.Method 3: Using Statistical Software
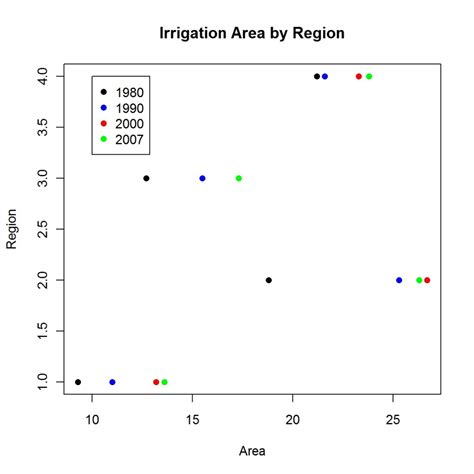
Statistical software packages such as R, Python libraries (like Matplotlib or Seaborn), or SAS offer powerful tools for creating dot plots. These programs often have specific functions or commands that can generate dot plots directly from your dataset. For example, in R, you can use the dotplot() function from the lattice package, while in Python, Seaborn's stripplot() can be used. These software options are particularly useful for complex datasets and for integrating the dot plot into a broader data analysis workflow.
Example Code for Creating a Dot Plot in R
```r # Install and load necessary packages install.packages("lattice") library(lattice)Create a sample dataset
data <- c(1, 2, 3, 4, 5)
Create the dot plot
dotplot(data)
Method 4: Using Online Tools and Apps
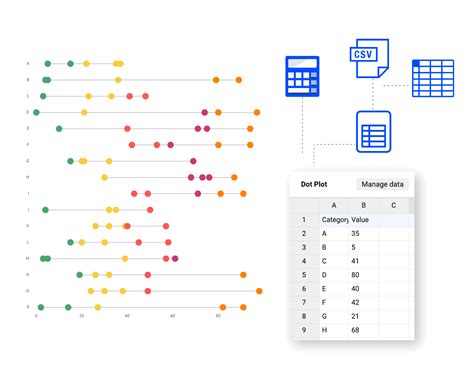 For those who prefer not to install software or have limited access to statistical programs, online tools and apps can be a convenient alternative. Websites like Plotly, GeoGebra, or even some online spreadsheet services offer interactive tools for creating dot plots. These tools often have user-friendly interfaces where you can input your data and customize the appearance of your dot plot. They're ideal for quick visualizations, educational purposes, or when collaborating with others.
Benefits of Using Online Tools for Dot Plots
- Accessibility: No need to install software.
- Collaboration: Easy to share and work on plots with others.
- Interactivity: Often allows for interactive exploration of the data.
Method 5: Using Graphic Design Software
 For those with experience in graphic design or looking for a highly customized visualization, graphic design software like Adobe Illustrator can be used to create a dot plot. This method involves manually placing dots along a scale, similar to using graph paper, but with the precision and customization options that professional design software offers. It's more time-consuming and requires design skills, but it allows for a high degree of control over the final product's appearance.
Tips for Designing a Dot Plot in Graphic Design Software
- Use a grid to ensure accuracy in placing the dots.
- Experiment with different dot sizes and colors to represent different data points or categories.
- Pay attention to the overall aesthetic to ensure the dot plot is visually appealing and easy to understand.
Dot Plot Image Gallery


What is a dot plot used for?
+
A dot plot is used for visualizing the distribution of data points. It's particularly useful for showing the location and spread of data, identifying patterns such as clusters, gaps, or outliers.
How do you create a dot plot?
+
To create a dot plot, determine the scale based on your data's range, mark the scale on a graph or use software, and then place a dot for each data point at its corresponding value on the scale.
What are the advantages of using a dot plot?
+
The advantages of using a dot plot include its simplicity, effectiveness in showing data distribution, and the ability to identify patterns and outliers easily. It's also versatile and can be created manually or with various software tools.
In conclusion, creating a dot plot is a versatile skill that can be applied in various contexts, from educational settings to professional data analysis. Whether you prefer traditional methods like graph paper, utilize spreadsheet software, leverage statistical packages, explore online tools, or design with graphic software, there's a method suited to your needs and preferences. By understanding and applying these methods, you can enhance your data visualization skills, making complex data more accessible and engaging for both yourself and your audience. Feel free to share your experiences with creating dot plots, ask questions, or explore more advanced data visualization techniques in the comments below.