Intro
Learn to change year in Excel with ease. Discover formulas, functions, and shortcuts for updating dates, years, and fiscal years, using techniques like EOMONTH and DATE functions.
The ability to manipulate and analyze data in Excel is a crucial skill for anyone working with spreadsheets. One common task that users face is changing the year in Excel, which can be necessary for updating dates, creating reports, or performing financial analysis. Whether you're working with a small dataset or a large one, Excel provides several methods to change the year, each with its own advantages and use cases.
Changing the year in Excel can be important for various reasons, such as updating financial reports to reflect the current year, adjusting project timelines, or modifying historical data for comparative analysis. The process can seem daunting, especially for those new to Excel, but it's actually quite straightforward once you understand the different approaches and tools available. In this article, we'll delve into the various methods for changing the year in Excel, including using formulas, the find and replace feature, and pivot tables, to help you efficiently manage your data.
Understanding Dates in Excel
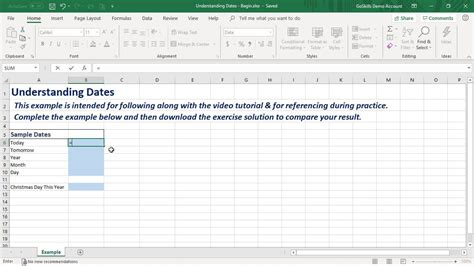
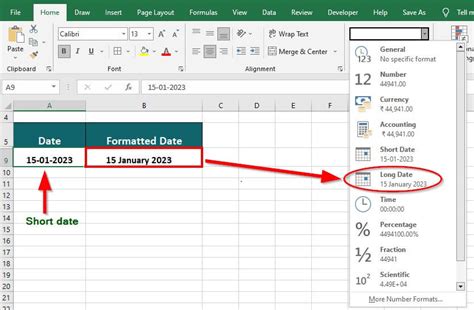
Before diving into the methods for changing the year, it's essential to understand how Excel handles dates. Excel stores dates as serial numbers, with January 1, 1900, being the first serial number (1). This means that every date is represented by a unique number, which allows for easy arithmetic operations on dates. For instance, you can add or subtract days, months, or years from a date using simple arithmetic. Understanding this concept is crucial for effectively manipulating dates in Excel.
Using Formulas to Change the Year
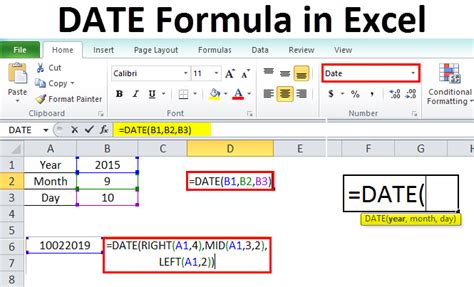
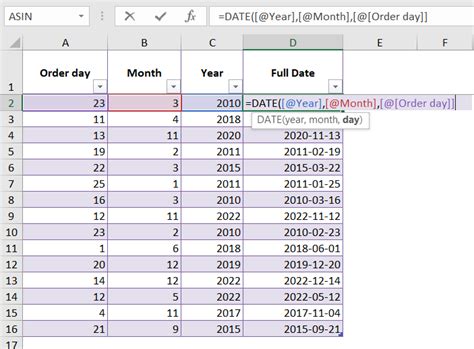
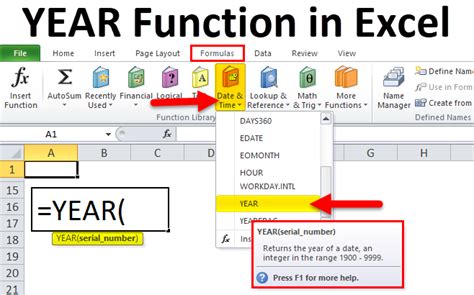
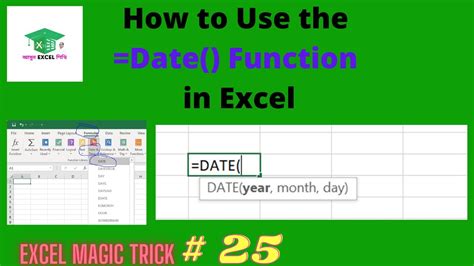
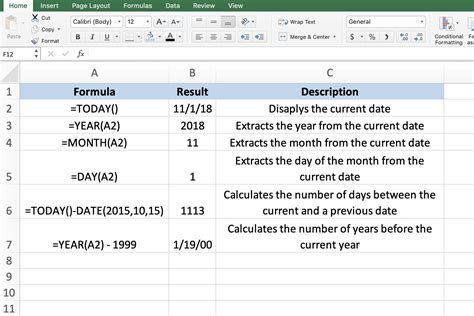
One of the most powerful ways to change the year in Excel is by using formulas. The YEAR function, for example, extracts the year from a given date, while the DATE function creates a new date based on the year, month, and day you specify. By combining these functions, you can easily change the year of a date. For instance, if you have a date in cell A1 and you want to change its year to 2024, you can use the formula =DATE(2024,MONTH(A1),DAY(A1)). This formula keeps the month and day the same but changes the year to 2024.
Examples of Using Formulas
- **Changing the Year to a Specific Year**: If you want to change all dates in a column to a specific year, say 2023, you can use a formula like `=DATE(2023,MONTH(A1),DAY(A1))` and then copy it down for all cells. - **Incrementing the Year**: To increment the year of a date by a certain number of years, you can use `=DATE(YEAR(A1)+1,MONTH(A1),DAY(A1))` for incrementing by one year.Using the Find and Replace Feature
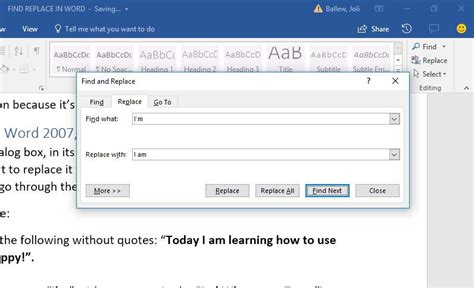
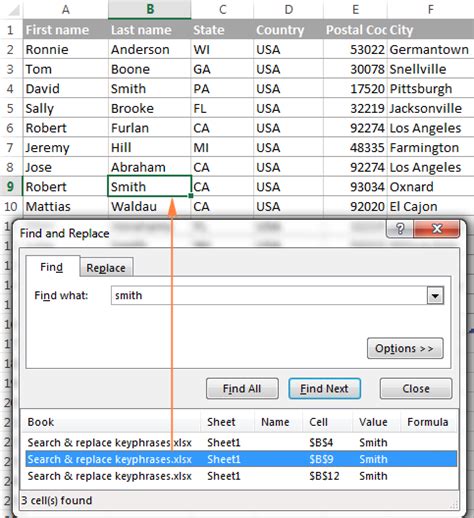
For a more straightforward approach, especially when dealing with text dates, the find and replace feature can be quite handy. This method is particularly useful if you're working with a dataset where dates are stored as text rather than serial numbers. By using the find and replace function (Ctrl + H), you can replace a specific year with another. For example, to replace all instances of "2022" with "2024", you simply type "2022" in the find what field and "2024" in the replace with field, and then click replace all. This method is quick but be cautious as it will replace all occurrences of the specified text, not just dates.
Precautions with Find and Replace
- **Avoiding Unintended Replacements**: Be careful when using find and replace, especially if the year you're replacing appears in other contexts (like text or numbers) that shouldn't be changed. - **Using Wildcards**: If you need to replace years in a more complex pattern (e.g., changing "2022" to "2024" in dates like "01/01/2022"), consider using wildcards or regular expressions if your version of Excel supports them.Using Pivot Tables
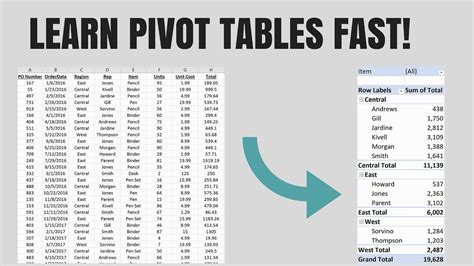
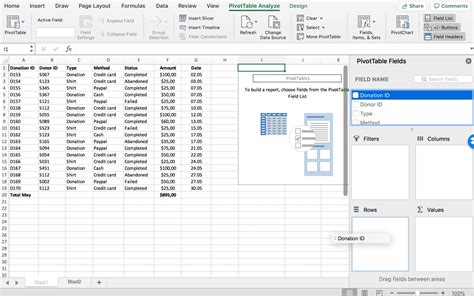
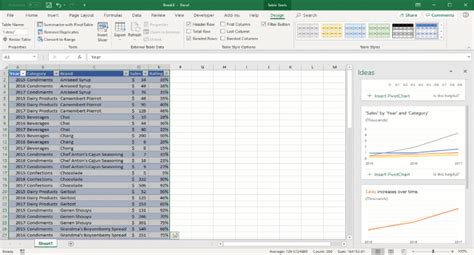
Pivot tables are another powerful tool in Excel that can help with changing the year, especially when you're working with large datasets and need to analyze data by year. By creating a pivot table and using the date field, you can easily group your data by year, quarter, month, etc. If you need to change the year for analysis purposes, you can use the "Group" feature in pivot tables to create custom date ranges. For instance, if you want to compare sales data from 2022 to 2024, you can group your date field by year and then use the pivot table filters to select the years you're interested in.
Benefits of Pivot Tables
- **Flexibility**: Pivot tables offer great flexibility in analyzing data by different time periods without altering the original data. - **Efficiency**: They are particularly useful for large datasets where manually changing dates would be impractical.Gallery of Excel Date Manipulation
Excel Date Manipulation Image Gallery

How do I change the year of a date in Excel?
+You can change the year of a date in Excel by using the DATE function in combination with the YEAR, MONTH, and DAY functions. For example, =DATE(2024,MONTH(A1),DAY(A1)) changes the year of the date in cell A1 to 2024.
Can I use the find and replace feature to change years in Excel dates?
+Yes, you can use the find and replace feature to change years in Excel dates, especially if the dates are stored as text. However, be cautious as this method will replace all occurrences of the specified text, not just dates.
How do pivot tables help in changing the year for data analysis?
+Pivot tables allow you to group your data by year, quarter, month, etc., without altering the original data. This feature is particularly useful for analyzing data over different time periods and comparing trends between years.
In conclusion, changing the year in Excel can be accomplished through various methods, each suited to different scenarios and user preferences. Whether you're using formulas for precise control, the find and replace feature for simplicity, or pivot tables for data analysis, Excel provides the tools you need to efficiently manage and analyze your data. By mastering these techniques, you can enhance your productivity and gain deeper insights into your data. We invite you to share your experiences and tips on working with dates in Excel, and to explore more of our content for further learning and professional development.