Intro
Learn 5 ways to insert Excel horizontal line, including border tools, chart tricks, and formatting shortcuts, to enhance spreadsheet readability and visual appeal with horizontal lines, borders, and formatting techniques.
The importance of visual organization in spreadsheets cannot be overstated. One of the simplest yet most effective ways to improve the readability and aesthetics of your Excel worksheets is by incorporating horizontal lines. These lines serve as separators, making it easier for viewers to distinguish between different sections of data. Whether you're creating reports, budgets, or any other type of spreadsheet, learning how to insert horizontal lines in Excel is a fundamental skill. In this article, we'll delve into the various methods of adding horizontal lines to your Excel spreadsheets, exploring both the traditional methods and some of the more advanced techniques.
Excel, being the versatile tool that it is, offers multiple ways to achieve the same outcome, catering to different user preferences and needs. The method you choose might depend on the specific requirements of your project, such as the need for dynamic lines that adjust with your data or the desire for a more manual, customizable approach. Understanding these different methods can significantly enhance your productivity and the overall presentation of your spreadsheets.
Understanding the Need for Horizontal Lines in Excel
Before diving into the "how," it's essential to understand the "why." Horizontal lines in Excel are not just about aesthetics; they play a crucial role in data visualization. They can be used to separate headers from the body of the data, distinguish between different categories of information, or even highlight important rows such as totals or summaries. By strategically placing these lines, you can guide the viewer's eye through the spreadsheet, making complex data sets easier to understand and analyze.
Method 1: Using Borders to Create Horizontal Lines
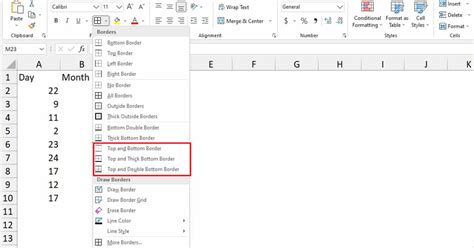
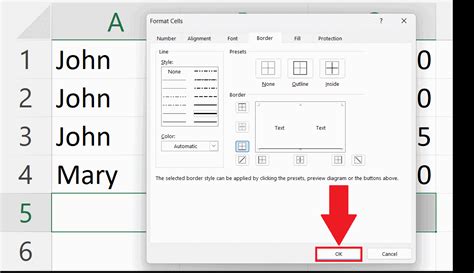
One of the most straightforward methods to create a horizontal line in Excel is by using the border feature. This method involves selecting the cell or cells where you want the line to appear and then applying a bottom border to those cells. To do this, follow these steps:
- Select the cell below where you want the horizontal line to appear.
- Go to the "Home" tab on the Ribbon.
- Click on the "Font" group's "Borders" button, which looks like a small box with lines around it.
- From the dropdown menu, select "Bottom Border."
This method is quick and effective for adding lines to separate data within a spreadsheet. However, it might not be ideal for creating lines that span the entire width of the worksheet, as it requires selecting each cell individually.
Method 2: Using the Shape Tool for Customizable Lines

For more control over the appearance and placement of your horizontal lines, Excel's shape tool can be incredibly useful. This method allows you to draw lines of varying thickness, color, and style directly onto your worksheet. Here’s how to use it:
- Go to the "Insert" tab on the Ribbon.
- Click on the "Shapes" button.
- From the shapes menu, select the line shape (it looks like a small line).
- Click and drag on the worksheet to draw your line. You can hold the Shift key while dragging to constrain the line to be perfectly horizontal.
This method provides a lot of flexibility, especially when you need lines that are not necessarily tied to specific cell boundaries. However, it can be less precise than using borders, especially if you're trying to align the line with specific rows or columns.
Benefits of Using Shapes for Horizontal Lines
Using shapes for horizontal lines offers several benefits, including the ability to customize the line's appearance extensively. You can change the color, thickness, and even add arrows or other endings to the line. Additionally, shapes can be easily moved or resized as needed, making them a versatile option for dynamic spreadsheets.Method 3: Utilizing the REPT Function for Text-Based Lines
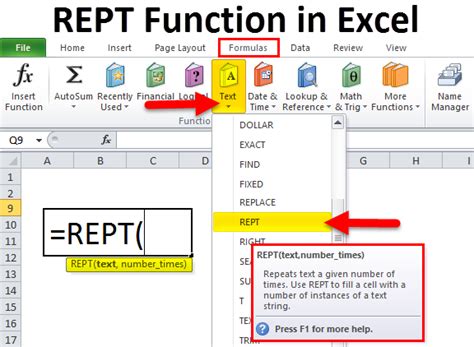
For a more formulaic approach, you can use Excel's REPT function to create text-based horizontal lines. The REPT function repeats a specified character a certain number of times, which can be useful for creating lines of dashes, underscores, or any other character. The syntax for the REPT function is REPT(text, number_times), where text is the character you want to repeat, and number_times is how many times you want it repeated.
To create a horizontal line using the REPT function, you might use a formula like =REPT("_", 100), which would create a line of 100 underscores. This method is particularly useful if you want the line to adjust dynamically based on the width of your spreadsheet or if you're working within a table or range where you can't use borders or shapes.
Method 4: Creating Dynamic Horizontal Lines with Conditional Formatting
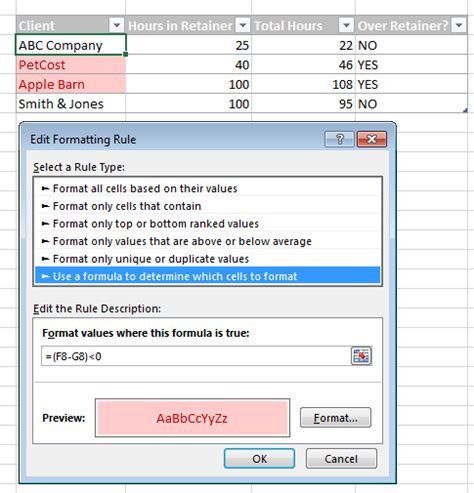
Conditional formatting is another powerful tool in Excel that can be used to create horizontal lines, especially when you want these lines to appear dynamically based on certain conditions. For example, you might want a horizontal line to appear below a row that contains a specific value or meets a particular criterion. To achieve this, follow these steps:
- Select the range of cells where you want the conditional formatting to apply.
- Go to the "Home" tab and click on "Conditional Formatting."
- Choose "New Rule" and then select "Use a formula to determine which cells to format."
- Enter a formula that identifies the condition under which you want the line to appear. For example, if you want a line below every row that contains the word "Total" in column A, your formula might look like
=$A1="Total". - Click "Format" and then select the border option to apply a bottom border, which will act as your horizontal line.
This method is highly flexible and can be adapted to a wide range of scenarios, making it particularly useful for reports and dashboards where data is constantly changing.
Method 5: Using Page Breaks for Printing
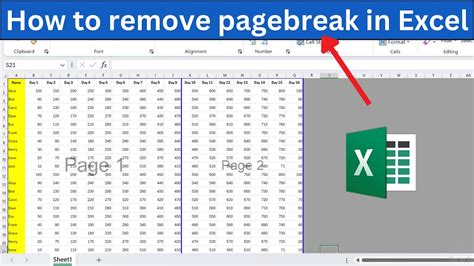
Finally, if your primary concern is the printed appearance of your spreadsheet, you might consider using page breaks to create horizontal lines. While not exactly a line, a page break can effectively separate sections of your data when printed, acting similarly to a horizontal line in terms of visual separation. To insert a page break, select the row below where you want the break to occur, go to the "Page Layout" tab, and click on "Breaks" in the "Page Setup" group. Then, select "Insert Page Break."
This method is more about controlling the print layout than adding visual elements to your spreadsheet, but it can be a useful technique for creating printed reports that are easy to read and understand.
Excel Horizontal Line Image Gallery


What is the easiest way to insert a horizontal line in Excel?
+The easiest way often involves using the border feature, as it is straightforward and quickly accessible from the Ribbon.
Can I use shapes to create horizontal lines in Excel?
+Yes, Excel's shape tool allows you to draw lines directly onto your worksheet, offering a high degree of customization.
How do I make a dynamic horizontal line in Excel that adjusts with my data?
+You can use the REPT function in combination with other formulas to create lines that adjust based on the width of your data or specific conditions.
In conclusion, incorporating horizontal lines into your Excel spreadsheets can significantly enhance their readability and overall presentation. With multiple methods available, ranging from simple border adjustments to more complex formulas and conditional formatting, you can choose the approach that best fits your specific needs and skill level. Whether you're a beginner looking to improve your spreadsheet's aesthetics or an advanced user seeking to create dynamic, interactive reports, mastering the art of adding horizontal lines in Excel is a valuable skill that can elevate your work to the next level. We invite you to explore these methods further, experiment with different techniques, and share your experiences or tips on using horizontal lines in Excel in the comments below.