Intro
The presence of dotted lines in various applications, such as Microsoft Word, Excel, or PowerPoint, can sometimes be unwanted. These lines often appear as guides to help with alignment or as borders around cells, but there are instances where removing them is necessary for a cleaner look or to meet specific formatting requirements. In this article, we will delve into five ways to remove dotted lines, focusing on common Microsoft Office applications and general principles that can be applied across different software.
Removing dotted lines efficiently requires understanding their purpose and the context in which they appear. Whether they are used as table borders, cell boundaries, or layout guides, the method for removing them can vary significantly. The following sections will guide you through different scenarios and provide step-by-step instructions on how to eliminate unwanted dotted lines, enhancing the overall appearance and professionalism of your documents and presentations.
Understanding Dotted Lines in Microsoft Office
Dotted lines in Microsoft Office applications, such as Word, Excel, and PowerPoint, serve various purposes. They can be part of a table's border, indicate non-printing characters, or act as guides for aligning objects. The first step in removing these lines is identifying their source. For instance, if the dotted lines are part of a table's formatting, you would approach their removal differently than if they were guides or borders around text or objects.
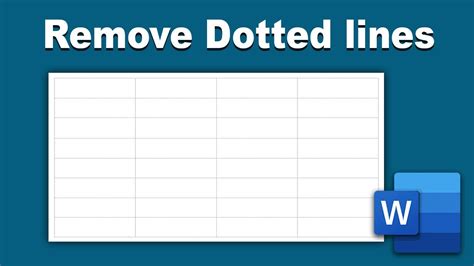
Method 1: Removing Dotted Lines from Tables
Tables are a common place to find dotted lines, especially if the table borders are set to be dotted. To remove these lines, follow these steps:
- Select the table by clicking on it.
- Go to the "Table Design" tab in the ribbon.
- Click on the "Borders" button and select "No Border" to remove all borders, including dotted lines.
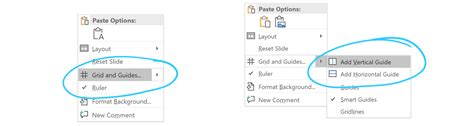
Method 2: Eliminating Dotted Guides
Guides in applications like PowerPoint or Word can sometimes appear as dotted lines, helping you align objects or text. To remove these guides:
- Go to the "View" tab in the ribbon.
- Uncheck the "Guides" option to hide them. Note that this does not delete the guides but merely hides them from view.

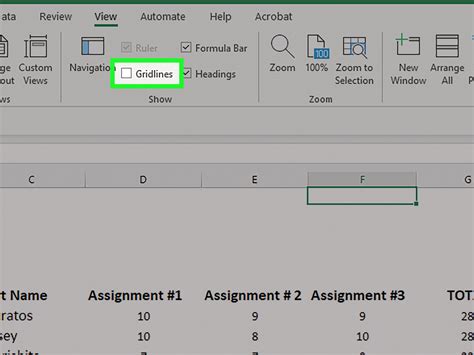
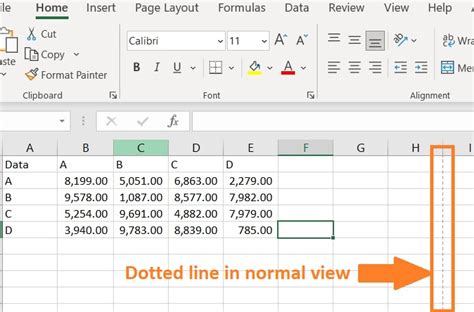
Method 3: Removing Dotted Lines from Cell Boundaries in Excel
In Excel, dotted lines around cells can be due to the gridline settings. To remove these:
- Select the entire worksheet by pressing Ctrl+A.
- Go to the "View" tab in the ribbon.
- Uncheck the "Gridlines" checkbox to remove the dotted lines representing cell boundaries.
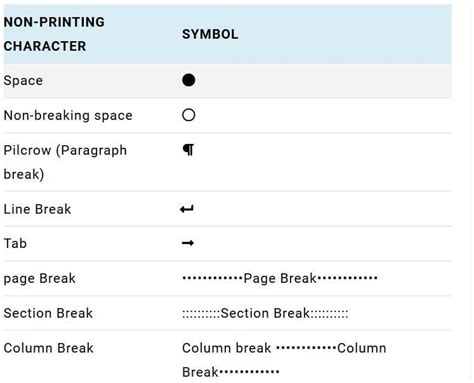
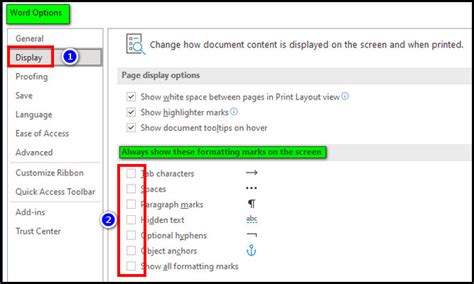
Method 4: Adjusting Non-Printing Characters
Non-printing characters, such as paragraph marks or tab characters, can sometimes be displayed as dotted lines under certain viewing conditions. To remove these:
- Go to the "Home" tab in the ribbon.
- Click on the "Paragraph" dialog box launcher (usually a small arrow in the bottom right corner of the Paragraph group).
- In the dialog box, under the "Line and Page Breaks" tab, you can adjust settings related to these characters, though typically, toggling the visibility of these characters is done through the "Show/Hide" button in the Paragraph group.
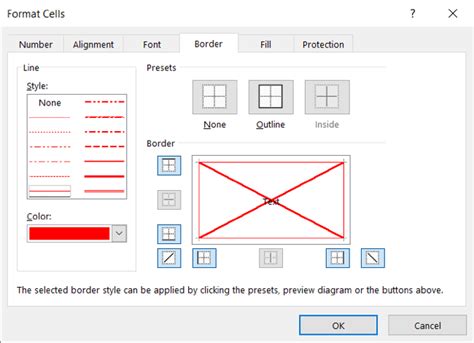
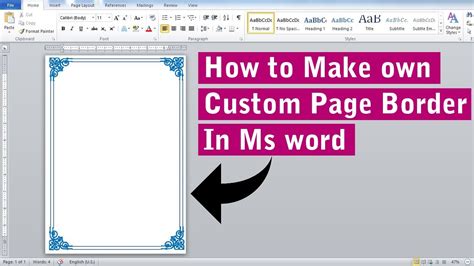
Method 5: Customizing Border Settings
For dotted lines that appear as borders around text, images, or other objects, you can remove them by adjusting the border settings. Select the object or text with the dotted border, go to the relevant formatting tab (this can vary depending on the object type), and look for border options. Typically, you can remove a border by selecting "No Border" or adjusting the border style to not include dots.
Advanced Techniques for Removing Dotted Lines
In some cases, especially when dealing with complex documents or presentations, dotted lines may be more challenging to remove due to their source or the specific formatting applied. Advanced techniques might involve using macros in Excel to remove gridlines based on specific conditions or using PowerPoint's selection pane to isolate and remove unwanted guides or borders.

Best Practices for Working with Dotted Lines
To efficiently work with dotted lines and ensure they do not become an issue, follow these best practices:
- Regularly review your document or presentation's layout and formatting.
- Use guides and gridlines judiciously, as they can clutter the workspace.
- Apply consistent formatting throughout your document to avoid confusion.
- Use the "Show/Hide" feature to toggle the visibility of non-printing characters and guides as needed.
Gallery of Removing Dotted Lines
Removing Dotted Lines Image Gallery

Frequently Asked Questions
How do I remove dotted lines from a table in Microsoft Word?
+To remove dotted lines from a table in Microsoft Word, select the table, go to the "Table Design" tab, click on the "Borders" button, and select "No Border."
Can I remove guides in PowerPoint permanently?
+While you can hide guides in PowerPoint by unchecking the "Guides" option under the "View" tab, they are not removed permanently and can be toggled back on as needed.
How do I customize border settings for text in Microsoft Word?
+To customize border settings for text in Microsoft Word, select the text, go to the "Home" tab, find the "Paragraph" group, and click on the "Borders" button to access various border options.
In conclusion, removing dotted lines from documents and presentations involves understanding their source and purpose, whether they are part of a table, serve as guides, or represent non-printing characters. By applying the methods outlined in this article, you can efficiently eliminate unwanted dotted lines, enhancing the clarity and professionalism of your work. Remember to utilize the best practices discussed to maintain a clean and organized workspace. If you have any further questions or need additional assistance, feel free to comment below or share this article with others who might benefit from this information.