Intro
Create dynamic Excel drop down lists from different sheets using validation and references, enhancing data management with dependent lists and worksheet interactions.
Creating an Excel drop-down list from a different sheet can be a useful feature for organizing and streamlining your data entry process. This functionality allows you to create a list of options in one sheet and then use that list to populate a drop-down menu in another sheet. This can help reduce errors, as users can only select from predefined options, and it makes your spreadsheet more user-friendly.
To create an Excel drop-down list from a different sheet, follow these steps:
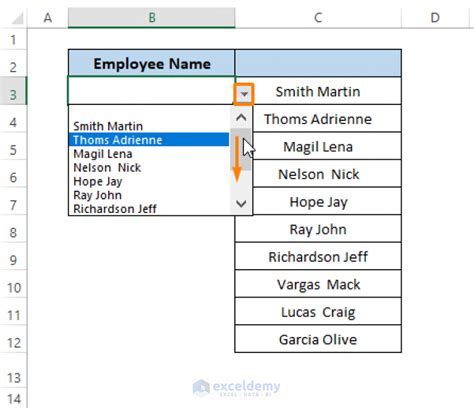
First, let's assume you have two sheets in your Excel workbook: "Sheet1" and "Sheet2". You want to create a drop-down list in "Sheet1" that references a list of options located in "Sheet2".
Step 1: Prepare Your List
In "Sheet2", prepare your list of options. For example, if you're creating a list of countries, your data might look like this:
| Country |
|---|
| USA |
| Canada |
| Mexico |
| UK |
| France |
Ensure your list is in a continuous range without blank cells, as this can affect how the drop-down list is populated.
Step 2: Create a Named Range (Optional but Recommended)
Although not strictly necessary, creating a named range for your list can make it easier to manage and update your drop-down list in the future.
- Select the range of cells containing your list (e.g., A1:A5 in "Sheet2").
- Go to the "Formulas" tab on the Ribbon.
- Click "Define Name".
- In the "New Name" dialog box, enter a name for your range (e.g., "Countries").
- In the "Refers to" field, you'll see the range you selected. You can also use the "Scope" dropdown to decide if this name is available for the entire workbook or just the current worksheet.
- Click "OK" to create the named range.
Step 3: Create the Drop-Down List
Now, go to "Sheet1" where you want to create the drop-down list.
- Select the cell where you want the drop-down list to appear.
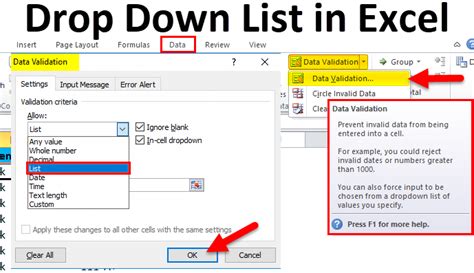
- Go to the "Data" tab on the Ribbon.
- Click on "Data Validation" in the "Data Tools" group.
- In the "Data Validation" dialog box, under the "Settings" tab, select "List" from the "Allow" dropdown.
- In the "Source" field, you need to reference the range in "Sheet2". You can either:
- Directly type
=Sheet2!A1:A5(assuming your list is in cells A1 through A5 in "Sheet2"). - Or, if you created a named range, type
=Countries.
- Directly type
- Click "OK" to apply the data validation.
Step 4: Test Your Drop-Down List
Now, when you click on the cell in "Sheet1" where you applied the data validation, a drop-down arrow should appear. Clicking on this arrow will display your list of options from "Sheet2", allowing you to select one of the predefined values.
Tips and Variations
- Updating the List: If you need to add or remove options from your drop-down list, simply update the range in "Sheet2". If you used a named range, you'll need to update the named range as well to reflect any changes in the size of your list.
- Using Tables: If your list is in a table, you can reference the table column in your data validation, which can automatically update if your table grows or shrinks.
- Multiple Columns: If your options are spread across multiple columns, you might need to adjust how you define your named range or the source for your data validation.
Common Issues
- #REF! Error: This can occur if the reference to the other sheet is incorrect or if the named range was not created correctly.
- Drop-Down List Not Appearing: Check that data validation was applied correctly and that the cell is not formatted as text, which can sometimes prevent the drop-down from appearing.
Advanced Drop-Down List Techniques
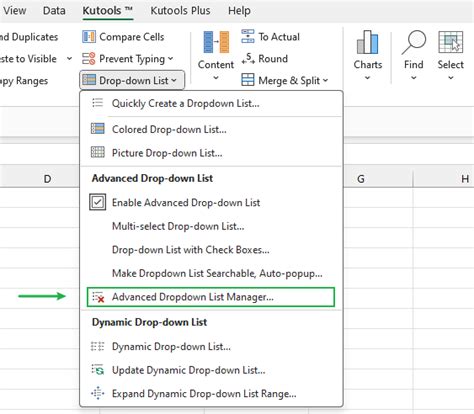
For more complex scenarios, such as creating dependent drop-down lists where the options in one list depend on the selection in another, you might need to use more advanced techniques, including the use of INDEX/MATCH functions, or even VBA macros for dynamic and interactive user forms.
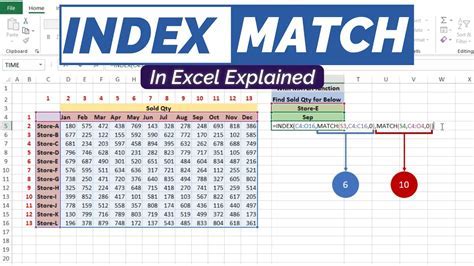
Using INDEX/MATCH for Dynamic Lists
The INDEX/MATCH function combination is powerful for creating dynamic lists that can change based on user selections. This method allows you to look up a value in a table and return a corresponding value from another column, which can be particularly useful for creating cascading drop-down lists.
Conclusion and Next Steps
Creating an Excel drop-down list from a different sheet is a straightforward process that can significantly improve the usability and data integrity of your spreadsheets. By following the steps outlined above and exploring more advanced techniques, you can create interactive and dynamic spreadsheets that make data entry easier and less prone to errors.
For further learning, consider exploring Excel's built-in functions and features, such as Power Query for data manipulation, Power Pivot for data modeling, and VBA for more complex automation tasks. The world of Excel is vast, and mastering its capabilities can greatly enhance your productivity and analytical skills.
Gallery of Excel Drop Down List Examples
Excel Drop Down List Image Gallery


How do I create a drop-down list in Excel from a different sheet?
+To create a drop-down list in Excel from a different sheet, select the cell where you want the drop-down list, go to Data Validation, select List, and then reference the range in the other sheet either directly or by using a named range.
Can I use a named range for my drop-down list options?
+Yes, creating a named range for your list of options can make it easier to manage and update your drop-down list. Simply define a named range for your list and then reference this named range in your data validation settings.
How do I update my drop-down list if my options change?
+If you used a direct reference to a range, simply update the range in the source sheet. If you used a named range, you'll need to update the named range to reflect any changes in the size of your list.
We hope this comprehensive guide has helped you understand how to create an Excel drop-down list from a different sheet and explore more advanced features for dynamic and interactive spreadsheets. Feel free to share your experiences or ask further questions in the comments below.