Intro
Extract month and year from dates in Excel using formulas and functions, including DATE, MONTH, and YEAR functions, to analyze and format data efficiently.
Extracting the month and year from a date in Excel can be incredibly useful for organizing, analyzing, and presenting data. Whether you're working with a small dataset or a large one, Excel provides several methods to achieve this, including using formulas and the TEXT function. Let's dive into the details of how to extract the month and year from a date in Excel.
The importance of being able to manipulate dates in Excel cannot be overstated. Dates are a fundamental component of many datasets, and the ability to extract specific parts of a date, such as the month or year, is crucial for filtering, grouping, and analyzing data. For instance, in financial analysis, you might need to summarize sales data by month and year to identify trends and patterns over time.
In addition to financial analysis, extracting the month and year from dates is useful in a variety of contexts, including academic research, marketing, and project management. For example, in academic research, you might need to analyze data collected over several years and compare outcomes by month and year. In marketing, understanding sales trends by month and year can help inform campaign strategies and product launches.
Given the versatility and power of Excel, it's no wonder that professionals and individuals alike rely on it for data analysis and presentation. The software's ability to handle complex calculations and data manipulation makes it an indispensable tool for anyone working with data.
Using Formulas to Extract Month and Year
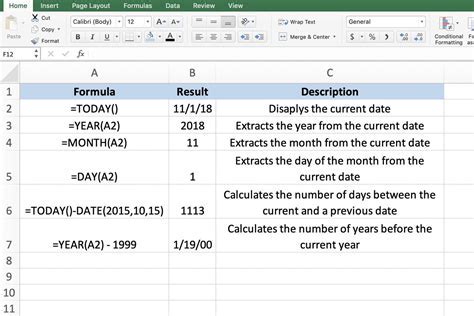
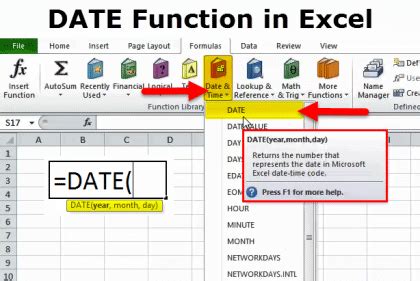
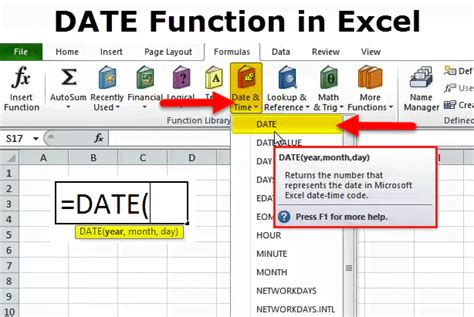
One of the most straightforward ways to extract the month and year from a date in Excel is by using formulas. The MONTH and YEAR functions are specifically designed for this purpose. Here's how you can use them:
- MONTH Function: The MONTH function returns the month of a date. The syntax is
MONTH(serial_number), whereserial_numberis the date from which you want to extract the month. - YEAR Function: The YEAR function returns the year of a date. The syntax is
YEAR(serial_number), whereserial_numberis the date from which you want to extract the year.
For example, if you have a date in cell A1 and you want to extract the month and year, you can use the following formulas:
- Month:
=MONTH(A1) - Year:
=YEAR(A1)
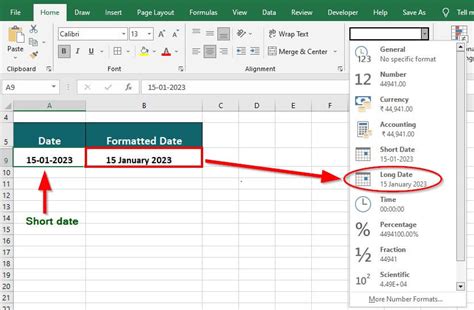
These formulas will return the month and year of the date in cell A1 as numbers. If you want to display the month as text (e.g., January instead of 1), you can use the TEXT function in combination with the MONTH function.
Using the TEXT Function for Custom Formats
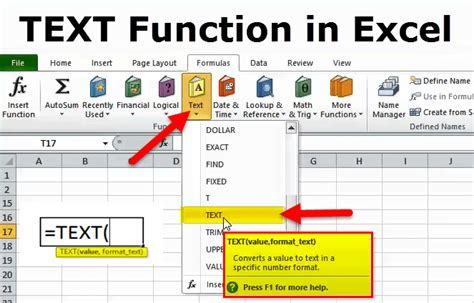
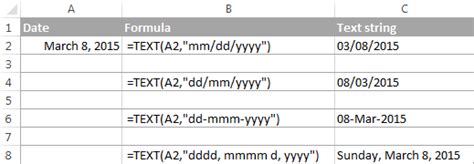
The TEXT function in Excel allows you to format a value to a specific format using a format code. This is particularly useful for dates, as it enables you to extract the month and year in a custom format. The syntax for the TEXT function is TEXT(value, format_text), where value is the date you want to format, and format_text is the format code.
For example, to extract the month and year from a date in cell A1 and display them as "mmm yyyy" (e.g., Jan 2023), you can use the following formula:
=TEXT(A1, "mmm yyyy")
This formula will return the month as an abbreviation and the year as a four-digit number.
Practical Applications and Examples

Extracting the month and year from dates has numerous practical applications in Excel, including:
- Data Analysis: Summarizing data by month and year can help in identifying trends and patterns.
- Reporting: Custom formatting of dates can make reports more readable and understandable.
- Data Visualization: Using the extracted month and year in charts and graphs can enhance the visual representation of data.
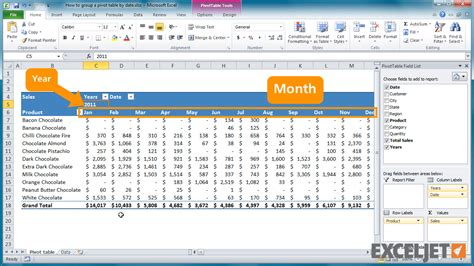
For instance, if you have a dataset of sales figures with corresponding dates, you can extract the month and year from these dates and then use pivot tables to summarize the sales by month and year. This can provide valuable insights into sales trends over time.
Step-by-Step Guide to Summarizing Data by Month and Year
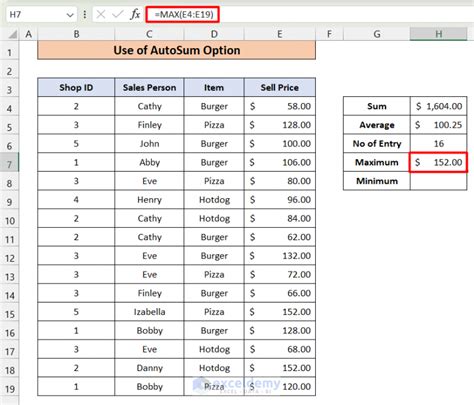
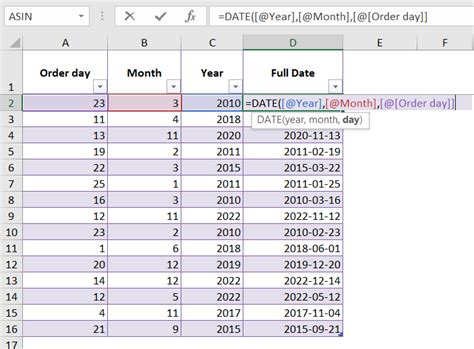
- Prepare Your Data: Ensure your data is organized with dates in one column and the corresponding data (e.g., sales figures) in another.
- Extract Month and Year: Use the MONTH and YEAR functions or the TEXT function to extract the month and year from your dates.
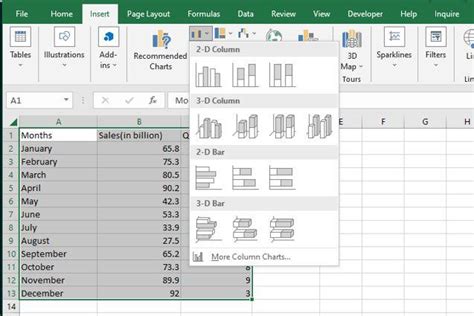
- Create a Pivot Table: Select your data range, go to the "Insert" tab, and click on "PivotTable." Follow the prompts to create a new pivot table.
- Configure the Pivot Table: Drag the extracted month and year fields to the "Row Labels" area, and drag your data field (e.g., sales) to the "Values" area.
- Analyze Your Data: Use the pivot table to analyze your data by month and year. You can further customize the pivot table by applying filters, using different aggregation functions, or creating charts directly from the pivot table data.
Gallery of Excel Date Functions
Excel Date Functions Gallery


Frequently Asked Questions
How do I extract the month from a date in Excel?
+You can extract the month from a date in Excel using the MONTH function. The syntax is =MONTH(serial_number), where serial_number is the date from which you want to extract the month.
Can I format the extracted month as text?
+Yes, you can format the extracted month as text using the TEXT function. For example, =TEXT(A1, "mmm") will return the month as an abbreviation (e.g., Jan for January).
How do I summarize data by month and year in Excel?
+To summarize data by month and year, you can use pivot tables. First, extract the month and year from your dates using the MONTH and YEAR functions or the TEXT function. Then, create a pivot table and drag the extracted month and year fields to the "Row Labels" area, and your data field to the "Values" area.
In conclusion, extracting the month and year from dates in Excel is a fundamental skill that can significantly enhance your data analysis and presentation capabilities. By mastering the use of the MONTH, YEAR, and TEXT functions, as well as pivot tables, you can efficiently summarize and analyze data by month and year, leading to better insights and decision-making. Whether you're a professional data analyst or just starting to explore the capabilities of Excel, understanding how to work with dates is an essential part of unlocking the full potential of the software. We invite you to share your experiences, tips, and questions about working with dates in Excel in the comments below, and don't forget to share this article with anyone who might benefit from learning more about this valuable skill.