Intro
Boost productivity with 5 ways to excel in Center data management, utilizing data analysis, pivot tables, and data visualization to optimize business intelligence and data reporting techniques.
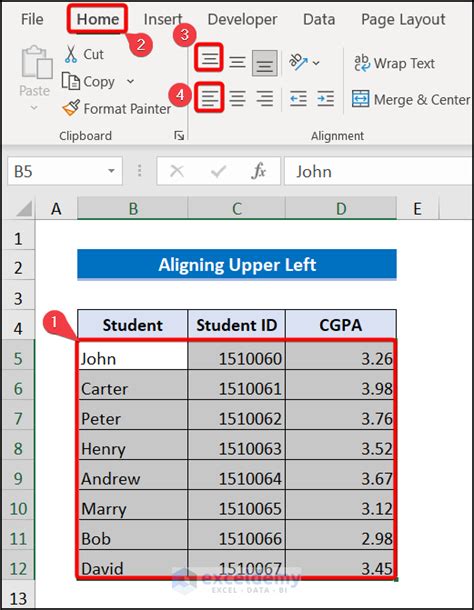
Centering data in Excel is a common task that can significantly improve the readability and visual appeal of your spreadsheets. Whether you're working on a report, a dashboard, or any other type of spreadsheet, properly aligning your data is crucial. In this article, we'll explore five ways to center data in Excel, making it easier for you to present your information in a clear and professional manner.
Excel offers various alignment options, including left, right, and center alignment, which can be applied to cells, ranges of cells, or even entire worksheets. Understanding how to use these alignment options effectively can enhance the overall presentation of your data. Let's dive into the five ways to center data in Excel, along with practical examples and tips to help you master data alignment.
Understanding Alignment Options in Excel
Before we explore the specific methods for centering data, it's essential to understand the alignment options available in Excel. The program offers three primary alignment options: left alignment, right alignment, and center alignment. Each of these options can be accessed through the Home tab on the Excel ribbon, under the "Alignment" group. Additionally, Excel provides more advanced alignment features, such as justification and orientation, which can be used to further customize the appearance of your data.
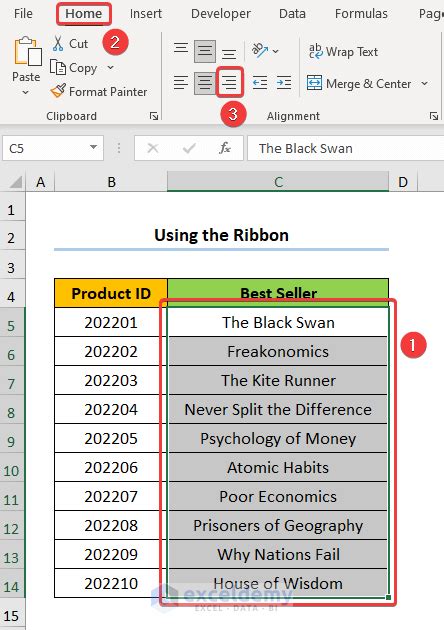
Method 1: Using the Ribbon to Center Data

The most straightforward way to center data in Excel is by using the alignment buttons on the Home tab of the ribbon. To center data using this method, follow these steps:
- Select the cell or range of cells you want to center.
- Go to the Home tab on the Excel ribbon.
- In the "Alignment" group, click on the "Center" button. This method is quick and easy, making it perfect for simple centering tasks. However, for more complex alignments or when working with large datasets, you might find other methods more efficient.
Benefits of Using the Ribbon for Alignment
Using the ribbon for alignment offers several benefits, including ease of use and quick access to other formatting options. The alignment buttons are prominently displayed, making it hard to miss them. Additionally, the ribbon provides a centralized location for most formatting tasks, allowing you to adjust the appearance of your data without having to navigate through multiple menus.
Method 2: Using Keyboard Shortcuts to Center Data
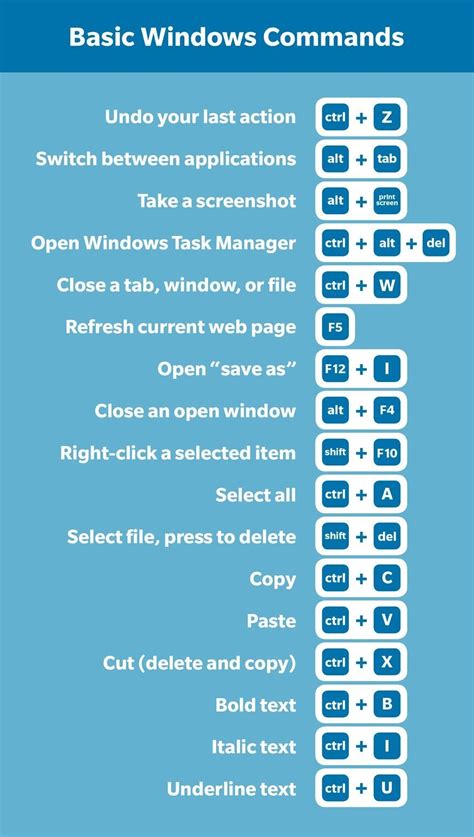
For those who prefer keyboard shortcuts or need to work more efficiently, Excel provides shortcuts for aligning data. To center data using keyboard shortcuts:
- Select the cell or range of cells.
- Press "Ctrl + E" on your keyboard (for Windows) or "Command + E" (for Mac). This method is particularly useful for users who are accustomed to using keyboard shortcuts for most tasks, as it allows for faster data alignment without the need to reach for the mouse.
Advantages of Keyboard Shortcuts
Keyboard shortcuts can significantly speed up your workflow, especially when working on large spreadsheets or performing repetitive tasks. By memorizing key shortcuts for common actions like centering data, you can enhance your productivity and reduce the time spent on formatting tasks.
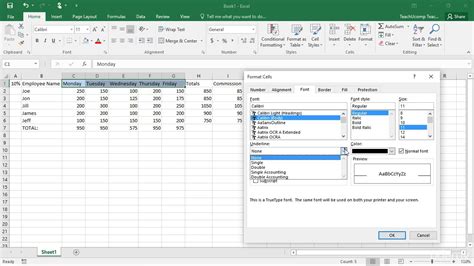
Method 3: Using the Format Cells Dialog Box
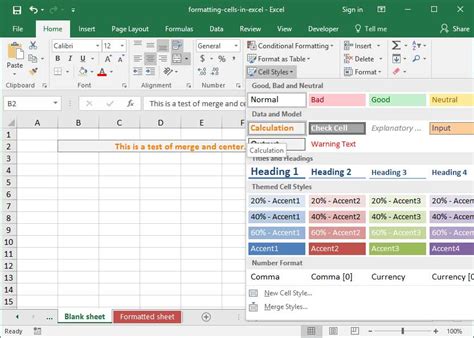
For more detailed control over data alignment, you can use the Format Cells dialog box. To access this dialog box:
- Select the cell or range of cells you want to format.
- Right-click on the selection and choose "Format Cells" from the context menu, or press "Ctrl + 1" (for Windows) or "Command + 1" (for Mac).
- In the Format Cells dialog box, navigate to the "Alignment" tab.
- Under "Horizontal," select "Center" from the drop-down menu.
- Click "OK" to apply the changes. This method provides additional alignment options, such as custom angles for text and more precise control over text positioning within cells.
Customizing Alignment with the Format Cells Dialog
The Format Cells dialog box offers a range of customization options beyond simple left, right, or center alignment. You can rotate text, adjust the indentation, and even shrink text to fit within a cell. These advanced features make the Format Cells dialog box a powerful tool for complex data formatting tasks.
Method 4: Using Excel Formulas for Conditional Alignment
While Excel formulas cannot directly change the alignment of cells, you can use them in conjunction with conditional formatting to achieve dynamic alignment based on cell contents. However, this approach is more about formatting than direct alignment and requires using macros or add-ins for actual alignment changes based on conditions.
Limits and Alternatives for Conditional Alignment
Conditional alignment based on formulas is not directly supported in Excel without using VBA (Visual Basic for Applications) macros. For most users, applying conditional formatting based on cell values and using the other alignment methods described will be more practical for achieving dynamic visual effects.
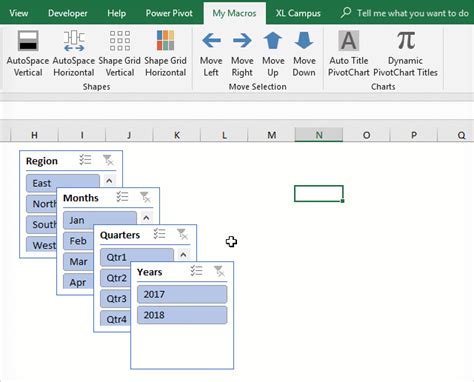
Method 5: Automating Alignment with Macros

For repetitive tasks or complex alignment scenarios, macros can automate the process. By recording or writing a macro, you can apply specific alignment settings to selected cells or an entire worksheet with a single command. This method is particularly useful for tasks that involve consistent formatting across multiple spreadsheets or for applying unique alignment rules based on specific conditions.
Creating and Using Macros for Alignment
To create a macro for alignment, start by opening the Visual Basic Editor (VBE) in Excel, then record a macro while you apply the desired alignment settings. Once recorded, you can assign the macro to a button or a keyboard shortcut for easy access. Keep in mind that macros can pose security risks if downloaded from untrusted sources, so it's essential to understand what a macro does before running it.
Excel Alignment Image Gallery


What is the quickest way to center data in Excel?
+The quickest way to center data in Excel is by using the "Center" button in the "Alignment" group on the Home tab of the ribbon or by using the keyboard shortcut "Ctrl + E" (for Windows) or "Command + E" (for Mac).
Can I automate the alignment process in Excel?
+Yes, you can automate the alignment process in Excel by using macros. Macros allow you to record or write scripts that can perform repetitive tasks, including applying specific alignment settings to cells or worksheets.
How do I access more advanced alignment options in Excel?
+To access more advanced alignment options in Excel, use the Format Cells dialog box. You can open this dialog box by right-clicking on a selected cell or range of cells and choosing "Format Cells," or by pressing "Ctrl + 1" (for Windows) or "Command + 1" (for Mac).
Centering data in Excel is a fundamental skill that can greatly enhance the clarity and professionalism of your spreadsheets. By mastering the five methods outlined in this article, you'll be able to efficiently align your data, whether you're working on simple reports or complex dashboards. Remember, the key to efficient data alignment is understanding the tools and options available in Excel and choosing the method that best fits your needs. Experiment with different alignment options and techniques to find what works best for you and your projects. If you have any questions or tips on centering data in Excel, feel free to share them in the comments below.