Intro
Learn to create a sliding scale in Excel with ease, using formulas and charts to visualize data, including weighted averages and percentage calculations, for dynamic and interactive spreadsheets.
Creating a sliding scale in Excel can be a useful tool for various applications, such as budgeting, forecasting, or data analysis. A sliding scale, also known as a dynamic scale or interactive scale, allows users to adjust a value or range of values and see the corresponding changes in other related values or charts. In this article, we will explore the importance of sliding scales in Excel and provide a step-by-step guide on how to create one.
The ability to create a sliding scale in Excel is essential for many professionals, including financial analysts, data scientists, and business managers. It enables them to analyze and visualize complex data, identify trends, and make informed decisions. Moreover, a sliding scale can be used to create interactive dashboards, reports, and presentations, making it easier to communicate insights and results to stakeholders.
To create a sliding scale in Excel, you need to have a basic understanding of Excel formulas, charts, and data visualization techniques. You can use various methods, such as using formulas, pivot tables, or add-ins like Power BI or Tableau. In this article, we will focus on using formulas and charts to create a sliding scale.
Understanding the Basics of Sliding Scales

Before creating a sliding scale, it's essential to understand the basics of how it works. A sliding scale typically consists of a input cell or range, a formula or calculation, and a output cell or chart. The input cell or range allows users to adjust a value or range of values, which triggers the formula or calculation to update the output cell or chart. This creates a dynamic and interactive visualization of the data.
To create a sliding scale, you need to decide on the input and output values, as well as the formula or calculation that will be used to update the output. You can use various formulas, such as IF, INDEX, or VLOOKUP, to create the sliding scale. Additionally, you can use charts, such as line charts, bar charts, or scatter plots, to visualize the output.
Creating a Sliding Scale using Formulas
To create a sliding scale using formulas, follow these steps:
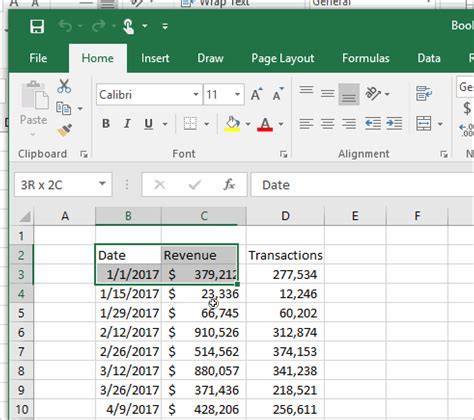
- Create a table with the input values and corresponding output values.
- Select the cell where you want to display the output value.
- Enter a formula that references the input cell and calculates the output value.
- Use the IF function to create a conditional statement that updates the output value based on the input value.
- Use the INDEX and MATCH functions to create a dynamic lookup table that updates the output value.
For example, suppose you want to create a sliding scale that shows the price of a product based on the quantity purchased. You can create a table with the quantity and price values, and then use the IF function to create a conditional statement that updates the price value based on the quantity.
Using IF Function
The IF function is a powerful tool for creating conditional statements in Excel. It allows you to test a condition and return one value if the condition is true and another value if the condition is false. To use the IF function, follow these steps:- Select the cell where you want to display the output value.
- Enter the IF function, using the syntax =IF(logical_test, [value_if_true], [value_if_false]).
- Define the logical test, using a comparison operator such as =, <, >, or <>.
- Define the value_if_true and value_if_false arguments, using a value or a formula.
For example, suppose you want to create a sliding scale that shows the price of a product based on the quantity purchased. You can use the IF function to create a conditional statement that updates the price value based on the quantity.
Creating a Sliding Scale using Charts
To create a sliding scale using charts, follow these steps:
- Create a table with the input values and corresponding output values.
- Select the data range and create a chart, such as a line chart or bar chart.
- Use the chart tools to customize the chart and add interactive elements, such as sliders or dropdown menus.
- Use the IF function to create a conditional statement that updates the chart based on the input value.
- Use the INDEX and MATCH functions to create a dynamic lookup table that updates the chart.
For example, suppose you want to create a sliding scale that shows the sales revenue of a company based on the marketing budget. You can create a table with the marketing budget and sales revenue values, and then use a line chart to visualize the data. You can add a slider or dropdown menu to the chart to allow users to adjust the marketing budget and see the corresponding changes in sales revenue.
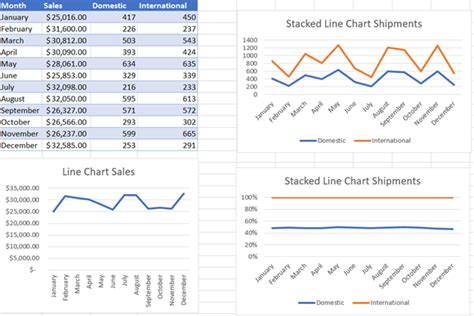
Using Line Charts
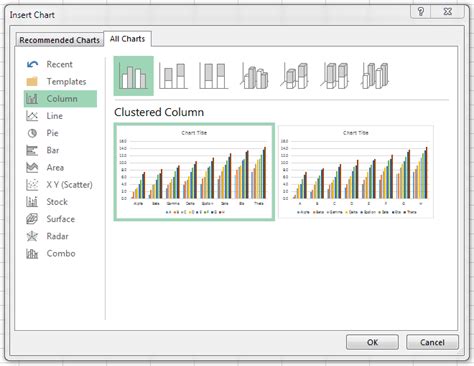
Line charts are a popular choice for creating sliding scales in Excel. They allow you to visualize the relationship between two variables and show the trends and patterns in the data. To create a line chart, follow these steps:- Select the data range and go to the Insert tab.
- Click on the Line Chart button and select the type of line chart you want to create.
- Customize the chart using the chart tools, such as adding titles, labels, and legends.
- Use the IF function to create a conditional statement that updates the chart based on the input value.
Best Practices for Creating Sliding Scales

When creating a sliding scale in Excel, there are several best practices to keep in mind:
- Use clear and concise language when creating formulas and charts.
- Use consistent formatting and styling throughout the worksheet.
- Use conditional formatting to highlight important values or trends.
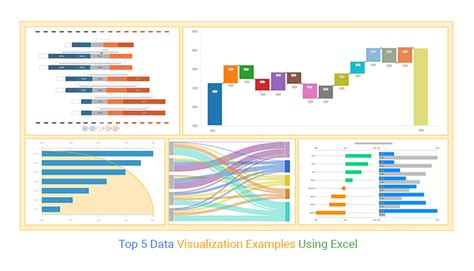
- Use charts and graphs to visualize the data and make it easier to understand.
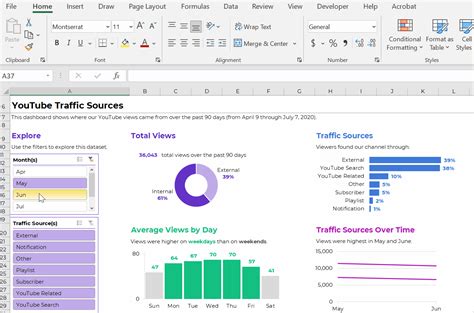
- Use interactive elements, such as sliders or dropdown menus, to make the sliding scale more engaging and user-friendly.
By following these best practices, you can create a sliding scale that is easy to use, interactive, and effective in communicating insights and results.
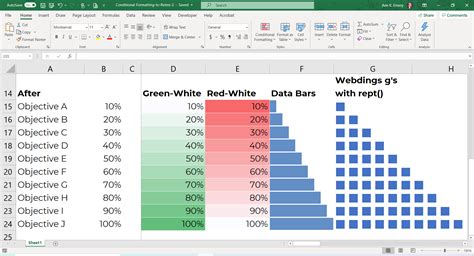
Using Conditional Formatting
Conditional formatting is a powerful tool for highlighting important values or trends in a sliding scale. It allows you to apply formatting to a cell or range of cells based on a condition or formula. To use conditional formatting, follow these steps:- Select the cell or range of cells you want to format.
- Go to the Home tab and click on the Conditional Formatting button.
- Select the type of formatting you want to apply, such as highlighting cells or formatting values.
- Define the condition or formula that will trigger the formatting.
Sliding Scale Image Gallery

What is a sliding scale in Excel?
+A sliding scale in Excel is a dynamic and interactive visualization of data that allows users to adjust a value or range of values and see the corresponding changes in other related values or charts.
How do I create a sliding scale in Excel?
+To create a sliding scale in Excel, you can use formulas, charts, or add-ins like Power BI or Tableau. You can also use conditional formatting and interactive elements, such as sliders or dropdown menus, to make the sliding scale more engaging and user-friendly.
What are the benefits of using a sliding scale in Excel?
+The benefits of using a sliding scale in Excel include the ability to analyze and visualize complex data, identify trends and patterns, and make informed decisions. It also allows users to create interactive dashboards, reports, and presentations, making it easier to communicate insights and results to stakeholders.
Can I use a sliding scale in Excel for budgeting and forecasting?
+Yes, you can use a sliding scale in Excel for budgeting and forecasting. It allows you to adjust assumptions and see the corresponding changes in revenue, expenses, and profits. You can also use it to create scenarios and sensitivity analysis, making it easier to identify risks and opportunities.
Can I share a sliding scale in Excel with others?
+Yes, you can share a sliding scale in Excel with others. You can save the workbook as a PDF or Excel file and share it via email or cloud storage. You can also use collaboration tools, such as Microsoft Teams or SharePoint, to share and work on the sliding scale with others in real-time.
In conclusion, creating a sliding scale in Excel can be a powerful tool for analyzing and visualizing complex data. By using formulas, charts, and interactive elements, you can create a dynamic and interactive visualization of data that allows users to adjust a value or range of values and see the corresponding changes in other related values or charts. Whether you're a financial analyst, data scientist, or business manager, a sliding scale in Excel can help you make informed decisions, identify trends and patterns, and communicate insights and results to stakeholders. So why not give it a try and see the benefits for yourself? Share your thoughts and experiences with sliding scales in Excel in the comments below, and don't forget to share this article with others who may find it useful.