Intro
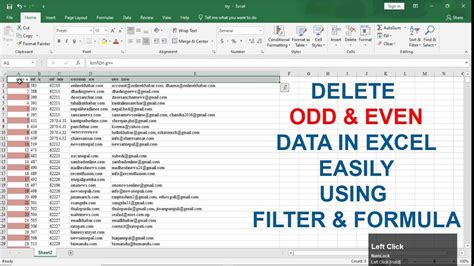
Learn how to delete odd rows in Excel using formulas, filters, and macros, streamlining data management and analysis with efficient row removal techniques.
Delete odd rows in Excel is a common task that can be accomplished using various methods. Whether you're working with a large dataset or a small one, removing unwanted rows can help you organize and analyze your data more efficiently. In this article, we'll explore the different ways to delete odd rows in Excel, including using formulas, filters, and VBA macros.
The importance of deleting odd rows in Excel cannot be overstated. By removing unnecessary data, you can improve the performance of your worksheets, reduce errors, and make your data more manageable. Moreover, deleting odd rows can help you prepare your data for analysis, reporting, or presentation. With the right techniques, you can save time and effort, and focus on more critical tasks.
Deleting odd rows in Excel can be challenging, especially for those who are new to the software. However, with the right guidance, you can master the techniques and become more proficient in managing your data. In this article, we'll provide step-by-step instructions, examples, and tips to help you delete odd rows in Excel with ease. Whether you're a beginner or an advanced user, you'll find the information you need to improve your skills and work more efficiently.
Understanding the Problem
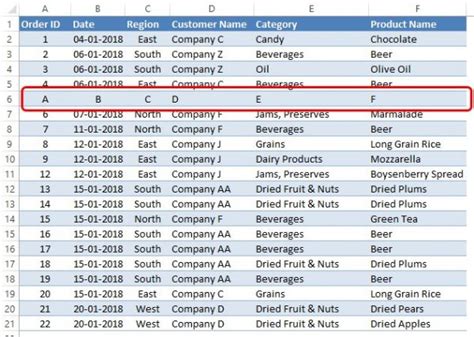
Before we dive into the solutions, let's understand the problem. Deleting odd rows in Excel means removing every other row, starting from the first row. For example, if you have a dataset with 10 rows, you would remove rows 1, 3, 5, 7, and 9. The remaining rows would be 2, 4, 6, 8, and 10.
Method 1: Using Formulas
One way to delete odd rows in Excel is by using formulas. You can use the MOD function to identify odd rows and then filter out the unwanted data. Here's how:
- Select the entire dataset.
- Go to the "Data" tab and click on "Filter."
- In the first column, enter the formula
=MOD(ROW(),2)=0. - Press Enter to apply the formula.
- Click on the filter button and select "Filter by Selected Cell's Value."
- Only the even rows will be displayed.
- Select the remaining rows and delete them.
Using the MOD Function
The MOD function returns the remainder of a division operation. In this case, we use `MOD(ROW(),2)` to check if the row number is odd or even. If the remainder is 0, the row number is even; otherwise, it's odd.Method 2: Using Filters
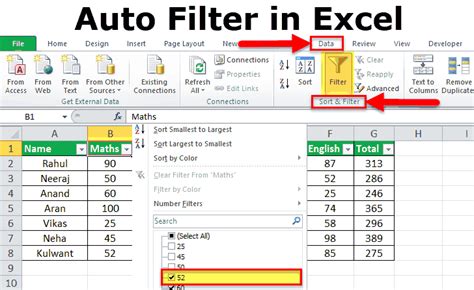
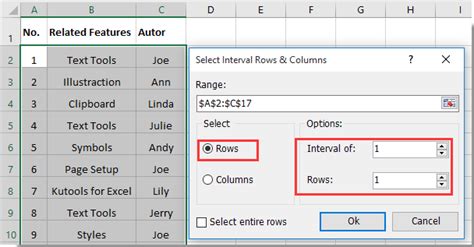
Another way to delete odd rows in Excel is by using filters. You can create a custom filter to select only the even rows and then delete the remaining data. Here's how:
- Select the entire dataset.
- Go to the "Data" tab and click on "Filter."
- In the first column, select "Custom Filter."
- In the "Custom Filter" dialog box, select "Formula" and enter
=MOD(ROW(),2)=0. - Click "OK" to apply the filter.
- Only the even rows will be displayed.
- Select the remaining rows and delete them.
Using Custom Filters
Custom filters allow you to create complex filters using formulas. In this case, we use the MOD function to select only the even rows.Method 3: Using VBA Macros
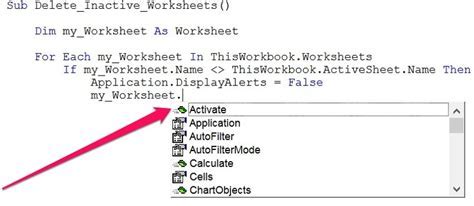
If you're comfortable with coding, you can use VBA macros to delete odd rows in Excel. Here's an example code:
Sub DeleteOddRows()
    Dim i As Long
    For i = Cells.Rows.Count To 1 Step -1
        If i Mod 2 = 1 Then
            Rows(i).Delete
        End If
    Next i
End Sub
To use this code, follow these steps:
- Open the Visual Basic Editor by pressing Alt + F11.
- In the Editor, click "Insert" and select "Module."
- Paste the code into the module.
- Click "Run" to execute the code.
Using VBA Macros
VBA macros allow you to automate tasks in Excel. In this case, we use a loop to iterate through the rows and delete the odd rows.Benefits of Deleting Odd Rows
Deleting odd rows in Excel can have several benefits, including:
- Improved data organization: By removing unnecessary data, you can make your dataset more manageable and easier to analyze.
- Reduced errors: Deleting odd rows can help you avoid errors caused by incorrect data.
- Improved performance: Removing unwanted data can improve the performance of your worksheets and reduce the risk of crashes.
Best Practices
When deleting odd rows in Excel, it's essential to follow best practices to avoid errors and ensure data integrity. Here are some tips:- Always make a backup of your data before deleting rows.
- Use filters or formulas to select the rows you want to delete.
- Avoid using the "Delete" button to delete rows, as this can cause errors.
Delete Odd Rows Image Gallery


How do I delete odd rows in Excel?
+You can delete odd rows in Excel using formulas, filters, or VBA macros. Select the entire dataset, go to the "Data" tab, and click on "Filter." Then, use the MOD function to identify odd rows and filter out the unwanted data.
What is the MOD function in Excel?
+The MOD function returns the remainder of a division operation. In this case, we use MOD(ROW(),2) to check if the row number is odd or even. If the remainder is 0, the row number is even; otherwise, it's odd.
How do I use VBA macros to delete odd rows in Excel?
+Open the Visual Basic Editor by pressing Alt + F11. In the Editor, click "Insert" and select "Module." Paste the code into the module, and click "Run" to execute the code. The code will delete the odd rows in your dataset.
In conclusion, deleting odd rows in Excel can be a useful technique for data analysis and management. By using formulas, filters, or VBA macros, you can efficiently remove unwanted data and improve the performance of your worksheets. Remember to follow best practices and make a backup of your data before deleting rows. With these tips and techniques, you'll be able to delete odd rows in Excel like a pro! We invite you to share your experiences, ask questions, or provide feedback on this article. Your input will help us improve our content and provide better solutions for our readers.