Intro
Learn to insert row below in Excel with ease. Master spreadsheet editing with simple shortcuts and formulas, including row insertion, data management, and table manipulation techniques.
Inserting rows in Excel is a common task that can help you organize your data better, especially when you need to add new information between existing rows. Excel provides several ways to insert rows, and the method you choose often depends on how many rows you need to insert and where you want to insert them.
To start working with inserting rows, it's essential to understand the basic layout of Excel and how rows and columns are structured. Rows are horizontal, and each row is identified by a number (1, 2, 3, etc.) on the left side of the spreadsheet. Columns, on the other hand, are vertical and identified by letters (A, B, C, etc.) at the top of the spreadsheet.
When you decide to insert a row, you're essentially telling Excel to create a new, blank row either above or below an existing row or set of rows. This action shifts all the rows below the insertion point down by one row, making space for the new row.
Why Insert Rows in Excel?
Inserting rows can be useful in various scenarios. For example, if you're maintaining a list or database in Excel and need to add a new entry between existing ones, inserting a row allows you to do so without having to cut and paste or reorganize your entire spreadsheet. It's also helpful when you're working with formulas and need to add more data that the formula should include, or when you're creating a report and need to add more details.
How to Insert a Row in Excel
There are a few methods to insert rows in Excel, each suited to different needs:
-
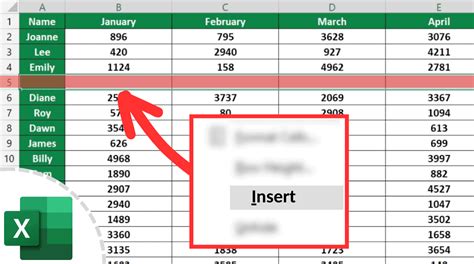
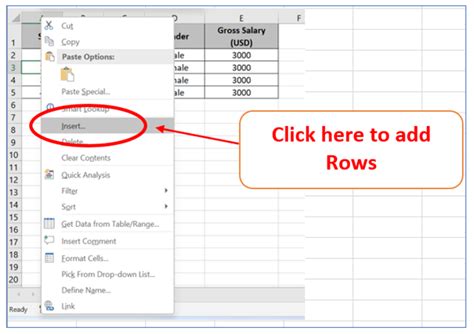
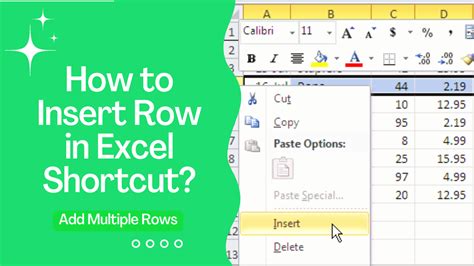
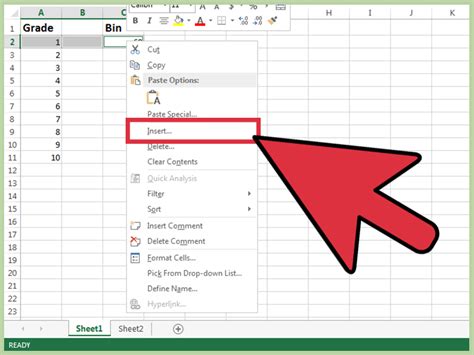
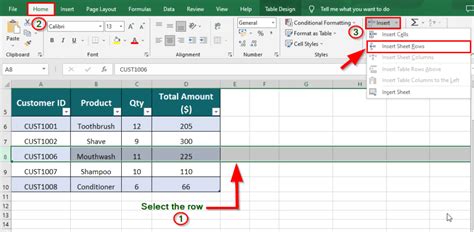
Inserting a Single Row: To insert a single row, select the row below where you want the new row to appear by clicking on the row number. Then, go to the "Home" tab on the Ribbon, find the "Cells" group, and click on "Insert Sheet Rows." This will insert a new row above the selected row. Alternatively, you can right-click on the selected row number and choose "Insert" from the context menu.
-
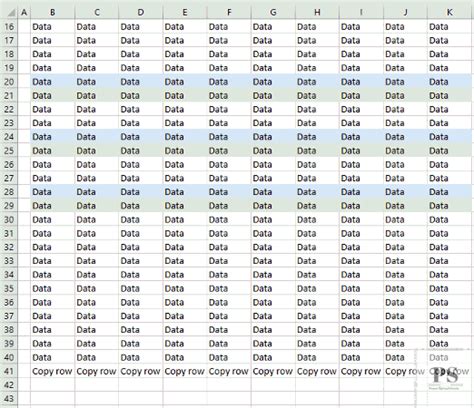
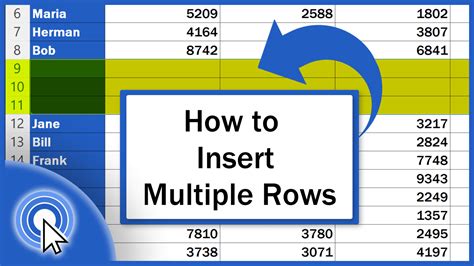
Inserting Multiple Rows: If you need to insert more than one row, select the same number of rows below where you want the new rows to appear. For example, to insert three new rows, select three rows. Then, follow the same steps as for inserting a single row. Excel will insert the same number of new rows as you selected.
-
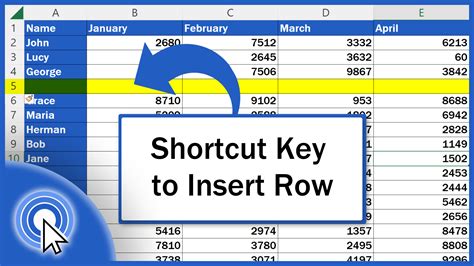
Using Keyboard Shortcuts: For a quicker method, you can use keyboard shortcuts. Select the row below where you want to insert a new row and press "Ctrl + Shift + +" (plus sign) on your keyboard. This will insert a new row.
Inserting Rows with Specific Formats
Sometimes, you might want the inserted row to have the same format as the row above or below it. Excel provides an option to do this:
- After inserting a row, select the row.
- Go to the "Home" tab.
- In the "Cells" group, click on "Format Painter."
- Select the row with the format you want to apply.
- Click on the "Format Painter" again and select the newly inserted row.
This will apply the formatting from the selected row to the new row.
Best Practices for Inserting Rows

When inserting rows, especially in worksheets with complex formulas or references, it's crucial to consider the impact on your data and formulas:
- Check Formulas: Ensure that any formulas that reference the area where you're inserting rows are updated correctly. Sometimes, inserting rows can shift the references in formulas, potentially leading to errors.
- Use Absolute References: If you're working with formulas that should always reference a specific row or column, consider using absolute references (by using the "
Inserting rows in Excel is a common task that can help you organize your data better, especially when you need to add new information between existing rows. Excel provides several ways to insert rows, and the method you choose often depends on how many rows you need to insert and where you want to insert them.
To start working with inserting rows, it's essential to understand the basic layout of Excel and how rows and columns are structured. Rows are horizontal, and each row is identified by a number (1, 2, 3, etc.) on the left side of the spreadsheet. Columns, on the other hand, are vertical and identified by letters (A, B, C, etc.) at the top of the spreadsheet.
When you decide to insert a row, you're essentially telling Excel to create a new, blank row either above or below an existing row or set of rows. This action shifts all the rows below the insertion point down by one row, making space for the new row.
Why Insert Rows in Excel?
Inserting rows can be useful in various scenarios. For example, if you're maintaining a list or database in Excel and need to add a new entry between existing ones, inserting a row allows you to do so without having to cut and paste or reorganize your entire spreadsheet. It's also helpful when you're working with formulas and need to add more data that the formula should include, or when you're creating a report and need to add more details.
How to Insert a Row in Excel
There are a few methods to insert rows in Excel, each suited to different needs:
-
Inserting a Single Row: To insert a single row, select the row below where you want the new row to appear by clicking on the row number. Then, go to the "Home" tab on the Ribbon, find the "Cells" group, and click on "Insert Sheet Rows." This will insert a new row above the selected row. Alternatively, you can right-click on the selected row number and choose "Insert" from the context menu.
-
Inserting Multiple Rows: If you need to insert more than one row, select the same number of rows below where you want the new rows to appear. For example, to insert three new rows, select three rows. Then, follow the same steps as for inserting a single row. Excel will insert the same number of new rows as you selected.
-
Using Keyboard Shortcuts: For a quicker method, you can use keyboard shortcuts. Select the row below where you want to insert a new row and press "Ctrl + Shift + +" (plus sign) on your keyboard. This will insert a new row.
Inserting Rows with Specific Formats
Sometimes, you might want the inserted row to have the same format as the row above or below it. Excel provides an option to do this:
- After inserting a row, select the row.
- Go to the "Home" tab.
- In the "Cells" group, click on "Format Painter."
- Select the row with the format you want to apply.
- Click on the "Format Painter" again and select the newly inserted row.
This will apply the formatting from the selected row to the new row.
Best Practices for Inserting Rows
When inserting rows, especially in worksheets with complex formulas or references, it's crucial to consider the impact on your data and formulas:
- Check Formulas: Ensure that any formulas that reference the area where you're inserting rows are updated correctly. Sometimes, inserting rows can shift the references in formulas, potentially leading to errors.
- Use Absolute References: If you're working with formulas that should always reference a specific row or column, consider using absolute references (by using the "${content}quot; symbol, e.g., $A$1) to prevent the reference from shifting when rows are inserted.
- Test Your Work: After inserting rows, especially in critical worksheets, test your formulas and references to ensure everything is working as expected.
Common Issues with Inserting Rows

While inserting rows is a straightforward process, there are some common issues to watch out for:
- Formula Errors: Inserting rows can sometimes cause formula errors, especially if the formulas are not designed to accommodate changes in the data range.
- Data Shift: Be cautious of how inserting rows shifts your data. This can sometimes lead to data being misplaced or formulas not working as intended.
- Performance: In very large worksheets, inserting many rows at once can impact performance. It's sometimes better to insert rows in smaller batches.
Advanced Row Insertion Techniques
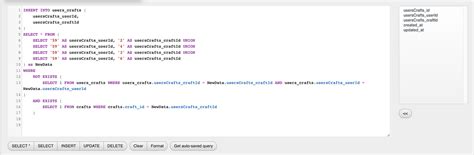
For more advanced users, Excel offers additional techniques for inserting rows, such as using macros or Excel's built-in functions to dynamically insert rows based on specific conditions.
- Using Macros: You can record or write a macro to insert rows. This is particularly useful if you find yourself inserting rows in the same place repeatedly.
- Conditional Insertion: With the use of formulas and possibly macros, you can set up your worksheet to insert rows automatically based on certain conditions, such as when a new item is added to a list.
Excel Row Insertion Gallery


How do I insert a row in Excel?
+To insert a row in Excel, select the row below where you want the new row to appear, go to the "Home" tab, find the "Cells" group, and click on "Insert Sheet Rows."
Can I insert multiple rows at once in Excel?
+Yes, you can insert multiple rows by selecting the same number of rows below where you want the new rows to appear and then following the same steps as for inserting a single row.
How do I insert rows with specific formats in Excel?
+After inserting a row, you can use the "Format Painter" tool to apply the format from an existing row to the new row. Select the row with the desired format, click on "Format Painter," and then select the new row.
In conclusion, inserting rows in Excel is a versatile tool that can help you manage and organize your data more effectively. Whether you're working with simple lists or complex databases, understanding how to insert rows efficiently can save you time and reduce errors. By following the tips and techniques outlined in this article, you can become more proficient in using Excel to its full potential. We invite you to share your experiences or tips on working with rows in Excel in the comments below and to share this article with anyone who might find it useful.
quot; symbol, e.g., $A$1) to prevent the reference from shifting when rows are inserted. -
- Test Your Work: After inserting rows, especially in critical worksheets, test your formulas and references to ensure everything is working as expected.
Common Issues with Inserting Rows
While inserting rows is a straightforward process, there are some common issues to watch out for:
- Formula Errors: Inserting rows can sometimes cause formula errors, especially if the formulas are not designed to accommodate changes in the data range.
- Data Shift: Be cautious of how inserting rows shifts your data. This can sometimes lead to data being misplaced or formulas not working as intended.
- Performance: In very large worksheets, inserting many rows at once can impact performance. It's sometimes better to insert rows in smaller batches.
Advanced Row Insertion Techniques
For more advanced users, Excel offers additional techniques for inserting rows, such as using macros or Excel's built-in functions to dynamically insert rows based on specific conditions.
- Using Macros: You can record or write a macro to insert rows. This is particularly useful if you find yourself inserting rows in the same place repeatedly.
- Conditional Insertion: With the use of formulas and possibly macros, you can set up your worksheet to insert rows automatically based on certain conditions, such as when a new item is added to a list.
Excel Row Insertion Gallery
How do I insert a row in Excel?
+To insert a row in Excel, select the row below where you want the new row to appear, go to the "Home" tab, find the "Cells" group, and click on "Insert Sheet Rows."
Can I insert multiple rows at once in Excel?
+Yes, you can insert multiple rows by selecting the same number of rows below where you want the new rows to appear and then following the same steps as for inserting a single row.
How do I insert rows with specific formats in Excel?
+After inserting a row, you can use the "Format Painter" tool to apply the format from an existing row to the new row. Select the row with the desired format, click on "Format Painter," and then select the new row.
In conclusion, inserting rows in Excel is a versatile tool that can help you manage and organize your data more effectively. Whether you're working with simple lists or complex databases, understanding how to insert rows efficiently can save you time and reduce errors. By following the tips and techniques outlined in this article, you can become more proficient in using Excel to its full potential. We invite you to share your experiences or tips on working with rows in Excel in the comments below and to share this article with anyone who might find it useful.