Intro
Lock cells in Google Sheets to protect data, formulas, and formatting. Learn how to freeze cells, protect ranges, and use permissions to secure your spreadsheet, ensuring data integrity and collaboration control with conditional formatting and editing restrictions.
Locking cells in Google Sheets is an essential feature for protecting sensitive data, formulas, and formatting from accidental or intentional changes. This feature is particularly useful when collaborating with others or sharing spreadsheets with multiple users. By locking cells, you can ensure that critical information remains intact and prevent unauthorized edits.
The importance of locking cells in Google Sheets cannot be overstated. In a collaborative environment, it's easy for changes to be made unintentionally, which can lead to errors, inconsistencies, and even data loss. Moreover, when working with sensitive information, such as financial data or personal identifiable information, it's crucial to take extra precautions to protect it from unauthorized access or modifications.
Google Sheets provides a robust set of tools for locking cells, including the ability to lock specific cells, ranges, or entire sheets. You can also set permissions to control who can edit or view certain cells or sheets, adding an extra layer of security and flexibility to your spreadsheets.
Why Lock Cells in Google Sheets?

Locking cells in Google Sheets offers several benefits, including:
- Protecting sensitive data from unauthorized changes or access
- Preventing accidental changes or deletions
- Ensuring that critical formulas and formatting remain intact
- Controlling who can edit or view specific cells or sheets
- Enhancing collaboration by setting clear permissions and boundaries
Benefits of Locking Cells
Locking cells in Google Sheets can help prevent common issues that can arise when collaborating with others, such as:- Accidental changes or deletions
- Unauthorized access or modifications
- Inconsistent formatting or data entry
- Errors or inconsistencies in formulas or calculations
By locking cells, you can ensure that your spreadsheet remains accurate, consistent, and secure, even when multiple users are accessing and editing it.
How to Lock Cells in Google Sheets

Locking cells in Google Sheets is a straightforward process that involves selecting the cells you want to lock and setting the appropriate permissions. Here's a step-by-step guide:
- Select the cells you want to lock by clicking and dragging your mouse over the range.
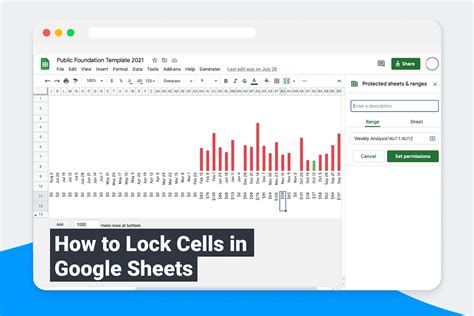
- Go to the "Data" menu and select "Protected sheets and ranges."
- Click on "Add a sheet or range" and select the range you want to lock.
- Set the permissions by selecting who can edit or view the locked cells.
- Click "Done" to apply the changes.
Setting Permissions
When locking cells in Google Sheets, you can set permissions to control who can edit or view the locked cells. You can choose from the following options:- "Anyone with the link can edit"
- "Anyone with the link can view"
- "Specific people can edit"
- "Specific people can view"
You can also set custom permissions by selecting specific users or groups and assigning them edit or view access.
Best Practices for Locking Cells

To get the most out of locking cells in Google Sheets, follow these best practices:
- Lock cells that contain sensitive or critical data
- Use clear and descriptive names for your protected ranges
- Set permissions carefully to ensure that only authorized users can edit or view locked cells
- Use conditional formatting to highlight locked cells and make them stand out
- Regularly review and update your protected ranges to ensure they remain relevant and effective
Common Mistakes to Avoid
When locking cells in Google Sheets, avoid the following common mistakes:- Locking cells that don't need to be protected
- Setting permissions too broadly or too narrowly
- Failing to update protected ranges when changes are made to the spreadsheet
- Not using clear and descriptive names for protected ranges
By following these best practices and avoiding common mistakes, you can effectively use locking cells in Google Sheets to protect your data, ensure collaboration, and maintain the integrity of your spreadsheets.
Gallery of Lock Cells In Google Sheets
Lock Cells In Google Sheets Image Gallery


Frequently Asked Questions
What is the purpose of locking cells in Google Sheets?
+The purpose of locking cells in Google Sheets is to protect sensitive data, formulas, and formatting from accidental or intentional changes.
How do I lock cells in Google Sheets?
+To lock cells in Google Sheets, select the cells you want to lock, go to the "Data" menu, select "Protected sheets and ranges," and set the permissions.
Can I lock specific cells or ranges in Google Sheets?
+Yes, you can lock specific cells or ranges in Google Sheets by selecting the cells or range you want to lock and setting the permissions.
In conclusion, locking cells in Google Sheets is an essential feature for protecting sensitive data, formulas, and formatting from accidental or intentional changes. By following the best practices and avoiding common mistakes, you can effectively use locking cells to ensure collaboration, maintain the integrity of your spreadsheets, and protect your data. If you have any further questions or need more information, please don't hesitate to comment or share this article with others.