Intro
Save Excel tables as pictures with ease. Learn how to convert Excel spreadsheets into images, including charts and graphs, using simple methods and tools for instant visualization and sharing.
Saving an Excel table as a picture can be incredibly useful for presentations, reports, and sharing data with others who may not have Excel or need to view the data in a more static format. Excel provides several methods to achieve this, each with its own advantages depending on your specific needs. Whether you're looking to embed the picture into another document, share it via email, or use it on the web, Excel's functionalities make it straightforward.
Excel tables are powerful tools for organizing, analyzing, and presenting data. They offer a structured way to store and manage data, making it easier to perform calculations, create charts, and apply formatting to make your data more understandable and engaging. However, there are times when you might want to capture your table in a format that's not editable, such as when you're sharing sensitive information or when you want to ensure that your data presentation isn't altered by others.
Why Save an Excel Table as a Picture?
Saving an Excel table as a picture offers several benefits. It allows you to easily insert the table into documents, presentations, or web pages without worrying about compatibility issues or the recipient needing to have Excel installed. Additionally, converting your table into a picture format like JPEG or PNG can help protect your data from being edited, making it a secure way to share information.
Methods to Save Excel Table as Picture
There are multiple ways to save an Excel table as a picture, and the method you choose might depend on the version of Excel you're using or your personal preference. Here are some of the most common methods:-
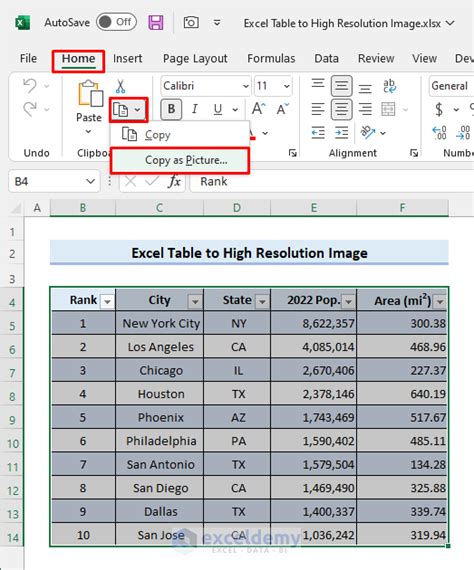
Copy and Paste as Picture: This is one of the simplest methods. Select your table, right-click, and choose "Copy" or use the keyboard shortcut Ctrl+C. Then, open your destination document or presentation, right-click where you want to paste, and select "Paste Special." From the options, choose to paste as a picture. This method is quick but might not offer the highest quality image, especially if you're working with detailed tables.
-
Snipping Tool: Windows comes with a built-in Snipping Tool that allows you to capture parts of your screen. You can use this tool to capture your Excel table. Open the Snipping Tool, select "New," choose the type of snip that best fits your needs (such as "Window" or "Rectangular Snip"), and capture your table. You can then save the snip as an image file.
-
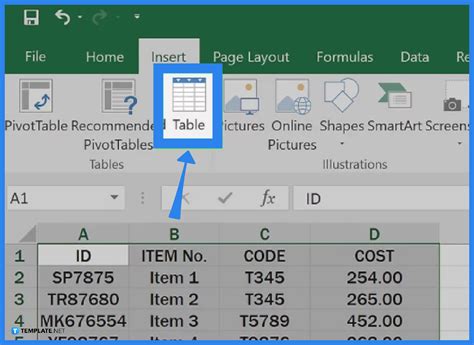
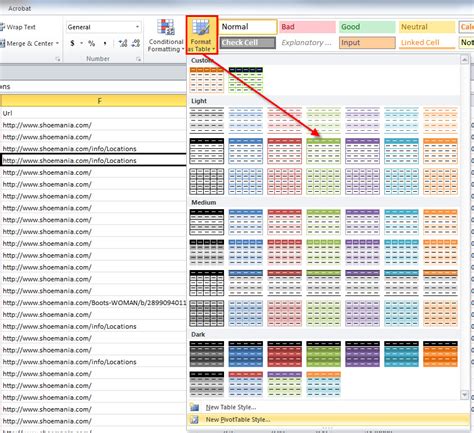
Excel's Built-in Screenshot Tool: In newer versions of Excel, you can use the "Screenshot" tool found in the "Illustrations" group under the "Insert" tab. This tool allows you to capture parts of your worksheet or other windows and insert them directly into your Excel file as images.
-
Save as Web Page: Although not directly saving as a picture, saving your Excel file as a web page can convert your tables into images that can be easily shared or embedded into web pages. To do this, go to "File" > "Save As," choose "Web Page" from the file type dropdown, and select the location to save. This method can be useful for tables that you want to share online.
Step-by-Step Guide to Saving Excel Table as Picture
For a more direct approach to saving an Excel table as a picture, follow these steps:
-
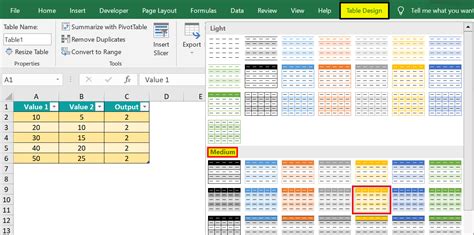
Select Your Table: Click and drag your mouse to select the entire table you wish to save as a picture. Make sure to include any headers or footers you want to capture.
-
Copy the Table: With your table selected, right-click and choose "Copy" or use the keyboard shortcut Ctrl+C.
-
Open an Image Editing Program: You can use any image editing program like Microsoft Paint, Adobe Photoshop, or even an online tool.
-
Paste the Table: In your chosen program, right-click and select "Paste" or use the keyboard shortcut Ctrl+V. The table will be pasted as an image.
-
Save the Image: Go to "File" > "Save As" and choose your desired image format (such as JPEG, PNG, or GIF). Select a location to save the file and give it a name.
Tips for Saving Excel Tables as Pictures
- Resolution and Quality: When saving as a picture, consider the resolution and quality you need. Higher resolutions are better for printing, while lower resolutions are sufficient for web use.
- Format Choice: Choose an image format that suits your needs. PNG is great for tables with text because it preserves sharp edges, while JPEG might be better for tables with many colors or gradients.
- Size Adjustment: After pasting the table into an image editing program, you might need to adjust its size. Be cautious not to distort the image, especially if it contains text.
Common Issues and Solutions

When saving Excel tables as pictures, you might encounter a few common issues, such as poor image quality, incorrect sizing, or difficulty in capturing the entire table. Here are some solutions:
- Poor Image Quality: Try increasing the zoom in Excel before copying the table, or use a higher resolution when saving the image.
- Incorrect Sizing: Adjust the size of the table in Excel or resize the image after it's been saved, taking care not to distort the content.
- Capturing the Entire Table: Use the "Window" snip option in the Snipping Tool or ensure you've selected the entire table before copying.
Best Practices for Using Pictures of Excel Tables
- Clarity and Readability: Ensure the table is clear and readable, even when resized.
- Consistency: Use consistent formatting across all tables to maintain a professional look.
- Accessibility: Consider adding alt text to images of tables when used online to improve accessibility.
Advanced Techniques for Excel Tables
Beyond saving tables as pictures, Excel offers a plethora of advanced techniques to enhance your data presentation and analysis capabilities. These include:
- Conditional Formatting: Highlight cells based on specific conditions to draw attention to important data.
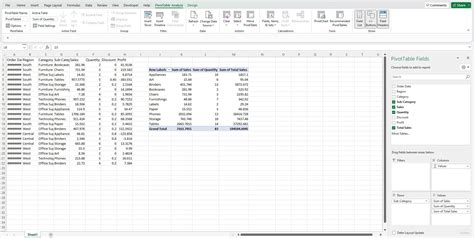
- PivotTables: Summarize large datasets and rotate data to view different perspectives.
- Macros: Automate repetitive tasks and create custom tools tailored to your workflow.
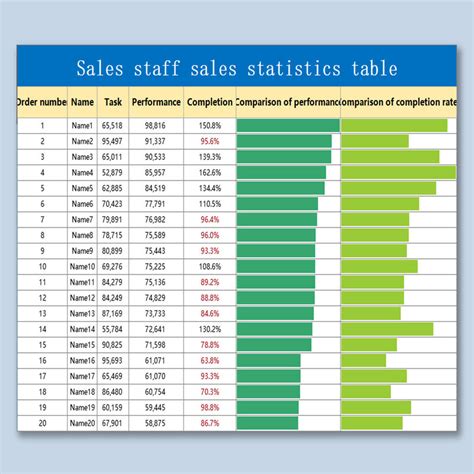
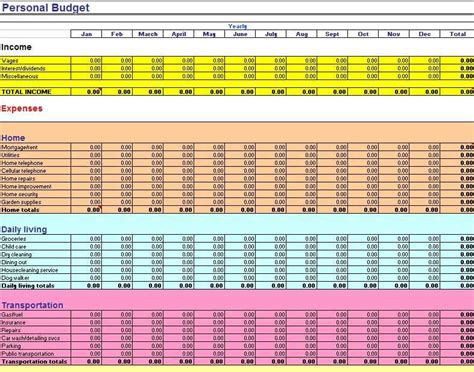
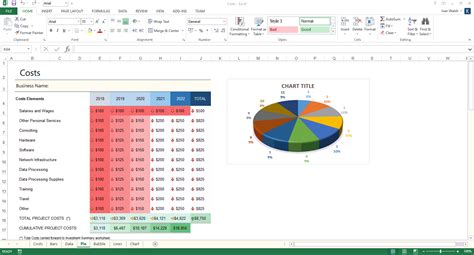
Gallery of Printable Excel Tables
Printable Excel Table Image Gallery


Frequently Asked Questions
How do I save an Excel table as a picture?
+You can save an Excel table as a picture by copying the table, opening an image editing program, and pasting the table as an image. Then, save the file in your desired image format.
What is the best image format for saving Excel tables?
+The best image format depends on your use case. PNG is ideal for tables with text because it preserves sharp edges, while JPEG might be better for tables with many colors or gradients.
Can I edit an Excel table saved as a picture?
+Once an Excel table is saved as a picture, it cannot be edited like an Excel file. However, you can edit the image itself using an image editing program, such as changing colors or resizing.
In conclusion, saving an Excel table as a picture is a versatile and useful skill that can enhance your data presentation and sharing capabilities. Whether you're looking to protect your data, ensure compatibility, or simply present information in a static format, Excel's functionalities, combined with external image editing tools, provide a comprehensive solution. By following the steps and tips outlined in this article, you can effectively capture and utilize your Excel tables as pictures, expanding your possibilities for data analysis, presentation, and communication. We invite you to share your experiences, tips, or questions about working with Excel tables and images in the comments below, helping to build a community of professionals and enthusiasts dedicated to maximizing the potential of Excel and related tools.