Intro
The ability to save images in Excel is a valuable feature for various purposes, including presentations, reports, and data visualization. Excel offers multiple methods to save images, each with its unique characteristics and applications. In this article, we will delve into the world of Excel image saving, exploring the benefits, steps, and best practices associated with each method.
Excel is a powerful tool that extends beyond numerical calculations and data analysis. Its capabilities in handling images have made it an essential software for professionals and individuals alike. Whether you are creating charts, diagrams, or simply inserting pictures into your spreadsheets, knowing how to save these images efficiently is crucial. This knowledge not only enhances your productivity but also improves the overall quality of your work.
The importance of saving images in Excel cannot be overstated. In today's visually driven world, images play a significant role in communication, making complex data more understandable and engaging. By mastering the art of saving images in Excel, you can significantly enhance your presentations, reports, and analyses, thereby conveying your message more effectively. Moreover, understanding the different methods of saving images allows you to choose the most appropriate technique based on your specific needs, ensuring that your work is always of the highest quality.
Understanding Excel Image Save Options
Before diving into the specifics of each saving method, it's essential to understand the broader context of image handling in Excel. The software provides a range of tools and features designed to make working with images as seamless as possible. From the basic insertion of pictures to the more advanced manipulation and editing of images directly within the spreadsheet, Excel's capabilities are both versatile and powerful.
Benefits of Saving Images in Excel
The benefits of saving images in Excel are multifaceted. Firstly, it allows for the creation of visually appealing and informative spreadsheets that can capture the essence of complex data in a single glance. Secondly, saving images facilitates the sharing of information across different platforms and software, ensuring that your message is conveyed consistently and effectively. Lastly, the ability to save images in Excel promotes flexibility and creativity, enabling users to tailor their presentations and reports to meet the specific needs of their audience.Method 1: Saving as a Picture

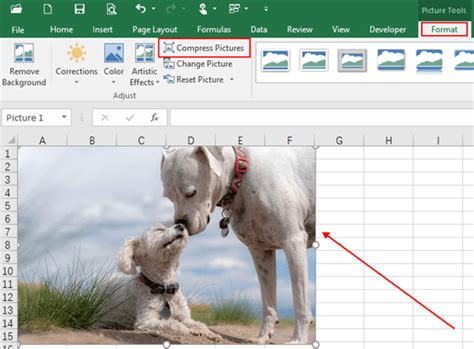
One of the most straightforward methods of saving an image in Excel is by using the "Save as Picture" option. This method is particularly useful for charts, graphs, and other visual elements that you wish to use in presentations or documents outside of Excel. To save an image using this method, simply select the image or chart you want to save, right-click on it, and choose "Save as Picture." You will then be prompted to choose a location to save the file and select a file format, such as PNG, JPEG, or BMP.
Step-by-Step Guide to Saving as a Picture
- Select the image or chart you want to save. - Right-click on the selected image. - Choose "Save as Picture" from the context menu. - Select a location to save the file. - Choose a file format (e.g., PNG, JPEG, BMP). - Click "Save" to complete the process.Method 2: Copy and Paste into Another Program

Another method of saving an image from Excel is by copying it and pasting it into another program, such as Microsoft Word, PowerPoint, or even a graphic design software like Adobe Photoshop. This method is useful when you need to further edit the image or integrate it into a larger document or presentation. To copy an image in Excel, select the image and press Ctrl+C (or right-click and choose "Copy"). Then, open the destination program, place your cursor where you want the image to appear, and press Ctrl+V (or right-click and choose "Paste").
Advantages of Copy and Paste Method
- Allows for easy integration of images into other documents and presentations. - Enables further editing of the image in other software. - Convenient for creating multimedia presentations and reports.Method 3: Using the Snipping Tool

The Snipping Tool is a Windows utility that allows users to capture screenshots of specific areas of their screen. This tool can be particularly useful for saving images from Excel, especially when you need to capture a portion of the spreadsheet that includes both images and data. To use the Snipping Tool, open it from the Start menu, select the type of snip you want (e.g., full-screen, window, rectangular), and then capture the area of the screen containing the image you wish to save.
Steps to Use the Snipping Tool
- Open the Snipping Tool from the Start menu. - Select the type of snip (e.g., full-screen, window, rectangular). - Capture the area of the screen containing the image. - Save the snip as an image file (e.g., PNG, JPEG).Method 4: Saving a Worksheet as a Web Page

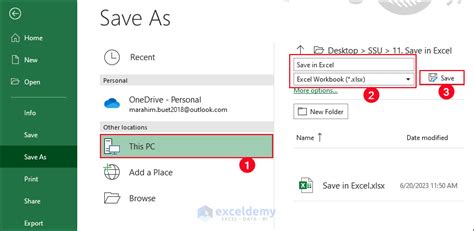
Saving a worksheet as a web page is another method of saving images in Excel, particularly useful for sharing spreadsheets online or creating web-based reports. To save a worksheet as a web page, go to the "File" menu, select "Save As," choose "Web Page" from the file type dropdown, and then click "Save." This method saves the entire worksheet, including images, as an HTML file that can be opened in a web browser.
Benefits of Saving as a Web Page
- Facilitates online sharing of spreadsheets. - Allows for the creation of interactive web-based reports. - Enables easy access to spreadsheet data from any device with a web browser.Method 5: Using Excel’s Built-in Screenshot Tool

Excel's built-in screenshot tool allows users to capture screenshots of windows or selections directly from within the Excel application. This tool is convenient for saving images of charts, graphs, or other visual elements without having to open an external screenshot utility. To use Excel's screenshot tool, go to the "Insert" tab, click on "Screenshot," select the window or area you want to capture, and then click to insert the screenshot into your worksheet.
Steps to Use Excel’s Screenshot Tool
- Go to the "Insert" tab in Excel. - Click on "Screenshot." - Select the window or area you want to capture. - Click to insert the screenshot into your worksheet.Excel Image Save Gallery


What are the benefits of saving images in Excel?
+Saving images in Excel allows for the creation of visually appealing spreadsheets, facilitates the sharing of information, and promotes flexibility and creativity in presentations and reports.
How do I save an image from Excel as a picture?
+To save an image from Excel as a picture, select the image, right-click on it, and choose "Save as Picture." Then, select a location and file format before clicking "Save."
Can I edit images directly in Excel?
+While Excel offers some basic image editing tools, such as resizing and cropping, more advanced editing typically requires external image editing software.
In conclusion, saving images in Excel is a versatile and powerful feature that enhances the usability and visual appeal of spreadsheets. By understanding the different methods of saving images, including saving as a picture, copying and pasting into another program, using the Snipping Tool, saving a worksheet as a web page, and using Excel's built-in screenshot tool, users can optimize their workflow and create engaging, informative presentations and reports. Whether you are a professional analyst, a student, or simply an individual looking to enhance your spreadsheet skills, mastering the art of saving images in Excel is an invaluable skill that can significantly impact the quality and effectiveness of your work. So, explore these methods, practice them, and discover how they can transform your approach to data visualization and communication.