Intro
The importance of visualizing data in a clear and concise manner cannot be overstated, especially in the realm of business and finance. One of the most effective tools for achieving this is the waterfall diagram, also known as a bridge chart or waterfall chart. This type of chart is particularly useful for showing how an initial value is affected by a series of positive or negative values, leading to a final result. When it comes to creating waterfall diagrams, Microsoft Excel is one of the most powerful and widely used tools available. In this article, we will explore five ways to create a waterfall diagram in Excel, highlighting the benefits and steps involved in each method.
Understanding the concept of a waterfall diagram is crucial before diving into the creation process. Essentially, it's a chart that helps in visualizing the cumulative effect of a series of values, either positive or negative, on an initial value. This can be incredibly useful in various scenarios, such as analyzing profit and loss statements, understanding changes in stock prices over time, or even tracking the progress of a project. The versatility of waterfall diagrams makes them an indispensable tool in data analysis and presentation.
The process of creating a waterfall diagram in Excel can vary, depending on the version of Excel you are using and your personal preference. Some methods involve using built-in Excel charts and formatting them to resemble a waterfall diagram, while others might require the use of additional tools or add-ins. Regardless of the method chosen, the end goal is to produce a clear, easy-to-understand visual representation of your data that can help in making informed decisions or presenting complex information in a simplified manner.
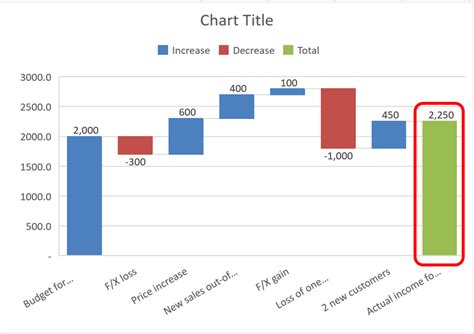
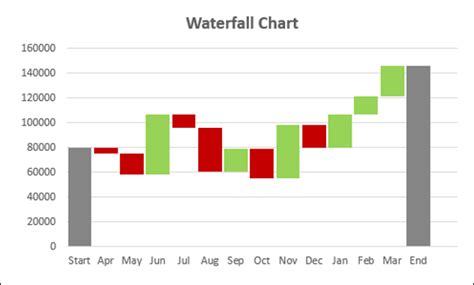
Method 1: Using Excel's Built-in Waterfall Chart

Benefits of Using Excel's Built-in Waterfall Chart
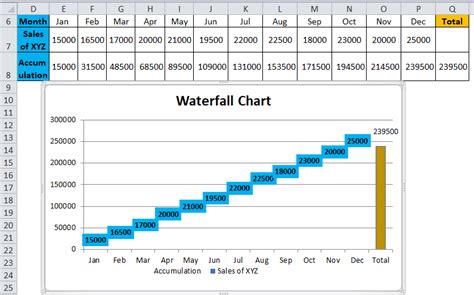
Using Excel's built-in waterfall chart feature offers several benefits, including ease of use and the ability to quickly create a professional-looking chart. This method also allows for easy customization, enabling you to change colors, add labels, and modify the chart's appearance to fit your presentation or report needs. Furthermore, since this feature is native to Excel, you don't need to worry about compatibility issues or the need for additional software.Method 2: Creating a Waterfall Diagram Using Stacked Columns
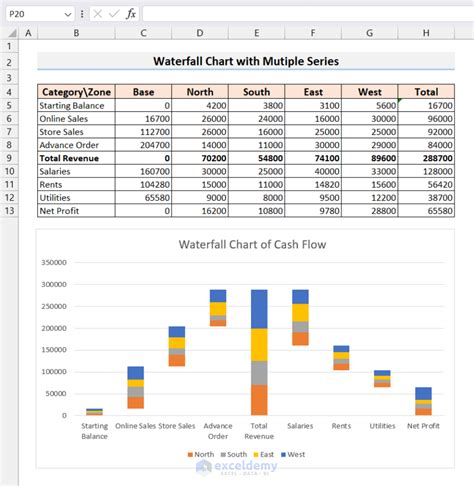
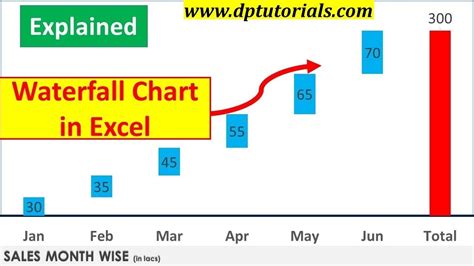
Steps to Create a Waterfall Diagram Using Stacked Columns
1. **Prepare Your Data**: Ensure your data is organized with the initial value, followed by the series of changes (positive and negative), and ending with the final value. 2. **Create a Stacked Column Chart**: Select your data and insert a stacked column chart. 3. **Format the Chart**: Customize the chart to make it look like a waterfall diagram, which involves changing colors, adding lines to connect the columns, and possibly adjusting the axis.Method 3: Utilizing Add-ins for Advanced Waterfall Diagrams

Benefits of Using Add-ins for Waterfall Diagrams
Add-ins can significantly enhance the functionality of Excel when it comes to creating waterfall diagrams. They can provide more advanced customization options, simplify the process of updating charts when data changes, and even offer templates for common types of waterfall diagrams. However, it's essential to choose reputable add-ins to avoid compatibility issues or security risks.Method 4: Manually Creating a Waterfall Diagram
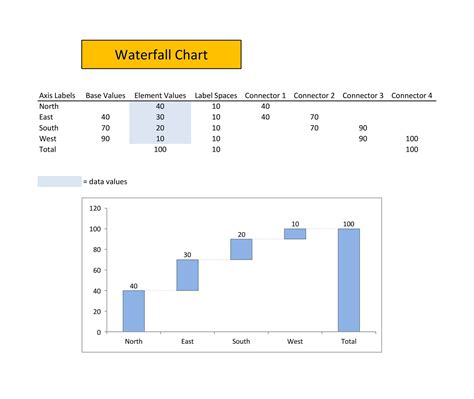
Steps to Manually Create a Waterfall Diagram
1. **Plan Your Diagram**: Decide on the layout and appearance of your waterfall diagram. 2. **Use Drawing Tools**: Utilize Excel's drawing tools to create the basic shapes of the diagram. 3. **Add Data**: Manually add your data to the diagram, using formulas to calculate the positions and sizes of the columns.Method 5: Using Excel Templates for Waterfall Diagrams

Benefits of Using Excel Templates
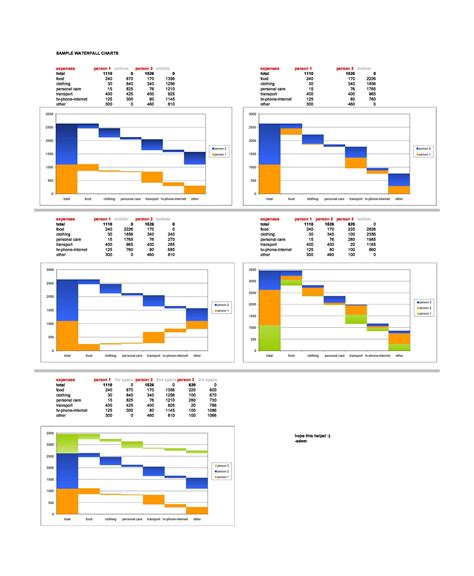
Using Excel templates for waterfall diagrams can save time and effort. These templates are often designed with best practices in mind, ensuring that your diagram is not only visually appealing but also easy to understand. Additionally, templates can be easily customized to fit your specific needs, making them a versatile option for creating waterfall diagrams.Waterfall Diagram Image Gallery


What is a Waterfall Diagram?
+A waterfall diagram, also known as a bridge chart or waterfall chart, is a type of chart that shows how an initial value is affected by a series of positive or negative values, leading to a final result.
How Do I Create a Waterfall Diagram in Excel?
+There are several methods to create a waterfall diagram in Excel, including using the built-in waterfall chart feature, creating a stacked column chart, utilizing add-ins, manually creating the diagram, or using Excel templates.
What Are the Benefits of Using a Waterfall Diagram?
+The benefits of using a waterfall diagram include the ability to clearly visualize the cumulative effect of a series of values, making it easier to understand complex data and make informed decisions.
In conclusion, creating a waterfall diagram in Excel can be achieved through various methods, each with its own set of benefits and requirements. Whether you're using the built-in waterfall chart feature, creating a stacked column chart, utilizing add-ins, manually creating the diagram, or using Excel templates, the key is to choose the method that best fits your needs and skill level. By mastering the art of creating waterfall diagrams in Excel, you can significantly enhance your data presentation and analysis capabilities, making complex information more accessible and understandable. We invite you to share your experiences with creating waterfall diagrams in Excel, ask questions, or explore more topics related to data visualization and analysis.