Intro
Learn to Excel highlight a row using formulas, conditional formatting, and shortcuts, making data analysis easier with highlighting techniques and row formatting options.
Highlighting a row in Excel can be a useful way to draw attention to specific data, make it easier to read, or simply to organize your spreadsheet. Excel offers several methods to highlight rows, each serving different purposes such as conditional formatting, manual formatting, or using formulas. Let's delve into the various ways you can highlight a row in Excel.
To begin with, it's essential to understand the basics of Excel and how it can be used for data analysis and presentation. Excel is a powerful tool that allows users to create spreadsheets, charts, and graphs to visualize data. Highlighting rows is just one of the many features that Excel offers to make data more readable and understandable.
Highlighting rows can be particularly useful when working with large datasets. It helps to distinguish between different types of data, such as headers, footers, and body content. Moreover, highlighting rows can also be used to indicate trends, patterns, or anomalies in the data, making it easier to analyze and interpret.
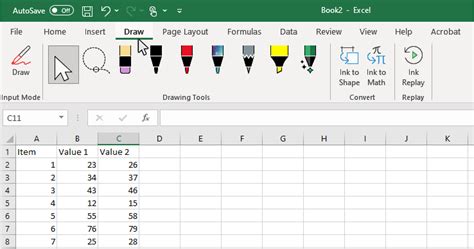
Manual Highlighting

Manual highlighting is the most straightforward method. It involves selecting the row you want to highlight and then applying a background color or fill to it. Here’s how you can do it:
- Select the row you want to highlight by clicking on the row number on the left side of the Excel sheet.
- Go to the "Home" tab in the ribbon.
- Click on the "Fill Color" button in the "Font" group.
- Choose a color from the palette to apply it to the selected row.
Conditional Formatting

Conditional formatting is a powerful feature in Excel that allows you to highlight rows based on specific conditions or rules. This can be particularly useful for highlighting rows that contain certain values, formulas, or formatting. To apply conditional formatting:
- Select the range of cells you want to apply the formatting to.
- Go to the "Home" tab and click on "Conditional Formatting" in the "Styles" group.
- Choose a rule type, such as "Highlight Cells Rules" or "Top/Bottom Rules," and follow the prompts to set up your rule.
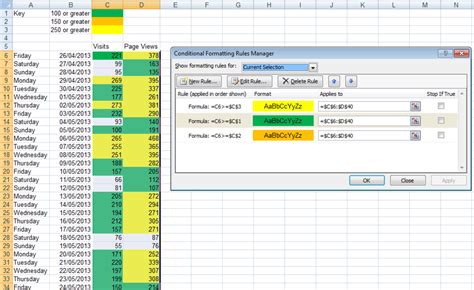
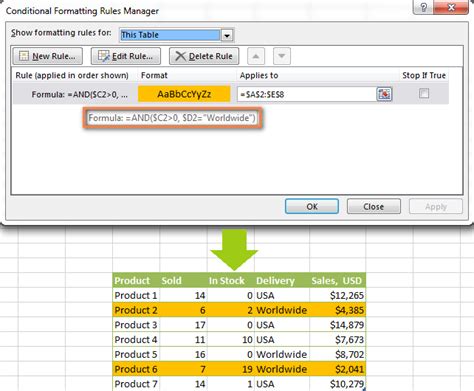
Using Formulas for Conditional Formatting

For more complex conditions, you can use formulas with conditional formatting. This allows you to highlight rows based on calculations or comparisons across different cells. To use a formula:
- Select the range of cells.
- Go to "Conditional Formatting" > "New Rule."
- Choose "Use a formula to determine which cells to format."
- Enter your formula, starting with an equals sign (=), and click "Format" to choose how you want to highlight the cells.
- Click "OK" to apply the rule.
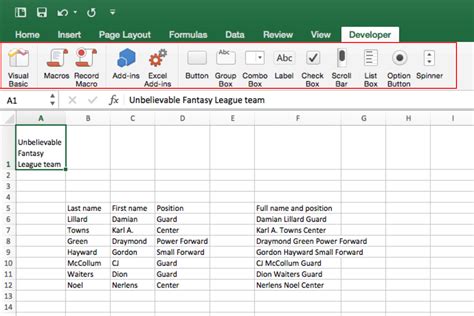
VBA Macros for Dynamic Highlighting
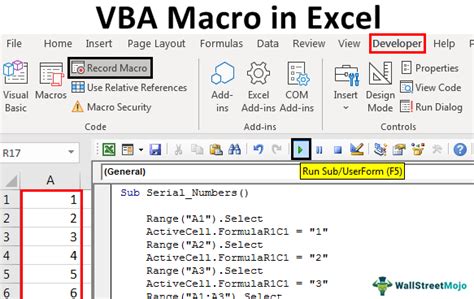
For dynamic highlighting that updates automatically based on changes in your data, you can use VBA (Visual Basic for Applications) macros. This involves writing a small script that Excel can execute to apply highlighting based on specific conditions. To create a VBA macro:
- Press "Alt + F11" to open the VBA Editor.
- In the Project Explorer, find your workbook and insert a new module.
- Write your macro code. For example, to highlight rows where a specific column contains a certain value, you might use a loop to check each cell in that column and apply formatting accordingly.
- Save your macro and run it, or set it to run automatically when the workbook opens.
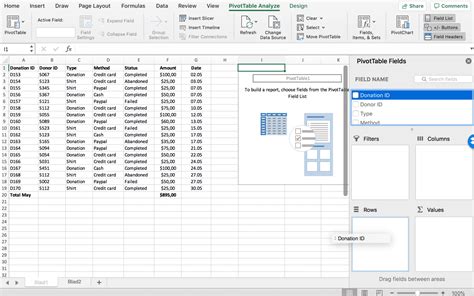
Highlighting Rows with PivotTables
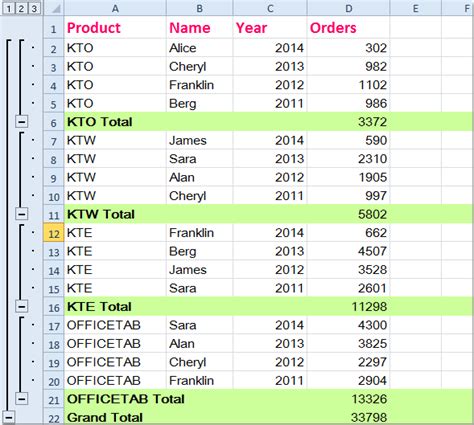
PivotTables are another powerful tool in Excel for summarizing and analyzing large datasets. You can use PivotTables to highlight rows based on summary data. For instance, you can highlight the top or bottom performers in a category. To do this:
- Create a PivotTable from your data.
- Right-click on a value field in the PivotTable and select "Value Field Settings."
- Go to the "Layout & Format" tab and check "For empty cells show:" to customize how empty cells are displayed.
- Use the "Conditional Formatting" feature directly on the PivotTable to highlight rows based on conditions.
Best Practices for Highlighting Rows

When highlighting rows, it's essential to follow best practices to ensure your spreadsheet remains clear and easy to understand:
- Use highlighting sparingly to avoid visual clutter.
- Choose colors that contrast well with your data and the default background.
- Be consistent in how you highlight different types of data.
- Consider using other formatting options like borders or font colors to differentiate between data types.
Common Challenges and Solutions

While highlighting rows can be very useful, you might encounter some challenges, such as formatting being lost when data is updated or difficulties in applying consistent formatting across large datasets. Solutions include:
- Using absolute references in formulas to ensure formatting rules are applied correctly even when data changes.
- Utilizing Excel's built-in formatting tools and shortcuts to efficiently apply and manage formatting.
- Regularly reviewing and updating your formatting to ensure it remains relevant and effective.
Gallery of Excel Highlighting Options
Excel Highlighting Gallery


How do I highlight an entire row in Excel?
+To highlight an entire row, click on the row number on the left side of the Excel sheet to select it, then use the "Fill Color" button in the "Home" tab to apply your desired color.
Can I highlight rows based on specific conditions?
+Yes, you can use conditional formatting to highlight rows based on specific conditions. Select your range, go to "Conditional Formatting," and choose a rule type or use a formula to determine which cells to format.
How do I make my highlighting dynamic so it updates with my data?
+You can make your highlighting dynamic by using formulas with conditional formatting or by creating VBA macros that apply formatting based on the current state of your data.
In conclusion, highlighting rows in Excel is a versatile feature that can enhance the readability and understandability of your spreadsheets. Whether you're using manual formatting, conditional formatting, or VBA macros, there's a method to suit your needs. By following the best practices and exploring the different options available, you can effectively use row highlighting to communicate your data insights more clearly. If you have more questions or need further clarification on any of the methods discussed, feel free to ask in the comments. Don't forget to share this article with anyone who might find it useful, and consider exploring other Excel features to take your data analysis to the next level.