Intro
Learn how to Excel highlight row selected using formulas and conditional formatting, making data analysis easier with automatic row highlighting and cell shading techniques.
When working with Excel, highlighting a selected row can be incredibly useful for visualizing and organizing data. This feature helps users quickly identify the row they are currently working on, making it easier to navigate through large spreadsheets. Excel offers several ways to highlight a selected row, and understanding these methods can significantly enhance your productivity.
The importance of highlighting a selected row in Excel cannot be overstated. It improves data readability, reduces errors, and enhances the overall user experience. Whether you are working on financial reports, data analysis, or simply managing a list, being able to visually distinguish between rows is crucial. Moreover, Excel's conditional formatting and highlighting capabilities allow for a more dynamic and interactive spreadsheet, enabling users to apply different formats based on various conditions.
Excel's ability to highlight rows based on selection or conditions is a testament to its versatility and power as a spreadsheet software. By leveraging these features, users can create more intuitive and user-friendly spreadsheets. The process of highlighting a row can be as simple as selecting a cell and applying a basic format or as complex as creating custom rules for conditional formatting. Excel caters to a wide range of needs, from basic data management to advanced data analysis and visualization.
Why Highlight Rows in Excel?
Highlighting rows in Excel serves multiple purposes. It can be used to draw attention to specific data, differentiate between various types of information, or simply to make the spreadsheet more aesthetically pleasing. For individuals working with large datasets, this feature can be particularly useful in identifying patterns, trends, or outliers. Moreover, when collaborating with others, highlighted rows can serve as a visual cue, indicating which data points are most relevant or require immediate attention.
Benefits of Row Highlighting
The benefits of highlighting rows in Excel are numerous: - **Enhanced Visualization**: Highlighting makes it easier to see which row you're working on, especially in large spreadsheets. - **Improved Organization**: It helps in categorizing and distinguishing between different types of data. - **Error Reduction**: By clearly identifying the row being edited, it reduces the chance of making changes to the wrong data. - **Collaboration**: It serves as a clear indicator of important data when sharing spreadsheets with others.How to Highlight a Selected Row in Excel
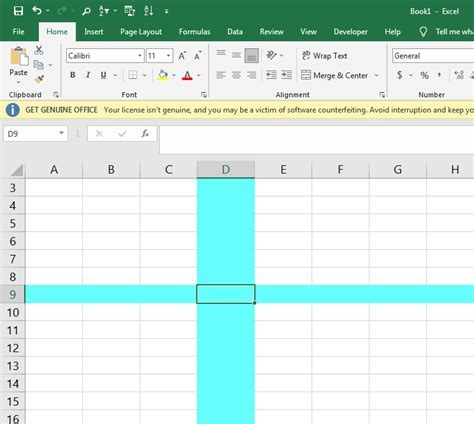
To highlight a selected row in Excel, you can follow a few simple steps:
- Select the Row: Click on the row number on the left side of the Excel window to select the entire row.
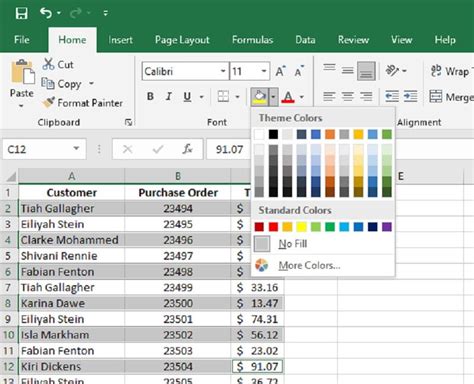
- Use the Format as Table Option: Go to the "Home" tab, find the "Styles" group, and click on "Format as Table." Choose a style that suits your needs. This method not only highlights the row but also applies a visually appealing format to your data.
- Apply Conditional Formatting: For a more dynamic approach, use conditional formatting. Select your data range, go to the "Home" tab, find the "Styles" group, and click on "Conditional Formatting." You can choose from several options, such as highlighting cells rules, top/bottom rules, or use formulas to determine which cells to format.
Conditional Formatting for Dynamic Highlighting
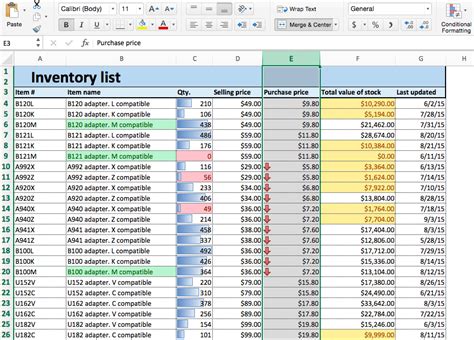
Conditional formatting is a powerful tool in Excel that allows you to highlight cells based on specific conditions. To dynamically highlight a row based on the value of a cell: - Select the range of cells you want to format. - Go to the "Home" tab and click on "Conditional Formatting." - Choose "New Rule" and select "Use a formula to determine which cells to format." - Enter a formula that refers to the cell you want to use as the condition. For example, if you want to highlight the row if the value in column A is greater than 10, you could use `=$A1>10`. - Click "Format" to choose how you want to highlight the cells. - Click "OK" to apply the rule.Advanced Row Highlighting Techniques

For more advanced users, Excel offers various techniques to enhance row highlighting:
- VBA Macros: You can create macros to automatically highlight rows based on specific conditions. This involves writing a small script that Excel can execute.
- PivotTables: Highlighting rows in PivotTables can help in data analysis. You can use the "Conditional Formatting" feature directly on the PivotTable.
- Custom Formatting: Excel allows for extensive customization of cell and row formats, enabling you to create unique visualizations tailored to your data.
Using VBA for Automated Row Highlighting
VBA (Visual Basic for Applications) is a powerful tool within Excel that allows for automation of tasks, including row highlighting. To create a macro that highlights rows: - Open the Visual Basic Editor by pressing `Alt + F11` or navigating to "Developer" tab and clicking on "Visual Basic." - Insert a new module by right-clicking on any of the objects for your workbook in the "Project" window and choosing "Insert" > "Module." - Write a script that loops through your data range and applies formatting based on your conditions. - Save your workbook as a macro-enabled file.Best Practices for Row Highlighting in Excel
To get the most out of row highlighting in Excel, consider the following best practices:
- Consistency: Use consistent formatting throughout your spreadsheet to avoid confusion.
- Clarity: Ensure that your highlighting does not obscure important data. Choose formats that are clear and visible.
- Purpose: Only highlight rows that serve a purpose, such as drawing attention to important data or differentiating between types of information.
Common Mistakes to Avoid
When highlighting rows in Excel, there are a few common mistakes to avoid: - Overuse of highlighting, which can make the spreadsheet look cluttered and reduce the effectiveness of the highlighting. - Inconsistent use of colors or formats, which can confuse the reader. - Not considering the audience and the purpose of the spreadsheet when deciding how to highlight rows.Excel Highlight Row Image Gallery


How do I highlight a row in Excel based on a condition?
+To highlight a row in Excel based on a condition, use the Conditional Formatting feature. Select the range of cells, go to the Home tab, click on Conditional Formatting, and choose New Rule. Then, select "Use a formula to determine which cells to format" and enter your condition.
Can I automate row highlighting in Excel?
+Yes, you can automate row highlighting in Excel by using VBA macros. This involves writing a script that loops through your data range and applies formatting based on your conditions.
What are some best practices for highlighting rows in Excel?
+Best practices include using consistent formatting, ensuring clarity so that important data is not obscured, and only highlighting rows that serve a purpose. It's also important to consider the audience and the purpose of the spreadsheet.
In conclusion, highlighting rows in Excel is a powerful tool for data visualization and organization. By understanding the various methods and best practices for row highlighting, users can create more effective and intuitive spreadsheets. Whether through basic formatting, conditional formatting, or advanced techniques like VBA macros, Excel provides a range of options to suit different needs and preferences. As you explore the capabilities of Excel, remember to share your experiences, ask questions, and continue learning to get the most out of this versatile software. Feel free to comment below with your favorite Excel tips or tricks for highlighting rows, and don't forget to share this article with others who might benefit from mastering Excel's row highlighting features.