Intro
Creating a histogram in Excel is a straightforward process that helps in visualizing the distribution of data. However, by default, Excel might not always start the histogram from 0, which can be misleading, especially when comparing different datasets or when the scale of the data is important. Here’s how you can ensure your Excel histogram starts at 0, providing a more accurate and comparable representation of your data.
First, let’s understand why starting a histogram at 0 is important. In many cases, especially when dealing with counts, percentages, or any data that logically should start from 0, beginning the scale at a non-zero value can distort the perception of the data. For instance, if you're comparing the sales of different products and one product's sales histogram starts at 10 while another's starts at 0, it might give a skewed view of which product is selling better, especially if the scale doesn't clearly indicate the starting point.
To create a histogram in Excel that starts at 0, follow these steps:
Step 1: Prepare Your Data
Ensure your data is organized in a column. This could be any set of numerical data you wish to analyze, such as exam scores, product sales, or measurement data.
Step 2: Create a Histogram
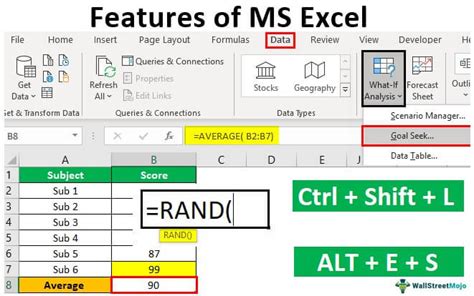
- Go to the "Data" tab in Excel.
- Click on "Data Analysis" in the Analysis group. If you don’t see this, you might need to activate the Analysis ToolPak add-in.
- Select "Histogram" and click "OK."
- In the Histogram dialog box, select the range of your data and the bin range (the intervals into which the data will be grouped).
- Check the "Chart Output" box to create a histogram chart.
- Click "OK" to generate the histogram.
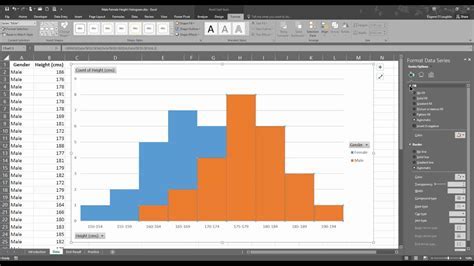
Step 3: Adjust the Axis to Start at 0
By default, Excel might not start the vertical axis (value axis) at 0. To adjust this:
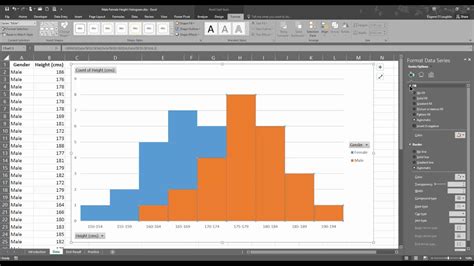
- Click on the histogram chart to select it.
- Right-click on the vertical axis and select "Format Axis."
- In the Format Axis pane, under Axis Options, find the section for Vertical axis crosses.
- Select "At" and then enter 0 in the box. This sets the axis to cross at 0.
- Additionally, you can adjust the Minimum bound to 0 if it's not already set, to ensure the axis starts at 0.
Alternatively, if you're using Excel 2016 or later, you can also use the built-in "Histogram" chart type, which can be found under the "Insert" tab > "Insert Statistic Chart" > "Histogram." After creating the chart, you can adjust the axis settings as described above to ensure it starts at 0.
Step 4: Final Adjustments
- Adjust Bins: Sometimes, the default bin settings might not provide the clearest view of your data. You can adjust the bin range and intervals to better suit your analysis needs.
- Add Titles and Labels: Make your chart more understandable by adding a title to the chart and labels to the axes.
- Customize Appearance: Excel offers various themes and customization options to make your histogram more visually appealing.

Benefits of Customizing Your Histogram
Customizing your histogram, including ensuring it starts at 0, provides several benefits:
- Accurate Representation: It gives a more accurate visual representation of your data, especially when dealing with data types that logically start from 0.
- Comparability: It allows for more direct comparisons between different datasets when each histogram is scaled from 0.
- Clarity: Starting the axis at 0 can make the histogram easier to understand, as it provides a clear baseline for the data distribution.
Common Challenges and Solutions
- Non-Numeric Data: Ensure your data is numeric. If your data includes text or other non-numeric values, you may need to clean it before creating a histogram.
- Negative Values: If your data includes negative values and you still want the axis to start at 0, you can adjust the minimum bound of the axis accordingly.
- Excel Version: Some features might vary between different versions of Excel. The steps above are generally applicable, but you might need to adjust them slightly depending on your Excel version.
Conclusion and Next Steps
Creating a histogram in Excel that starts at 0 is a simple yet effective way to enhance the clarity and comparability of your data analysis. By following the steps outlined above and customizing your histogram as needed, you can gain deeper insights into your data and communicate your findings more effectively. Whether you're analyzing sales data, student scores, or any other type of numerical data, ensuring your histogram scales from 0 can make a significant difference in how your data is perceived and understood.
Excel Histogram Image Gallery

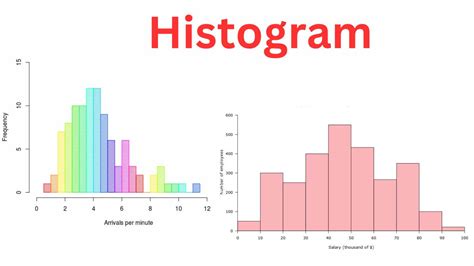

What is the purpose of a histogram in data analysis?
+A histogram is used to visualize the distribution of data, showing how frequently each different value in a set of data occurs.
How do I create a histogram in Excel?
+To create a histogram in Excel, go to the Data tab, click on Data Analysis, select Histogram, and follow the prompts to input your data and bin range.
Why is it important for a histogram to start at 0?
+Starting a histogram at 0 provides a clear baseline for the data, making it easier to compare different datasets and understand the distribution of the data.
We hope this guide has been helpful in creating Excel histograms that start at 0, enhancing your data analysis capabilities. Feel free to share your experiences or ask further questions in the comments below.