Intro
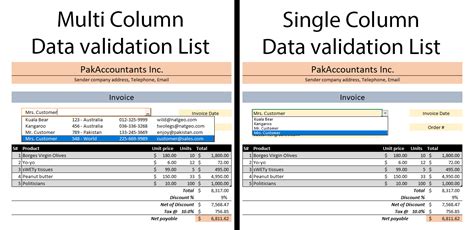
The ability to show a drop-down arrow in Excel can be incredibly useful for creating interactive and user-friendly spreadsheets. This feature, often utilized through data validation, allows users to select from a predefined list of options, making data entry more efficient and reducing errors. In this article, we will delve into the importance of using drop-down arrows in Excel, how to create them, and explore various scenarios where they can be particularly beneficial.
When working with Excel, especially in collaborative or data-intensive environments, ensuring that data is entered consistently and accurately is paramount. One of the challenges users face is maintaining data integrity while still allowing for flexibility in data entry. This is where the drop-down arrow feature comes into play, offering a simple yet effective solution. By limiting input to a set list of options, you can prevent incorrect data from being entered, thereby maintaining the integrity of your dataset.
Moreover, drop-down arrows can significantly enhance the user experience of your Excel spreadsheet. Imagine a scenario where you're creating a form or a survey within Excel, and you need respondents to select from a list of predefined choices. Without the drop-down feature, users might have to manually type their selections, which could lead to typos, inconsistencies, and ultimately, more work for you in cleaning up the data. By incorporating drop-down arrows, you make it easier for users to interact with your spreadsheet, reducing the potential for errors and making the overall experience more intuitive.
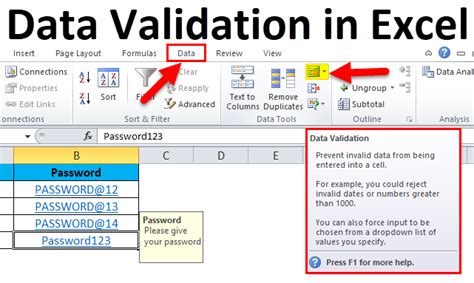
Introduction to Data Validation
To create a drop-down arrow in Excel, you'll be using the data validation feature. Data validation is a powerful tool that allows you to control what a user can enter into a cell. It can be used to restrict input to a specific range of numbers, dates, times, or even a list of items. For the purpose of creating a drop-down arrow, we're interested in the list feature.
Creating a Drop-Down Arrow
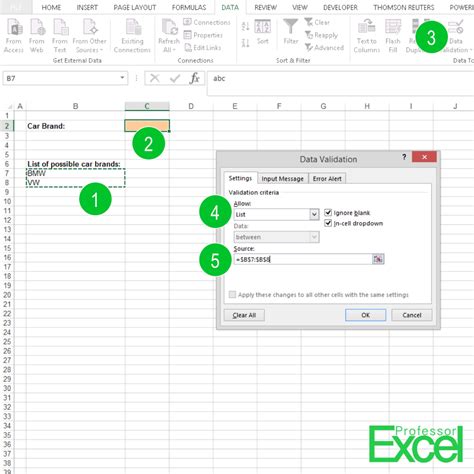
Creating a drop-down arrow in Excel is relatively straightforward. Here's a step-by-step guide:
- Select the Cell: Start by selecting the cell where you want the drop-down arrow to appear.
- Go to Data Validation: Navigate to the "Data" tab in the ribbon, find the "Data Tools" group, and click on "Data Validation."
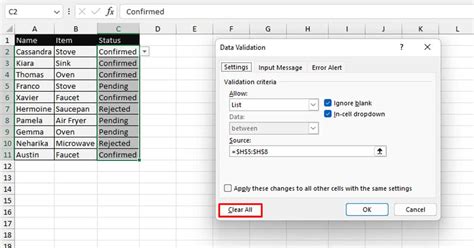
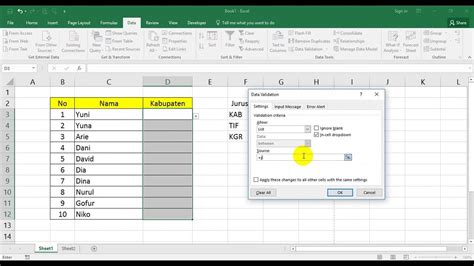
- Settings: In the Data Validation dialog box, under the "Settings" tab, click on the "Allow" dropdown menu and select "List."
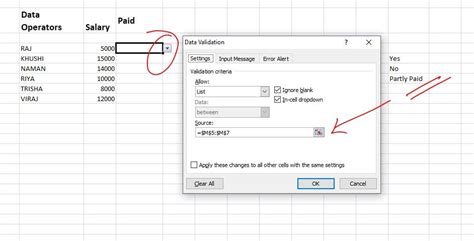
- Source: In the "Source" field, you can either directly type in your list of items separated by commas or reference a range of cells that contains your list. If your list is in a range of cells, you can select that range.
- Apply: Click "OK" to apply your changes. You should now see a drop-down arrow appear in the cell you selected.
Using Drop-Down Arrows in Different Scenarios
Drop-down arrows can be used in a variety of scenarios to enhance the functionality and usability of your Excel spreadsheets. Here are a few examples:
- Surveys and Forms: When creating surveys or forms in Excel, drop-down arrows can be used to present respondents with a list of options to choose from, making it easier for them to fill out the form and for you to analyze the data.
- Data Entry: For data entry tasks, drop-down arrows can help ensure consistency by limiting the options available to the user. This is particularly useful in scenarios where specific categories or codes need to be used.
- Dashboards and Reports: In interactive dashboards or reports, drop-down arrows can be used to allow users to select different data sets or parameters, thereby customizing the output without needing to manipulate the underlying data.
Advanced Uses of Data Validation
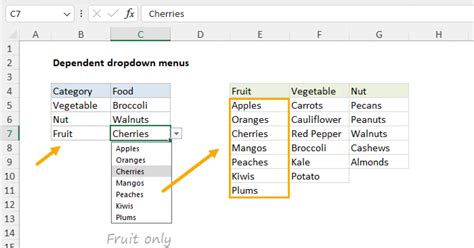
While the basic use of data validation for creating drop-down arrows is straightforward, there are more advanced techniques you can employ to further enhance your spreadsheets. For instance, you can use named ranges or references to make your lists dynamic, allowing them to update automatically when the source data changes.
Moreover, combining data validation with other Excel features, such as conditional formatting or macros, can lead to even more sophisticated and interactive spreadsheets. For example, you could use conditional formatting to highlight cells based on the selection made from a drop-down list, or use macros to perform actions automatically when a certain option is selected.
Practical Examples
To illustrate the practical application of drop-down arrows, consider the following scenarios:
- Order Form: You're creating an order form in Excel where customers can select the product they wish to purchase. By using a drop-down arrow, you can ensure that only valid products are selected, and you can even link this to a pricing table to automatically calculate the cost.
- Employee Database: In an employee database, you might use drop-down arrows to select job titles, departments, or locations, ensuring that data entry is consistent and reducing the chance of errors.
Tips and Tricks
When working with drop-down arrows in Excel, here are a few tips to keep in mind:
- Keep Lists Short: While drop-down arrows can be very useful, long lists can be overwhelming. Try to keep your lists as short as possible to make them user-friendly.
- Use Descriptive Names: When referencing ranges for your lists, use descriptive names to make your formulas easier to understand and maintain.
- Test Thoroughly: Always test your drop-down arrows to ensure they're working as expected, especially if you're using advanced features like dynamic ranges.
Gallery of Excel Drop Down Arrows
Excel Drop Down Arrow Gallery

FAQs
How do I create a drop-down arrow in Excel?
+To create a drop-down arrow in Excel, go to the Data tab, select Data Validation, choose List from the Allow dropdown, and then specify your source as either a range of cells or a list of items separated by commas.
Can I use drop-down arrows in Excel for anything else besides lists?
+Yes, while drop-down arrows are most commonly associated with lists, the data validation feature in Excel can be used for a variety of purposes, including restricting input to certain numbers, dates, or formulas.
How do I make my drop-down list dynamic in Excel?
+To make your drop-down list dynamic, you can use a named range that references a table or range that can be updated. As the source data changes, your drop-down list will automatically update to reflect those changes.
In conclusion, the use of drop-down arrows in Excel, facilitated through the data validation feature, offers a powerful tool for enhancing the usability and integrity of your spreadsheets. By understanding how to create and apply drop-down arrows effectively, you can streamline data entry, reduce errors, and create more interactive and user-friendly Excel applications. Whether you're working on personal projects, collaborative team efforts, or professional assignments, mastering the drop-down arrow is a skill that can significantly improve your workflow and productivity in Excel. We invite you to share your experiences with using drop-down arrows in Excel, ask questions, or explore more advanced techniques for leveraging this feature to its full potential.