Intro
The ability to delete rows in Excel using VBA (Visual Basic for Applications) is a powerful tool for automating tasks and managing data efficiently. Whether you're dealing with a small dataset or a large, complex spreadsheet, knowing how to programmatically delete rows can save you a significant amount of time and effort. In this article, we'll explore five different ways to delete rows in Excel using VBA, each with its own set of applications and benefits.
Deleting rows in Excel VBA can be approached in several ways, depending on your specific needs. You might want to delete rows based on certain conditions, such as the value in a specific column, or you might need to delete entire rows that contain blank cells. Whatever the case, mastering these techniques can elevate your Excel skills and make you more proficient in data management.
Understanding the Basics of VBA in Excel
Before diving into the methods of deleting rows, it's essential to have a basic understanding of how VBA works in Excel. VBA is a programming language that allows you to create and automate tasks within the Microsoft Office applications, including Excel. You can access the VBA editor by pressing Alt + F11 or by navigating to the Developer tab and clicking on Visual Basic. If the Developer tab is not visible, you can add it through Excel's settings.
Method 1: Deleting a Specific Row
To delete a specific row, you can use the Rows object followed by the row number and then the Delete method. For example, to delete the fifth row, you would use the following code:
Rows(5).Delete
This code is straightforward and directly targets the row you want to delete.
Step-by-Step Guide to Deleting a Specific Row
- Open the VBA editor.
- In the editor, insert a new module by right-clicking on any of the objects for your workbook in the Project Explorer, then choose
Insert>Module. - Type
Rows(5).Deleteto delete the fifth row. - Press
F5to run the code.
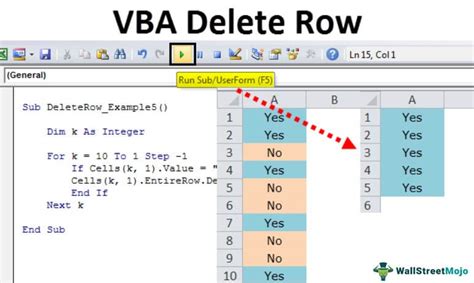
Method 2: Deleting Rows Based on Conditions
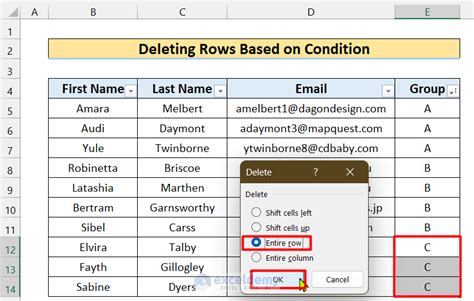
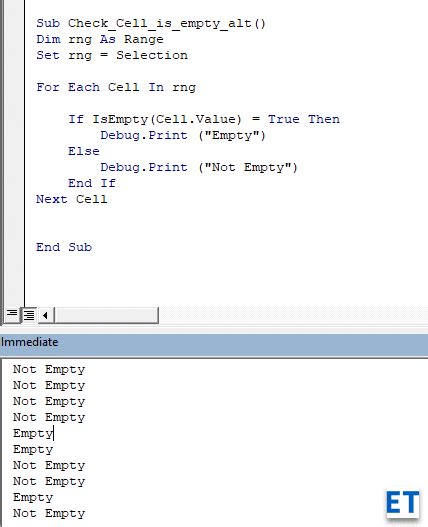
Often, you might need to delete rows based on specific conditions, such as the value in a particular column. This can be achieved by looping through the rows and checking the condition for each row. Here's an example that deletes rows where the value in column A is "Delete":
Dim ws As Worksheet
Set ws = ThisWorkbook.Sheets("Sheet1")

For i = ws.Cells(ws.Rows.Count, "A").End(xlUp).Row To 1 Step -1
    If ws.Cells(i, "A").Value = "Delete" Then
        ws.Rows(i).Delete
    End If
Next i
This method is more flexible and allows for dynamic decision-making based on your data.
Understanding the Loop
- The loop starts from the last row with data in column A and moves upwards to avoid issues with row indices changing after deletion.
ws.Cells(ws.Rows.Count, "A").End(xlUp).Rowfinds the last row with data in column A.Step -1indicates that the loop moves backwards.
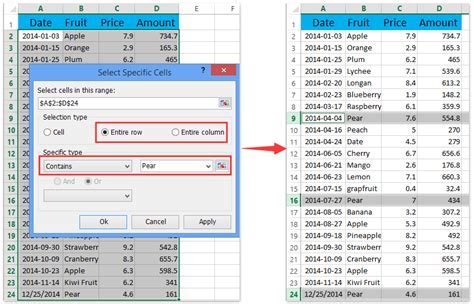
Method 3: Deleting Blank Rows

Deleting blank rows can help clean up your dataset. You can use the SpecialCells method to select blank cells and then delete the entire row. Here's how you can do it:
Dim ws As Worksheet
Set ws = ThisWorkbook.Sheets("Sheet1")

On Error Resume Next
ws.Columns("A").SpecialCells(xlBlanks).EntireRow.Delete
On Error GoTo 0
This method is useful for removing unnecessary blank rows, especially after data manipulation.
Handling Errors
On Error Resume Nextskips any errors that occur during the execution, such as when there are no blank cells.On Error GoTo 0resets the error handling to its default behavior.
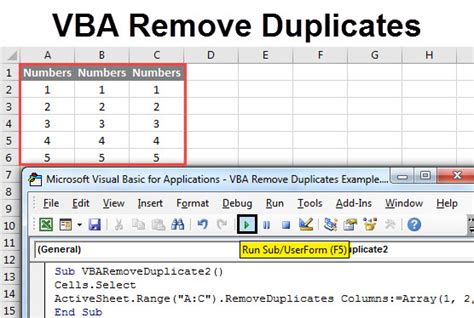
Method 4: Deleting Duplicates
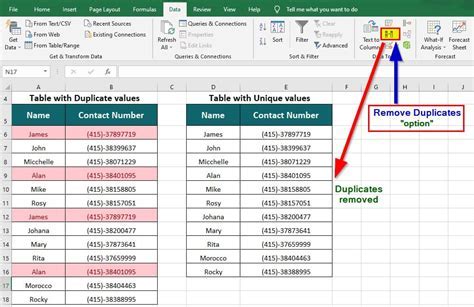
If your dataset contains duplicate rows and you want to remove them, you can use the RemoveDuplicates method. This method allows you to specify which columns to consider when looking for duplicates:
Dim ws As Worksheet
Set ws = ThisWorkbook.Sheets("Sheet1")

ws.Rows(1).RowHeight = 15
ws.Range("A1").EntireColumn.RemoveDuplicates Columns:=1, Header:=xlYes
This is particularly useful for ensuring data uniqueness.
Specifying Columns for Duplicate Removal
Columns:=1means only column A is considered for duplicate removal.Header:=xlYesindicates that the first row is a header and should not be included in the duplicate removal process.
Method 5: Deleting Rows with Errors
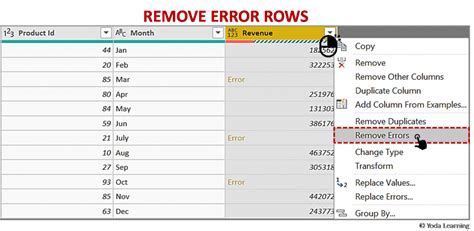
Sometimes, your dataset might contain rows with errors (e.g., #N/A, #VALUE!, etc.), and you might want to delete these rows. You can use the SpecialCells method with the xlErrors argument to select cells with errors and then delete the rows:
Dim ws As Worksheet
Set ws = ThisWorkbook.Sheets("Sheet1")

On Error Resume Next
ws.Cells.SpecialCells(xlCellTypeFormulas, xlErrors).EntireRow.Delete
On Error GoTo 0
This method helps in cleaning up your data by removing rows that contain errors.
Gallery of Excel VBA Examples
Excel VBA Image Gallery


Frequently Asked Questions
How do I enable the Developer tab in Excel to access VBA?
+To enable the Developer tab, go to File > Options > Customize Ribbon, and then check the Developer checkbox in the list of available main tabs.
What is the purpose of using `On Error Resume Next` in VBA code?
+`On Error Resume Next` is used to skip any lines of code that contain errors, allowing the program to continue running instead of stopping on the error line.
How can I loop through all the worksheets in a workbook and perform a specific action on each one?
+You can use a `For Each` loop to iterate through all the worksheets. For example: `For Each ws In ThisWorkbook.Worksheets` followed by your action, and then `Next ws`.
In conclusion, mastering the art of deleting rows in Excel using VBA can significantly enhance your productivity and data management skills. Whether you're dealing with specific conditions, blank rows, duplicates, or errors, there's a method tailored to your needs. By understanding and applying these techniques, you'll be well on your way to becoming an Excel power user. Remember, practice makes perfect, so don't hesitate to experiment with different scenarios and conditions to further hone your skills. If you have any questions or need further clarification on any of the methods discussed, feel free to ask in the comments below.