Intro
Excel VBA drop-down lists are a great way to enhance the user experience and make your spreadsheets more interactive. In this article, we will delve into the world of Excel VBA drop-down lists, exploring their importance, benefits, and how to create them. Whether you're a beginner or an advanced user, this tutorial will guide you through the process of creating and customizing drop-down lists in Excel using VBA.
The importance of drop-down lists in Excel cannot be overstated. They provide a user-friendly way to select data from a predefined list, reducing errors and increasing efficiency. With VBA, you can take drop-down lists to the next level, creating dynamic and interactive lists that respond to user input. In this article, we will cover the basics of Excel VBA drop-down lists, including how to create them, customize them, and use them in your spreadsheets.
Excel VBA drop-down lists are a powerful tool for any Excel user. They can be used to create interactive dashboards, automate tasks, and even create custom user interfaces. With the ability to customize the appearance and behavior of drop-down lists, you can create a unique and personalized user experience. In this article, we will explore the various ways you can use Excel VBA drop-down lists to enhance your spreadsheets and improve your productivity.
Introduction to Excel VBA Drop-Down Lists

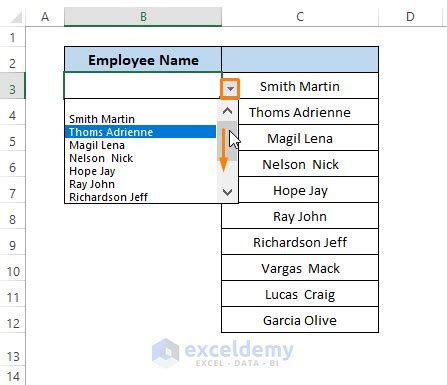
Excel VBA drop-down lists are created using the ComboBox control in the Visual Basic Editor. This control allows you to create a list of items that can be selected by the user. The ComboBox control can be customized to display a list of items, allow users to enter their own text, or even display a list of items based on a range of cells. In this section, we will explore the basics of creating and customizing ComboBox controls in Excel VBA.
To create a ComboBox control in Excel VBA, you need to open the Visual Basic Editor and insert a new User Form. The User Form is where you will create your ComboBox control. Once you have inserted the User Form, you can add a ComboBox control by clicking on the ComboBox tool in the Toolbox and drawing a rectangle on the User Form. This will create a new ComboBox control that you can customize to display a list of items.
Creating a ComboBox Control

To create a ComboBox control, follow these steps:
- Open the Visual Basic Editor by pressing Alt + F11 or by navigating to Developer > Visual Basic in the ribbon.
- Insert a new User Form by clicking on Insert > User Form in the menu.
- Click on the ComboBox tool in the Toolbox and draw a rectangle on the User Form.
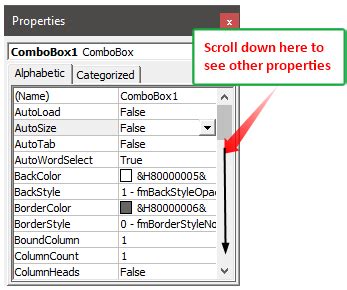
- Right-click on the ComboBox control and select Properties to customize its properties.
The Properties window allows you to customize the appearance and behavior of the ComboBox control. You can change the font, color, and alignment of the text, as well as the size and position of the control. You can also add items to the list by clicking on the Add Item button.
Customizing the ComboBox Control
To customize the ComboBox control, follow these steps:
- Right-click on the ComboBox control and select Properties.
- In the Properties window, change the font, color, and alignment of the text as desired.
- Click on the Add Item button to add items to the list.
- Use the Remove Item button to remove items from the list.
- Use the Move Up and Move Down buttons to reorder the items in the list.
You can also use VBA code to customize the ComboBox control. For example, you can use the AddItem method to add items to the list programmatically. You can also use the RemoveItem method to remove items from the list.
Using VBA Code to Customize the ComboBox Control
To use VBA code to customize the ComboBox control, follow these steps:
- Open the Visual Basic Editor and insert a new module.
- Declare a variable to refer to the ComboBox control.
- Use the AddItem method to add items to the list.
- Use the RemoveItem method to remove items from the list.
For example:
Dim cbo As ComboBox
Set cbo = UserForm1.ComboBox1
cbo.AddItem "Item 1"
cbo.AddItem "Item 2"
cbo.AddItem "Item 3"
This code adds three items to the list. You can also use a loop to add items to the list programmatically.
Using the ComboBox Control in a Worksheet
To use the ComboBox control in a worksheet, you need to create a User Form and add the ComboBox control to it. You can then display the User Form in the worksheet using VBA code.
For example:
Sub ShowUserForm()
    UserForm1.Show
End Sub
This code displays the User Form in the worksheet. You can then select an item from the list and use VBA code to perform an action based on the selection.
Getting the Selected Item

To get the selected item, you can use the Value property of the ComboBox control. For example:
Dim selectedItem As String
selectedItem = UserForm1.ComboBox1.Value
This code gets the selected item and stores it in the selectedItem variable. You can then use this variable to perform an action based on the selection.
Excel VBA Drop-Down Tutorial Image Gallery


What is an Excel VBA drop-down list?
+An Excel VBA drop-down list is a user interface element that allows users to select an item from a predefined list.
How do I create an Excel VBA drop-down list?
+To create an Excel VBA drop-down list, you need to open the Visual Basic Editor and insert a new User Form. You can then add a ComboBox control to the User Form and customize its properties.
How do I get the selected item from an Excel VBA drop-down list?
+To get the selected item from an Excel VBA drop-down list, you can use the Value property of the ComboBox control. For example: Dim selectedItem As String, selectedItem = UserForm1.ComboBox1.Value.
We hope this article has provided you with a comprehensive guide to creating and customizing Excel VBA drop-down lists. Whether you're a beginner or an advanced user, we encourage you to experiment with the techniques and examples provided in this article. If you have any questions or need further assistance, please don't hesitate to ask. Share this article with your friends and colleagues, and let us know what you think in the comments below. Happy coding!