Intro
Easily export Quicken to Excel with step-by-step guides, converting financial data seamlessly, and learn tips for smooth migration, data analysis, and budgeting management.
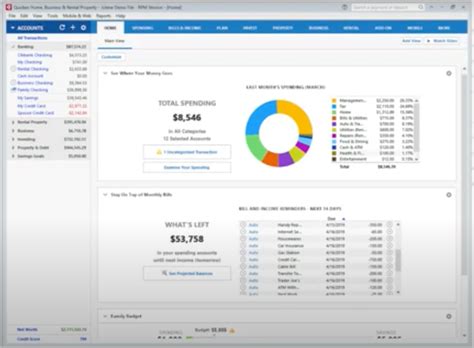
Exporting data from Quicken to Excel can be a straightforward process, allowing users to analyze and manipulate their financial information more efficiently. Quicken, a popular personal finance management tool, offers various features to help users track their expenses, create budgets, and set financial goals. However, sometimes users may need to export their data to Excel for more advanced analysis or to create custom reports. In this article, we will guide you through the process of exporting Quicken data to Excel easily.
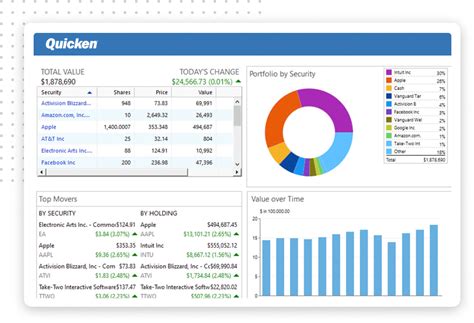
Quicken provides a seamless way to manage personal finances, but Excel offers more advanced features for data analysis and visualization. By exporting Quicken data to Excel, users can take advantage of Excel's powerful tools, such as pivot tables, charts, and formulas, to gain deeper insights into their financial situation. Whether you want to track your investments, create a budget, or simply analyze your spending habits, exporting Quicken data to Excel can be a valuable step in achieving your financial goals.
The process of exporting Quicken data to Excel is relatively simple and can be completed in a few steps. First, users need to prepare their Quicken data by ensuring that it is up-to-date and accurate. This involves reconciling accounts, updating transactions, and verifying that all data is correctly categorized. Once the data is ready, users can export it to Excel using Quicken's built-in export feature. This feature allows users to select the type of data they want to export, such as transactions, accounts, or investments, and choose the format, including Excel.
Preparing Quicken Data for Export
Before exporting Quicken data to Excel, it is essential to prepare the data to ensure that it is accurate and up-to-date. This involves several steps, including reconciling accounts, updating transactions, and verifying that all data is correctly categorized. Reconciling accounts helps to ensure that the data in Quicken matches the data in the user's bank or financial institution. Updating transactions involves adding any new transactions, such as deposits or withdrawals, and verifying that all transactions are correctly dated and categorized.
Reconciling Accounts in Quicken
Reconciling accounts in Quicken is a straightforward process that involves comparing the data in Quicken with the data in the user's bank or financial institution. This helps to ensure that the data in Quicken is accurate and up-to-date. To reconcile an account in Quicken, users need to follow these steps: * Open Quicken and select the account they want to reconcile * Click on the "Reconcile" button and select the account type * Enter the ending balance and the date of the statement * Compare the transactions in Quicken with the transactions on the statement * Make any necessary adjustments to the transactions in QuickenExporting Quicken Data to Excel

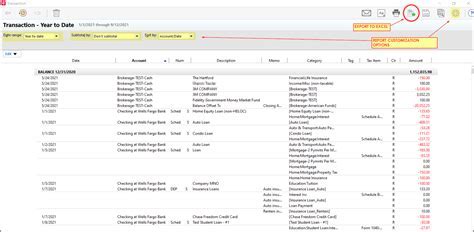
Once the Quicken data is prepared, users can export it to Excel using Quicken's built-in export feature. This feature allows users to select the type of data they want to export, such as transactions, accounts, or investments, and choose the format, including Excel. To export Quicken data to Excel, users need to follow these steps:
- Open Quicken and select the data they want to export
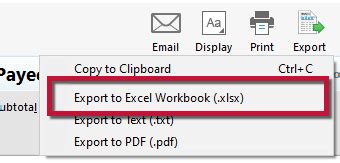
- Click on the "File" menu and select "Export"
- Choose the format, such as Excel, and select the location where they want to save the file
- Click on the "Export" button to start the export process
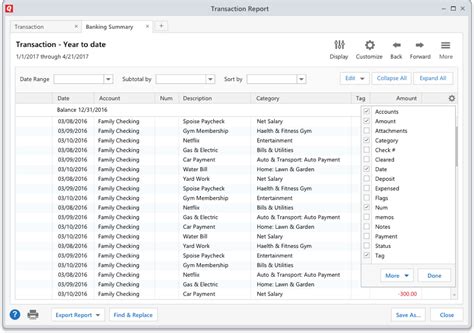
Choosing the Right Export Options
When exporting Quicken data to Excel, users need to choose the right export options to ensure that the data is exported correctly. This includes selecting the type of data they want to export, such as transactions or accounts, and choosing the format, including Excel. Users can also select the date range and the level of detail they want to include in the export file.Importing Quicken Data into Excel
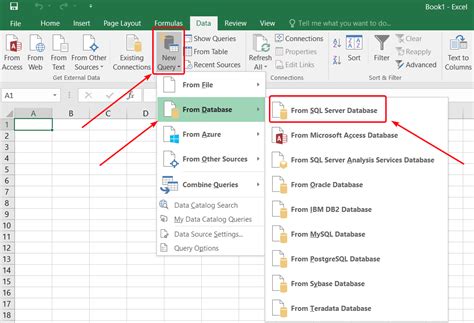
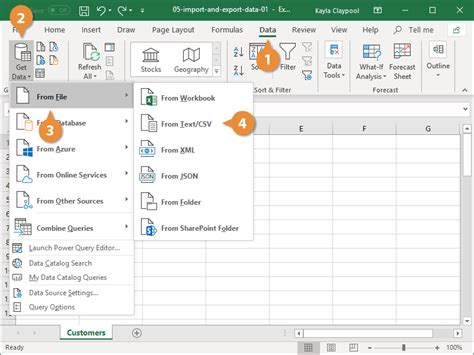
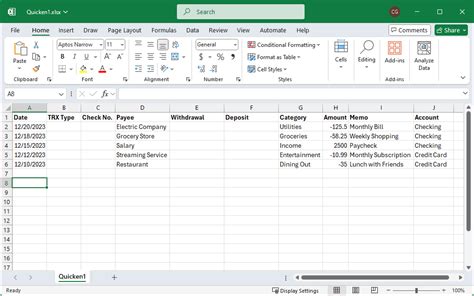
Once the Quicken data is exported to a file, users can import it into Excel. This involves opening the file in Excel and selecting the import options. To import Quicken data into Excel, users need to follow these steps:
- Open Excel and select the file they want to import
- Click on the "Data" menu and select "Import"
- Choose the format, such as CSV or Excel, and select the location where they want to import the file
- Click on the "Import" button to start the import process
Working with Quicken Data in Excel
Once the Quicken data is imported into Excel, users can start working with it to analyze and visualize their financial data. This includes creating charts and graphs, using formulas and functions, and creating pivot tables. Excel offers a wide range of tools and features that can help users to gain deeper insights into their financial situation and make informed decisions about their money.Benefits of Exporting Quicken Data to Excel

Exporting Quicken data to Excel offers several benefits, including:
- Advanced data analysis and visualization
- Custom reporting and charting
- Improved budgeting and forecasting
- Enhanced investment tracking and analysis
- Simplified tax preparation and planning
Using Excel to Analyze Quicken Data
Excel offers a wide range of tools and features that can help users to analyze and visualize their Quicken data. This includes creating charts and graphs, using formulas and functions, and creating pivot tables. By using Excel to analyze Quicken data, users can gain deeper insights into their financial situation and make informed decisions about their money.Quicken Data Export Image Gallery


What are the benefits of exporting Quicken data to Excel?
+The benefits of exporting Quicken data to Excel include advanced data analysis and visualization, custom reporting and charting, improved budgeting and forecasting, enhanced investment tracking and analysis, and simplified tax preparation and planning.
How do I export Quicken data to Excel?
+To export Quicken data to Excel, open Quicken and select the data you want to export. Click on the "File" menu and select "Export". Choose the format, such as Excel, and select the location where you want to save the file. Click on the "Export" button to start the export process.
What are the different export options available in Quicken?
+The different export options available in Quicken include exporting transactions, accounts, investments, and budgets. Users can also choose the format, such as Excel, CSV, or PDF, and select the location where they want to save the file.
How do I import Quicken data into Excel?
+To import Quicken data into Excel, open Excel and select the file you want to import. Click on the "Data" menu and select "Import". Choose the format, such as CSV or Excel, and select the location where you want to import the file. Click on the "Import" button to start the import process.
What are the common issues that users face when exporting Quicken data to Excel?
+The common issues that users face when exporting Quicken data to Excel include formatting issues, data corruption, and compatibility problems. Users can resolve these issues by checking the export options, verifying the data, and using the correct import settings in Excel.
In conclusion, exporting Quicken data to Excel can be a valuable step in managing personal finances. By following the steps outlined in this article, users can easily export their Quicken data to Excel and take advantage of Excel's powerful tools and features to analyze and visualize their financial data. Whether you want to track your investments, create a budget, or simply analyze your spending habits, exporting Quicken data to Excel can help you achieve your financial goals. We encourage you to try exporting your Quicken data to Excel today and discover the benefits of advanced data analysis and visualization. Share your experiences and tips with us in the comments below, and don't forget to share this article with your friends and family who may benefit from exporting their Quicken data to Excel.