Intro
The ability to add a yes/no drop-down list in Excel can significantly enhance the functionality and user experience of your spreadsheets. Whether you're creating surveys, tracking inventory, or managing projects, having a straightforward way to input binary choices can streamline data collection and analysis. In this article, we'll delve into the steps and benefits of incorporating yes/no drop-down lists into your Excel worksheets.
Excel, being a powerful and versatile tool, offers various methods to achieve this functionality. The most common approach involves using the Data Validation feature, which allows you to control the type of data that can be entered into a cell. This feature is not only useful for yes/no options but can also be applied to restrict input to specific numbers, dates, or even custom formulas.
The importance of using drop-down lists in Excel cannot be overstated. They help in reducing errors by limiting the input to predefined options, making it easier for users to select the correct choice. This is particularly beneficial in scenarios where data consistency is crucial, such as in data analysis or when creating templates that will be used by multiple people.
To entice you further into the world of Excel drop-downs, let's consider a practical scenario. Imagine you're managing a project and need to track the completion status of various tasks. A yes/no drop-down list can be used to quickly mark tasks as completed or not, allowing for easy filtering and overview of project progress. This simple feature can significantly enhance your productivity and the overall management of your project.
Adding a Yes/No Drop Down in Excel
To add a yes/no drop-down list in Excel, follow these steps:
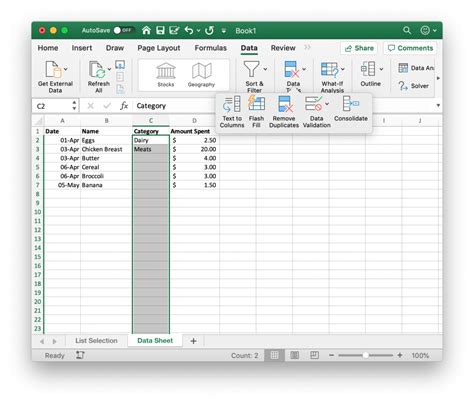
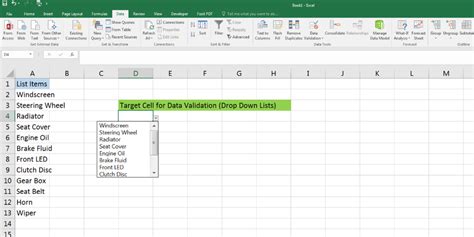
- Select the Cell: Choose the cell where you want the drop-down list to appear.
- Data Validation: Go to the "Data" tab in the ribbon, click on "Data Validation" in the Data Tools group, and then select "Data Validation" again from the drop-down menu.
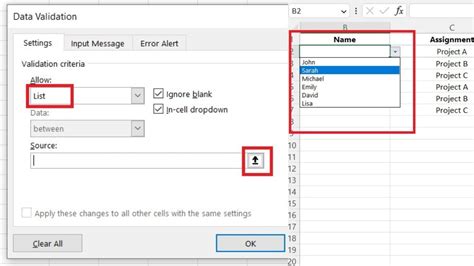
- Settings: In the Data Validation dialog box, click on the "Settings" tab.
- Allow: In the "Allow" field, select "List" from the drop-down menu.
- Source: In the "Source" field, you can either type in your list (separated by commas) directly into the box, or you can reference a range of cells that contains your list. For a yes/no drop-down, you can simply type
YES,NO(without the quotes) into the source field. - Apply: Click "OK" to apply the changes.
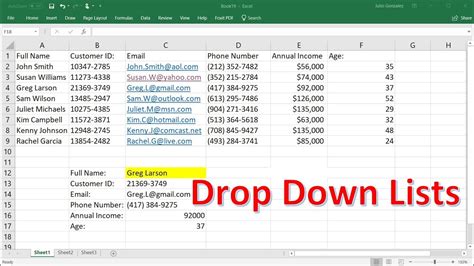
Using a Range for the Source
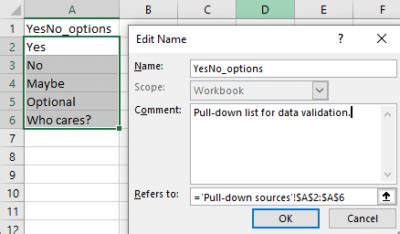
If you prefer to keep your yes/no options in a separate part of your worksheet, you can reference a range of cells instead of typing the options directly into the source field. Here’s how:- Enter Your List: In a convenient location (like a hidden column or another sheet), type
YESin one cell andNOin the cell below it. - Select the Range: Select the cells containing
YESandNO. - Data Validation: Follow the data validation steps as before, but this time, when you get to the "Source" field, click on the range of cells you've selected.
Customizing Your Drop-Down List
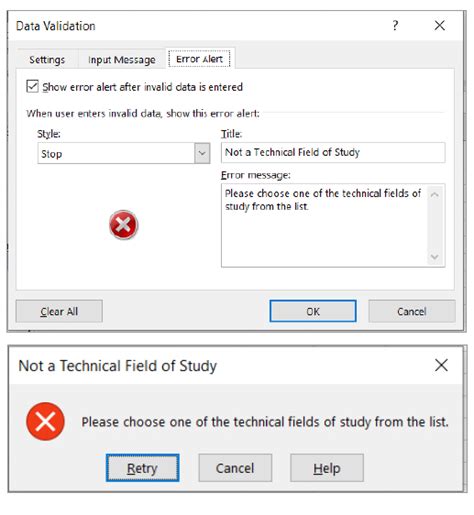
You can further customize your drop-down list by adjusting the input message and error alert settings within the Data Validation dialog box.
- Input Message: This allows you to display a message when a user selects the cell, providing instructions or context for the drop-down list.
- Error Alert: You can customize the error message that appears if a user tries to enter something that is not in your list. This can help guide the user back to using the drop-down list correctly.
Benefits of Using Drop-Down Lists
Using drop-down lists in Excel offers several benefits, including:
- Reduced Errors: By limiting input to predefined options, you reduce the chance of typos or incorrect data entry.
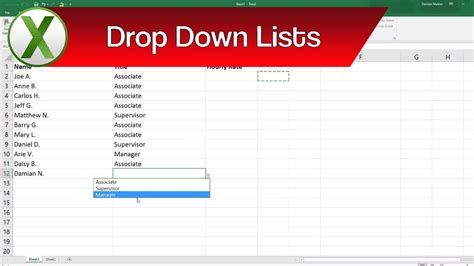
- Improved User Experience: Drop-downs make it easier for users to enter data, especially in situations where they need to select from a list of options.
- Enhanced Data Analysis: Consistent data entry facilitates easier filtering, sorting, and analysis of data.
Advanced Drop-Down List Techniques
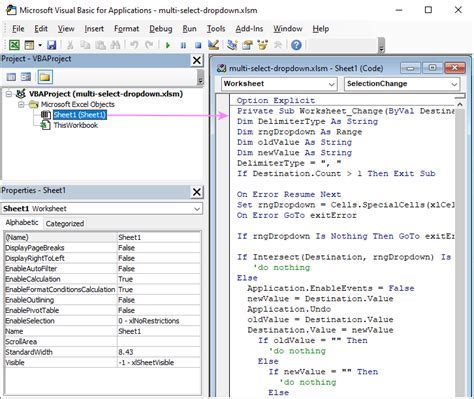
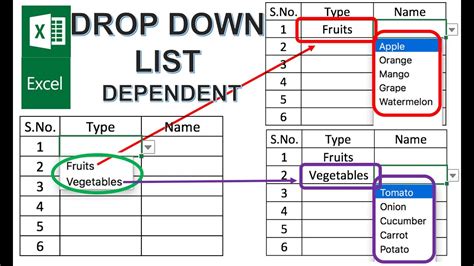
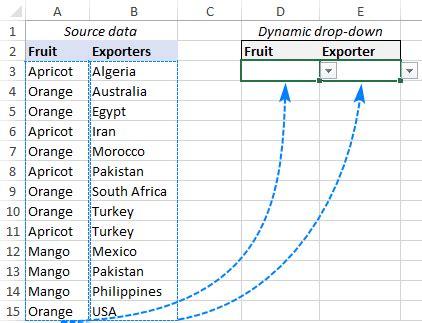
For more advanced users, Excel also supports dynamic drop-down lists that can change based on the selection in another cell. This can be achieved using named ranges and the INDIRECT function. The idea is to create a named range that refers to a range of cells based on the value in another cell, and then use that named range as the source for your drop-down list.
Dynamic Drop-Down Lists with INDIRECT
- Setup Your Data: Organize your data so that related options are grouped together.
- Named Ranges: Create named ranges for each group of options.
- INDIRECT Function: Use the INDIRECT function to create a named range that changes based on the value in a cell.
- Apply to Drop-Down: Use this dynamic named range as the source for your drop-down list.
Common Issues and Solutions

Sometimes, you might encounter issues with your drop-down lists, such as the list not appearing or users being able to type anything into the cell. Here are some common issues and their solutions:
- List Not Appearing: Check that the cell is selected and that the data validation settings are correct. Ensure that the source range or list is correctly referenced.
- Users Can Type Anything: Verify that the "Ignore blank" checkbox is unchecked in the data validation settings. Also, check the error alert settings to ensure that an alert is set up to notify users of incorrect input.
Troubleshooting Tips
- Always test your drop-down list after setting it up to ensure it works as expected.
- Use the "Circle Invalid Data" feature under the "Data Validation" dropdown to quickly identify cells where the input does not match the validation criteria.
Gallery of Excel Drop-Down Lists
Excel Drop-Down Lists Image Gallery

How do I create a yes/no drop-down list in Excel?
+To create a yes/no drop-down list, select the cell, go to Data Validation, choose "List" under Allow, and type "YES,NO" in the Source field, then click OK.
Can I customize the error message for invalid data entry in a drop-down list?
+Yes, you can customize the error alert by checking the "Show error alert after invalid data is entered" checkbox in the Data Validation dialog box and then typing your custom message in the "Error message" tab.
How do I make a drop-down list dynamic based on another cell's value?
+To make a dynamic drop-down list, use the INDIRECT function to create a named range that changes based on the value in another cell, and then reference this named range in your data validation settings.
In conclusion, incorporating yes/no drop-down lists into your Excel spreadsheets can significantly improve data entry efficiency and accuracy. By following the steps and tips outlined in this article, you can harness the full potential of Excel's data validation feature to create user-friendly and robust spreadsheets. Whether you're a beginner or an advanced user, mastering the art of drop-down lists can elevate your Excel skills and contribute to more effective data management and analysis. Feel free to share your experiences or ask questions about using drop-down lists in Excel in the comments below, and don't forget to share this article with anyone who might benefit from learning more about this powerful feature.