Intro
Learn 5 ways to graph Excel equations, including linear, quadratic, and polynomial functions, using charts, formulas, and data analysis techniques for accurate visual representations and insightful data interpretation.
Graphing Excel equations is a fundamental skill for anyone working with data in Microsoft Excel. It allows users to visualize trends, patterns, and relationships within their data, making it easier to understand and analyze. In this article, we will explore five ways to graph Excel equations, providing a comprehensive guide for both beginners and advanced users.
Excel equations can be used for a variety of purposes, including forecasting, budgeting, and scientific research. By graphing these equations, users can gain valuable insights into their data and make more informed decisions. Whether you're a student, a business professional, or a researcher, learning how to graph Excel equations is an essential skill that can help you achieve your goals.
Graphing Excel equations can also help users to identify trends and patterns in their data. By visualizing their data, users can quickly identify areas where their data is increasing or decreasing, and make adjustments accordingly. This can be especially useful for businesses, where identifying trends and patterns can help inform marketing and sales strategies.
Getting Started with Graphing Excel Equations
Before we dive into the five ways to graph Excel equations, it's essential to understand the basics of graphing in Excel. Excel provides a variety of graphing tools, including charts, graphs, and plots. To get started, users need to select the data they want to graph, choose the type of graph they want to create, and customize the graph as needed.
Step-by-Step Guide to Graphing Excel Equations
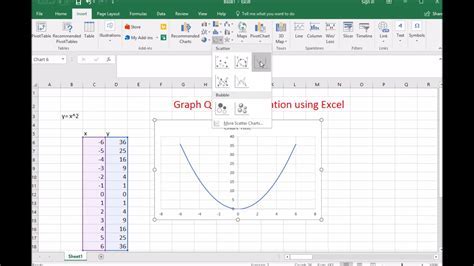
To graph an Excel equation, follow these steps: * Select the data you want to graph * Choose the type of graph you want to create * Customize the graph as needed * Use the equation to analyze and understand the dataMethod 1: Using the Chart Wizard

The Chart Wizard is a built-in tool in Excel that allows users to create a variety of charts and graphs. To use the Chart Wizard, follow these steps:
- Select the data you want to graph
- Click on the "Insert" tab in the ribbon
- Click on the "Chart" button
- Choose the type of chart you want to create
- Customize the chart as needed
Benefits of Using the Chart Wizard
The Chart Wizard is a powerful tool that provides a variety of benefits, including: * Easy to use: The Chart Wizard is a user-friendly tool that makes it easy to create charts and graphs * Customizable: The Chart Wizard allows users to customize their charts and graphs as needed * Variety of options: The Chart Wizard provides a variety of chart and graph options, including column charts, line charts, and pie chartsMethod 2: Using the Graphing Calculator
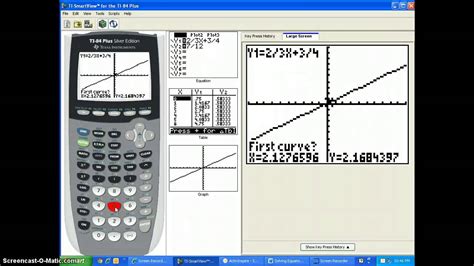
The Graphing Calculator is a powerful tool in Excel that allows users to graph mathematical equations. To use the Graphing Calculator, follow these steps:
- Select the equation you want to graph
- Click on the "Formulas" tab in the ribbon
- Click on the "Graphing Calculator" button
- Enter the equation into the calculator
- Customize the graph as needed
Benefits of Using the Graphing Calculator
The Graphing Calculator is a powerful tool that provides a variety of benefits, including: * Accurate: The Graphing Calculator provides accurate results and graphs * Customizable: The Graphing Calculator allows users to customize their graphs as needed * Variety of options: The Graphing Calculator provides a variety of graphing options, including 2D and 3D graphsMethod 3: Using the Trendline Tool
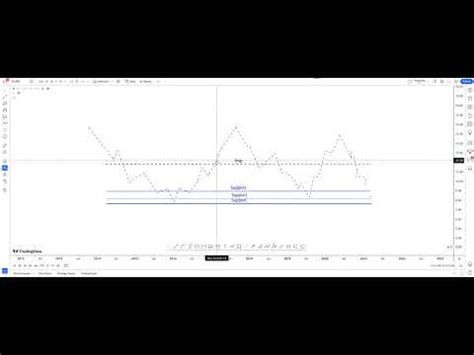
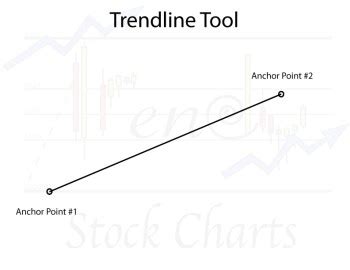
The Trendline Tool is a built-in tool in Excel that allows users to add a trendline to a chart or graph. To use the Trendline Tool, follow these steps:
- Select the chart or graph you want to add a trendline to
- Click on the "Chart Design" tab in the ribbon
- Click on the "Trendline" button
- Choose the type of trendline you want to add
- Customize the trendline as needed
Benefits of Using the Trendline Tool
The Trendline Tool is a powerful tool that provides a variety of benefits, including: * Easy to use: The Trendline Tool is a user-friendly tool that makes it easy to add trendlines to charts and graphs * Customizable: The Trendline Tool allows users to customize their trendlines as needed * Variety of options: The Trendline Tool provides a variety of trendline options, including linear, exponential, and logarithmic trendlinesMethod 4: Using the Solver Add-in

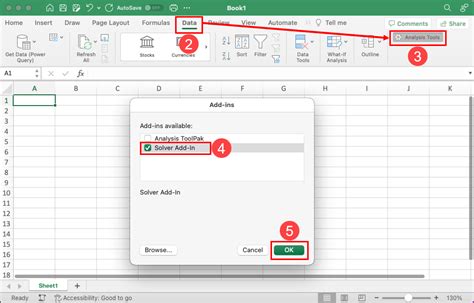
The Solver Add-in is a powerful tool in Excel that allows users to solve mathematical equations and graph the results. To use the Solver Add-in, follow these steps:
- Select the equation you want to solve
- Click on the "Data" tab in the ribbon
- Click on the "Solver" button
- Enter the equation into the solver
- Customize the graph as needed
Benefits of Using the Solver Add-in
The Solver Add-in is a powerful tool that provides a variety of benefits, including: * Accurate: The Solver Add-in provides accurate results and graphs * Customizable: The Solver Add-in allows users to customize their graphs as needed * Variety of options: The Solver Add-in provides a variety of solving options, including linear and nonlinear equationsMethod 5: Using VBA Macros
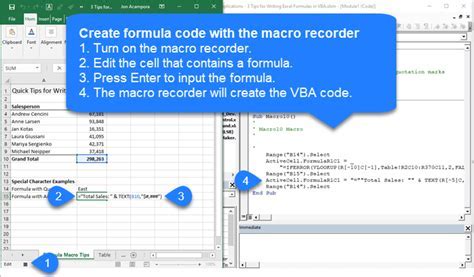
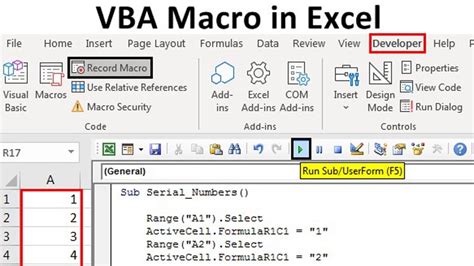
VBA Macros are a powerful tool in Excel that allows users to automate tasks and graph equations. To use VBA Macros, follow these steps:
- Select the equation you want to graph
- Click on the "Developer" tab in the ribbon
- Click on the "Visual Basic" button
- Enter the equation into the macro
- Customize the graph as needed
Benefits of Using VBA Macros
VBA Macros are a powerful tool that provides a variety of benefits, including: * Customizable: VBA Macros allow users to customize their graphs as needed * Automate tasks: VBA Macros allow users to automate tasks and graph equations * Variety of options: VBA Macros provide a variety of graphing options, including 2D and 3D graphsGraphing Excel Equations Image Gallery

What is the best way to graph Excel equations?
+The best way to graph Excel equations depends on the type of equation and the level of customization needed. The Chart Wizard, Graphing Calculator, Trendline Tool, Solver Add-in, and VBA Macros are all powerful tools that can be used to graph Excel equations.
How do I add a trendline to a chart in Excel?
+To add a trendline to a chart in Excel, select the chart, click on the "Chart Design" tab, and click on the "Trendline" button. Choose the type of trendline you want to add and customize as needed.
What is the difference between a chart and a graph in Excel?
+A chart and a graph are often used interchangeably in Excel, but a chart typically refers to a visual representation of data, while a graph refers to a mathematical representation of a equation or function.
How do I use the Solver Add-in in Excel?
+To use the Solver Add-in in Excel, select the equation you want to solve, click on the "Data" tab, and click on the "Solver" button. Enter the equation into the solver and customize as needed.
What are some common uses of graphing Excel equations?
+Graphing Excel equations is commonly used in a variety of fields, including business, science, and engineering. It can be used to visualize data, identify trends, and make predictions.
In conclusion, graphing Excel equations is a powerful tool that can be used to visualize data, identify trends, and make predictions. By following the five methods outlined in this article, users can create a variety of charts and graphs to suit their needs. Whether you're a beginner or an advanced user, learning how to graph Excel equations can help you achieve your goals and take your data analysis to the next level. We invite you to share your experiences and tips for graphing Excel equations in the comments below, and to share this article with others who may benefit from it.