Intro
Discover 5 ways to create informative stem plots in Excel, enhancing data visualization with stem and leaf plots, box plots, and more, for effective statistical analysis and data representation.
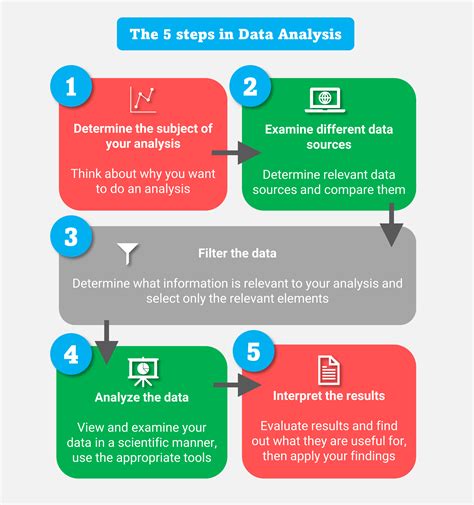
The importance of data analysis cannot be overstated in today's data-driven world. Among the myriad tools available for data analysis, Microsoft Excel stands out for its versatility and user-friendly interface. One of the lesser-known yet powerful features in Excel is the stem-and-leaf plot, also known as a stem plot. This tool is particularly useful for analyzing and visualizing datasets, especially when dealing with smaller sets of data. The stem plot in Excel is a graphical representation of the distribution of data, making it easier to understand the characteristics of the dataset at a glance.
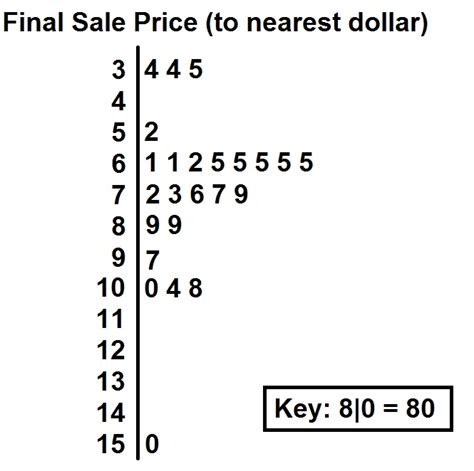
In essence, a stem plot is a special table that allows us to see the distribution of data. It separates each value in the dataset into a stem (the first part of the number) and a leaf (the latter part), making it easier to comprehend the data's spread and central tendency. Despite its usefulness, creating a stem plot directly in Excel can be a bit tricky since Excel doesn't have a built-in function for it. However, with a little creativity and the use of some Excel functions, one can easily create a stem plot.
For those looking to leverage the power of stem plots in their data analysis, there are several approaches to creating them in Excel. From manual creation to using formulas and even add-ins, the method chosen often depends on the size of the dataset, personal preference, and the version of Excel being used. The good news is that once you understand the basic concept of stem plots and how to create them in Excel, you can apply this knowledge across various datasets and versions of Excel, making you more proficient in data analysis.
Understanding Stem Plots

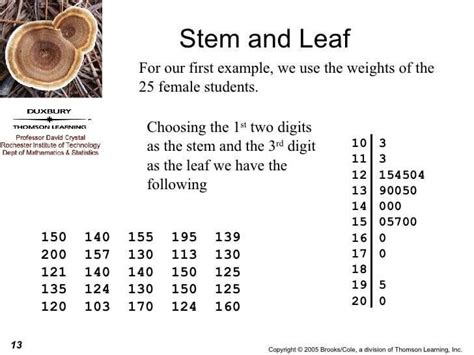
To begin with, it's crucial to understand what a stem plot is and how it works. Essentially, a stem plot is a way of representing a dataset with a focus on its distribution. Each data point is split into two parts: the stem and the leaf. For example, if we have the number 45, the stem could be "4" and the leaf "5". This simple yet effective way of breaking down numbers allows for a clear visual representation of how data points are distributed across different ranges.
Manual Creation of Stem Plots
One of the most straightforward ways to create a stem plot in Excel is by doing it manually. This involves sorting your data, then separating each number into its stem and leaf components. For smaller datasets, this can be a quick and effective method. However, as the dataset grows, this method can become time-consuming and prone to errors. The steps involve sorting the data in ascending order, creating two columns for stems and leaves, and then manually entering the respective parts of each number into these columns.
Steps for Manual Creation
- Sort the dataset in ascending order.
- Create two new columns, one for stems and one for leaves.
- Manually separate each number into its stem and leaf, entering them into the respective columns.
- Use the stems and leaves to create the stem plot, with each stem listed once and its corresponding leaves listed beside it.
Using Formulas for Stem Plots
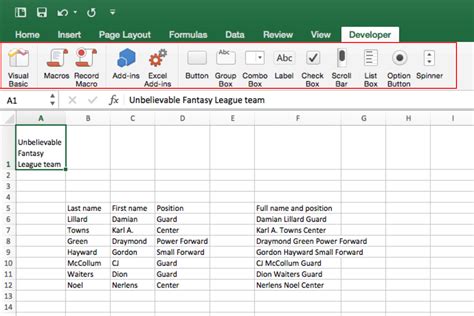
For larger datasets or for those who prefer a more automated approach, using Excel formulas can be a significant time-saver. Excel's text functions, such as LEFT and RIGHT, can be used to automatically separate numbers into stems and leaves. By applying these functions to each data point, you can quickly generate the stems and leaves needed for the plot. This method is not only faster but also reduces the chance of human error.
Example of Using Formulas
- Assume your data is in column A, starting from A1.
- In column B (for stems), you could use a formula like
=LEFT(A1,1)to extract the first digit. - In column C (for leaves), you could use a formula like
=RIGHT(A1,1)to extract the last digit. - Copy these formulas down for all data points.
Utilizing Excel Add-ins

Another option for creating stem plots in Excel is by using add-ins. There are several third-party add-ins available that can enhance Excel's capabilities, including data analysis and visualization tools. Some of these add-ins offer the ability to create stem plots directly, providing a user-friendly interface that simplifies the process. While this method requires installing additional software, it can offer a convenient solution for frequent users of stem plots.
Interpreting Stem Plots
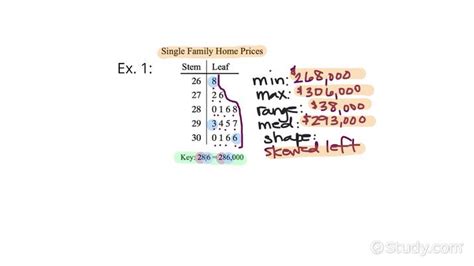
Once a stem plot is created, the next step is interpreting it. This involves looking at the distribution of the leaves for each stem to understand the spread of the data. A stem plot can show if the data is symmetric, skewed, or has outliers. It can also give insights into the median and mode of the dataset. By analyzing the stem plot, one can gain valuable insights into the characteristics of the data, which can inform further analysis or decision-making.
Key Points for Interpretation
- Look for symmetry or skewness in the distribution.
- Identify any outliers or gaps in the data.
- Determine the median and mode based on the stem plot.
- Use the plot to understand the data's central tendency and variability.
Applications of Stem Plots
Stem plots have various applications across different fields, including education, research, and business. They are particularly useful in statistics and data analysis courses for teaching concepts of data distribution and visualization. In research, stem plots can be used to preliminarily analyze data before proceeding with more complex statistical methods. In business, they can help in understanding customer data, sales figures, or any other numerical data that needs analysis.
Examples of Applications
- Educational settings for teaching data analysis.
- Research for preliminary data analysis.
- Business for understanding customer or sales data.
- Quality control to monitor production data.
Stem Plot Image Gallery


What is a stem plot used for?
+A stem plot is used for visualizing the distribution of a dataset, making it easier to understand the data's characteristics such as central tendency, variability, and the presence of outliers.
How do I create a stem plot in Excel?
+You can create a stem plot in Excel manually by separating numbers into stems and leaves, using formulas to automate this process, or by utilizing Excel add-ins that offer this functionality.
What are the benefits of using stem plots?
+The benefits include easy visualization of data distribution, identification of outliers, understanding of central tendency and variability, and simplicity in creation and interpretation, especially for smaller datasets.
In conclusion, stem plots are a valuable tool in data analysis, offering a simple yet effective way to visualize and understand the characteristics of a dataset. By mastering the creation and interpretation of stem plots in Excel, individuals can enhance their data analysis skills, making them more proficient in extracting insights from numerical data. Whether you're a student, researcher, or business professional, understanding and applying stem plots can significantly contribute to your ability to make informed decisions based on data. We invite you to share your experiences with stem plots, ask questions, or explore further resources on data analysis and visualization.