Intro
Discover 5 ways to create effective Excel bar graphs, enhancing data visualization with customizable charts, interactive dashboards, and informative reports using Excels built-in tools and features.
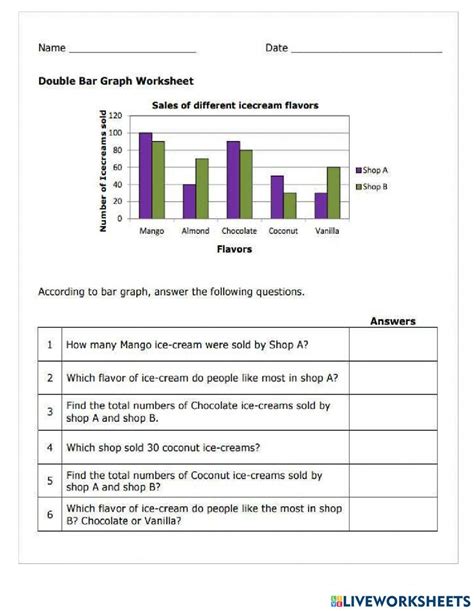
Understanding and utilizing Excel bar graphs can significantly enhance your data analysis and presentation skills. These graphs are particularly useful for comparing different groups or tracking changes over time for more than one group. Here's a comprehensive guide on how to create and customize Excel bar graphs, along with practical examples and tips to improve your data visualization skills.
Excel bar graphs are versatile and can be used in various contexts, from business and finance to education and research. They help in making complex data more understandable and engaging. Whether you're a student working on a project, a business analyst presenting market trends, or a researcher looking to visualize findings, Excel bar graphs are an indispensable tool.
The process of creating a bar graph in Excel is straightforward, and with a few clicks, you can turn your data into a visually appealing graph. However, to get the most out of your bar graphs, it's essential to understand the different types and how to customize them according to your needs. This includes choosing the right type of bar graph (e.g., clustered, stacked, or 100% stacked), adjusting colors, adding labels, and modifying the axis to better represent your data.
Creating a Basic Bar Graph in Excel
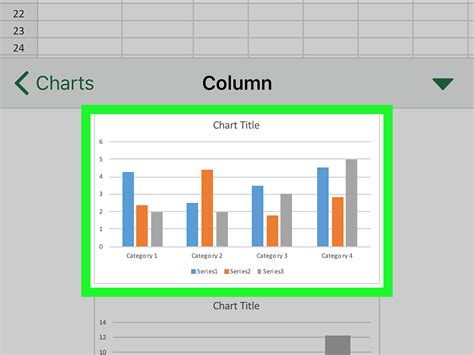
To create a basic bar graph, start by selecting your data range, including headers. Then, go to the "Insert" tab on the ribbon, click on the "Bar Chart" button in the "Charts" group, and select the type of bar chart you want. Excel automatically generates the chart based on your selected data. You can further customize the chart by adding a title, changing the colors of the bars, and modifying the axis labels.
Types of Bar Graphs in Excel
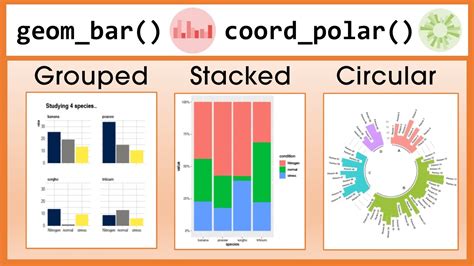
Excel offers several types of bar graphs, each serving a different purpose:
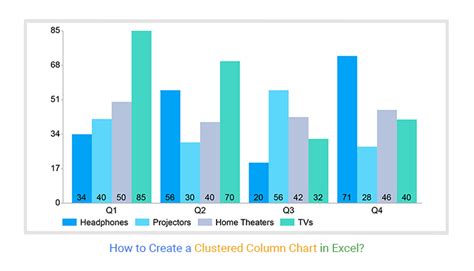
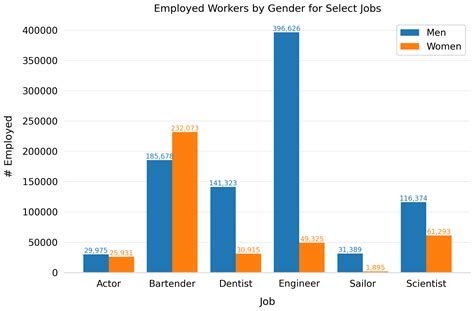
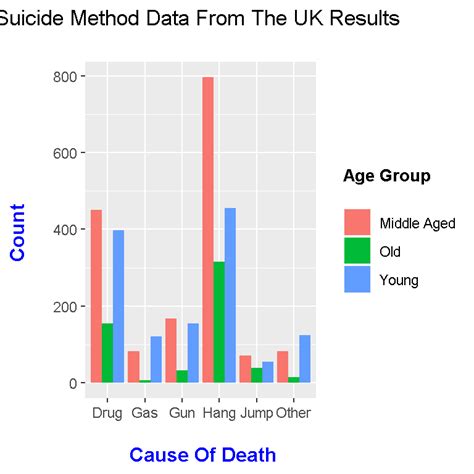
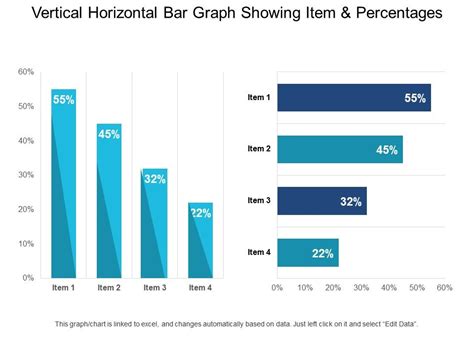
- Clustered Bar Chart: Used to compare different categories.
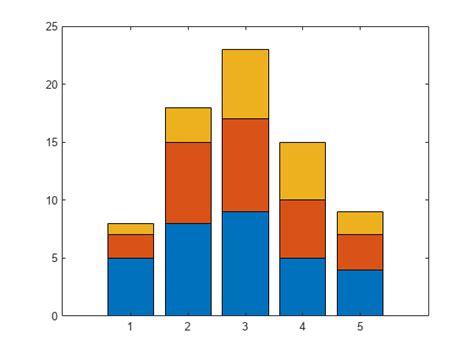
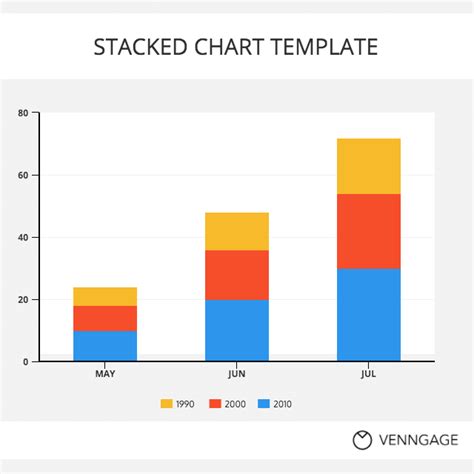
- Stacked Bar Chart: Shows how different categories contribute to a whole.
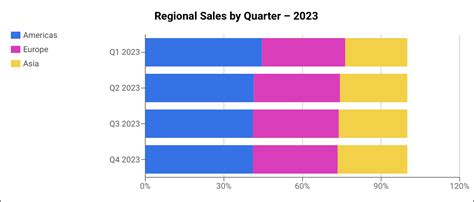
- 100% Stacked Bar Chart: Similar to the stacked bar chart but each category is displayed as a percentage of the whole.
Customizing Your Bar Graph
Customization is key to making your bar graph effective. This includes: - **Adding Data Labels:** To show the value of each bar directly on the graph. - **Changing Colors:** To differentiate between categories or to match your presentation's color scheme. - **Editing Axis:** To ensure that the scale of the axis accurately represents your data.Advanced Bar Graph Customization
For more complex data analysis, you might need to combine multiple bar graphs or create interactive graphs. Excel's built-in tools allow for advanced customization, such as:
- Combining Charts: You can combine a bar graph with other types of charts, like line graphs, to show trends and categorical data together.
- Using PivotCharts: PivotCharts are dynamic and can be easily filtered or modified based on your data.
Best Practices for Using Bar Graphs
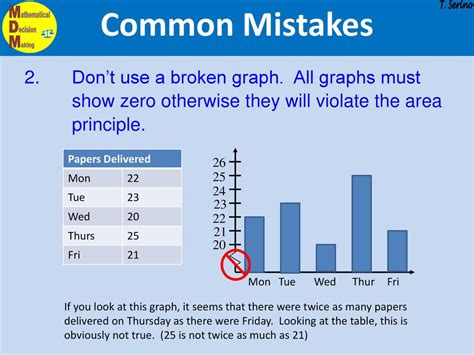
When using bar graphs, keep in mind: - **Keep it Simple:** Avoid cluttering your graph with too much data. - **Use Clear Labels:** Ensure that your axis and data labels are clear and descriptive. - **Choose Appropriate Colors:** Select colors that are visually appealing and distinguishable, especially for color-blind audiences.Common Mistakes to Avoid

- Incorrect Data Range: Double-check that you've selected the correct data range.
- Insufficient Labeling: Always label your axes and provide a title for your graph.
- Inappropriate Chart Type: Choose a chart type that best represents your data.
Tips for Effective Data Visualization
Effective data visualization is about communicating insights clearly and engagingly. Tips include: - **Tell a Story:** Use your graph to tell a story about your data. - **Keep it Interactive:** Especially in presentations, interactive graphs can engage your audience. - **Practice:** The more you practice, the better you'll become at creating effective bar graphs.Gallery of Bar Graph Examples
Bar Graph Image Gallery

What is the purpose of using bar graphs in data analysis?
+Bar graphs are used to compare different groups or to track changes over time for more than one group, making complex data more understandable and engaging.
How do I choose the right type of bar graph for my data?
+The choice of bar graph type depends on what you want to show: comparison (clustered), contribution to a whole (stacked), or percentage contribution (100% stacked).
Can I customize my bar graph in Excel?
+Yes, Excel offers various customization options for bar graphs, including adding data labels, changing colors, and editing axis, to make your graph more effective and engaging.
In conclusion, mastering the art of creating and customizing Excel bar graphs can significantly enhance your ability to analyze, present, and communicate data insights. By understanding the different types of bar graphs, how to customize them, and best practices for their use, you can create compelling and informative visualizations that captivate your audience and facilitate better decision-making. Whether you're working on a project, presenting research findings, or analyzing market trends, Excel bar graphs are an indispensable tool in your data visualization arsenal. So, go ahead and explore the world of Excel bar graphs, and discover how they can help you tell a story with your data. Feel free to share your experiences, ask questions, or provide tips on using Excel bar graphs in the comments below.