Intro
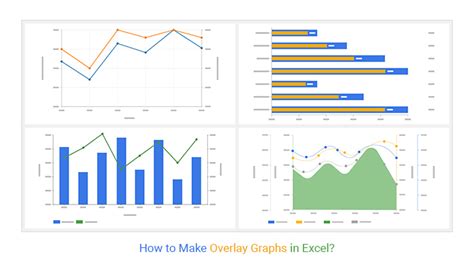
The importance of visualizing data in a clear and concise manner cannot be overstated, especially in the realm of business and finance. Microsoft Excel, a staple in data analysis, offers a plethora of tools to help users present their data in a meaningful way. One such tool is the ability to overlay Excel graphs, allowing for the comparison of multiple datasets on a single chart. This feature is particularly useful for identifying trends, patterns, and correlations between different sets of data. In this article, we will delve into the world of overlaying Excel graphs, exploring the benefits, steps, and best practices for creating effective and informative charts.
When dealing with complex data, it can be challenging to convey insights and findings to stakeholders. Overlaying Excel graphs provides a solution to this problem by enabling the simultaneous display of multiple datasets. This feature facilitates a deeper understanding of the relationships between different variables, making it an indispensable tool for data analysts and professionals alike. Whether you're analyzing sales trends, stock prices, or website traffic, overlaying Excel graphs can help you uncover valuable insights and make informed decisions.
The process of overlaying Excel graphs is relatively straightforward, and with a little practice, you can create professional-looking charts that effectively communicate your data. In the following sections, we will explore the different methods for overlaying Excel graphs, including using the built-in chart tools, creating combination charts, and using add-ins. We will also discuss the benefits and limitations of each approach, providing you with the knowledge and skills to create informative and engaging charts.
Understanding the Basics of Overlaying Excel Graphs
Before we dive into the nitty-gritty of overlaying Excel graphs, it's essential to understand the basics of creating charts in Excel. The program offers a range of chart types, including column, line, pie, and scatter plots, each with its own strengths and weaknesses. To create a chart, simply select the data you want to visualize, go to the "Insert" tab, and choose the desired chart type. Excel will automatically generate a chart based on your data.
Method 1: Using the Built-in Chart Tools
One of the simplest ways to overlay Excel graphs is by using the built-in chart tools. To do this, follow these steps:
- Select the data you want to visualize.
- Go to the "Insert" tab and choose the desired chart type.
- Click on the "Chart Tools" tab in the ribbon.
- Select the "Design" tab and click on "Add Chart Element."
- Choose the type of chart element you want to add, such as a line or column chart.
- Select the data you want to add to the chart.
By following these steps, you can create a combination chart that overlays multiple datasets on a single chart. This method is ideal for simple datasets and provides a quick and easy way to visualize your data.
Method 2: Creating Combination Charts
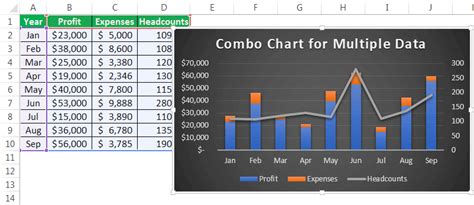
Another way to overlay Excel graphs is by creating combination charts. This method involves creating a single chart that combines multiple chart types, such as a column and line chart. To create a combination chart, follow these steps:
- Select the data you want to visualize.
- Go to the "Insert" tab and choose the desired chart type.
- Click on the "Chart Tools" tab in the ribbon.
- Select the "Design" tab and click on "Change Chart Type."
- Choose the combination chart type you want to create.
- Select the data you want to add to the chart.
Combination charts are ideal for visualizing complex datasets and provide a powerful way to communicate insights and findings. By using different chart types, you can highlight different aspects of your data and create a more engaging and informative chart.
Method 3: Using Add-ins
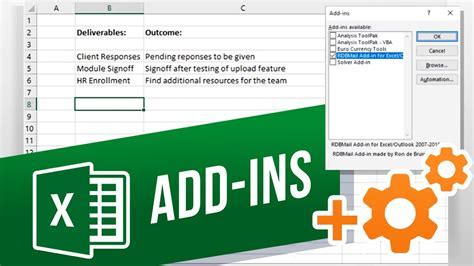
If you're looking for more advanced features and functionality, you can use add-ins to overlay Excel graphs. Add-ins are third-party tools that can be installed in Excel to provide additional features and capabilities. Some popular add-ins for overlaying Excel graphs include Power BI and Tableau. These tools provide a range of features, including data visualization, business intelligence, and data analysis.
To use an add-in, follow these steps:
- Install the add-in in Excel.
- Select the data you want to visualize.
- Go to the add-in tab in the ribbon.
- Choose the type of chart you want to create.
- Select the data you want to add to the chart.
Add-ins provide a powerful way to overlay Excel graphs and offer a range of features and functionality that can enhance your data visualization capabilities.
Best Practices for Overlaying Excel Graphs

When overlaying Excel graphs, there are several best practices to keep in mind. These include:
- Using clear and concise labels and titles.
- Choosing the right chart type for your data.
- Using colors and formatting to highlight important information.
- Avoiding clutter and keeping the chart simple and easy to read.
- Using data visualization best practices, such as using a consistent scale and avoiding 3D charts.
By following these best practices, you can create effective and informative charts that communicate your data insights and findings.
Common Challenges and Limitations

While overlaying Excel graphs can be a powerful way to visualize data, there are several common challenges and limitations to be aware of. These include:
- Data complexity: Overlaying multiple datasets can create a complex and cluttered chart.
- Chart type: Choosing the right chart type can be challenging, especially for complex datasets.
- Scalability: Large datasets can be difficult to visualize, especially when overlaying multiple charts.
- Interactivity: Static charts can be limiting, especially when trying to communicate complex insights and findings.
By being aware of these challenges and limitations, you can take steps to overcome them and create effective and informative charts.
Gallery of Overlaying Excel Graphs
Overlaying Excel Graphs Image Gallery


What is overlaying Excel graphs?
+Overlaying Excel graphs refers to the process of combining multiple datasets on a single chart to visualize and compare the data.
How do I overlay Excel graphs?
+To overlay Excel graphs, you can use the built-in chart tools, create combination charts, or use add-ins such as Power BI or Tableau.
What are the benefits of overlaying Excel graphs?
+The benefits of overlaying Excel graphs include the ability to compare multiple datasets, identify trends and patterns, and communicate complex insights and findings in a clear and concise manner.
What are the common challenges and limitations of overlaying Excel graphs?
+The common challenges and limitations of overlaying Excel graphs include data complexity, chart type, scalability, and interactivity.
How can I create effective and informative charts when overlaying Excel graphs?
+To create effective and informative charts when overlaying Excel graphs, use clear and concise labels and titles, choose the right chart type, use colors and formatting to highlight important information, and avoid clutter and keep the chart simple and easy to read.
In conclusion, overlaying Excel graphs is a powerful way to visualize and compare multiple datasets. By using the built-in chart tools, creating combination charts, or using add-ins, you can create effective and informative charts that communicate complex insights and findings. Remember to follow best practices, such as using clear and concise labels and titles, choosing the right chart type, and avoiding clutter. With practice and experience, you can become proficient in overlaying Excel graphs and take your data visualization skills to the next level. We invite you to share your thoughts and experiences with overlaying Excel graphs in the comments below.