Intro
Protecting all sheets in Excel is a crucial step in securing your workbook and preventing unauthorized changes. This is particularly important when sharing your workbook with others or when working on sensitive data. Excel provides a robust protection mechanism that allows you to lock your sheets and prevent modifications. In this article, we will delve into the importance of protecting Excel sheets, the steps to protect all sheets, and provide insights into the benefits and working mechanisms of this feature.
The importance of protecting Excel sheets cannot be overstated. When you share your workbook, whether it's with colleagues, clients, or partners, you want to ensure that your data remains intact and that no unauthorized changes are made. Protecting your sheets prevents others from modifying formulas, deleting data, or inserting new information, thereby safeguarding the integrity of your workbook. Moreover, protecting sheets can help prevent accidental changes, which can be particularly useful in work environments where multiple users access the same workbook.
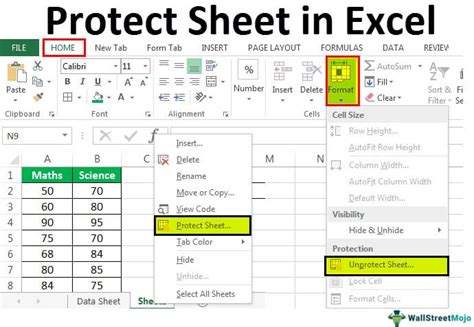
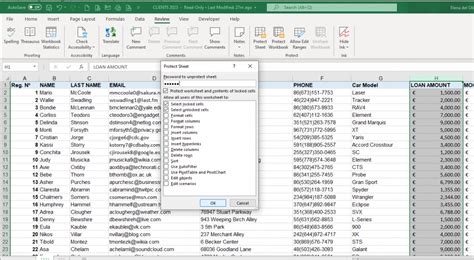
Protecting all sheets in Excel is a straightforward process that involves a few simple steps. First, you need to select all the sheets you want to protect by holding down the Ctrl key and clicking on each sheet tab. Once all the sheets are selected, go to the Review tab in the ribbon, click on Protect Sheet, and then select Protect Workbook. This will open a dialog box where you can set a password and choose the permissions you want to allow or deny. After setting your preferences, click OK to apply the protection.

Benefits of Protecting Excel Sheets
Protecting Excel sheets offers several benefits, including enhanced security, improved collaboration, and better data management. By locking your sheets, you ensure that your data is secure and that no unauthorized changes can be made. This is particularly important in industries that deal with sensitive information, such as finance, healthcare, or legal services. Protecting sheets also facilitates collaboration by allowing you to control who can make changes and who can only view the data. This ensures that your workbook remains consistent and that all changes are tracked and approved.
Moreover, protecting Excel sheets can help improve data management by preventing accidental deletions or modifications. When multiple users have access to a workbook, it's easy for changes to be made unintentionally, which can lead to data loss or corruption. By protecting your sheets, you can prevent such accidents and ensure that your data remains intact.

Working Mechanisms of Excel Sheet Protection
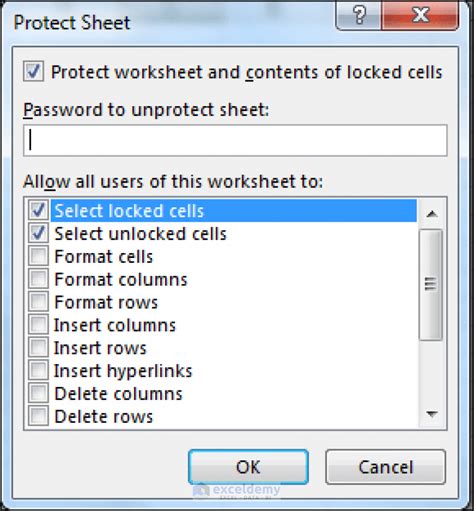
The working mechanism of Excel sheet protection involves a combination of password protection and permission settings. When you protect a sheet, you are prompted to set a password, which is used to unlock the sheet and make changes. You can also set specific permissions, such as allowing users to select locked cells or insert new columns. These permissions can be customized to suit your needs, providing a high degree of flexibility and control.
In addition to password protection and permissions, Excel also provides a range of other features to enhance sheet protection. For example, you can use the "Allow Users to Edit Ranges" feature to specify which cells or ranges can be edited by specific users. This feature is particularly useful in collaborative environments where multiple users need to make changes to different parts of the workbook.
Steps to Protect All Sheets in Excel
To protect all sheets in Excel, follow these steps:
- Select All Sheets: Hold down the Ctrl key and click on each sheet tab to select all the sheets you want to protect.
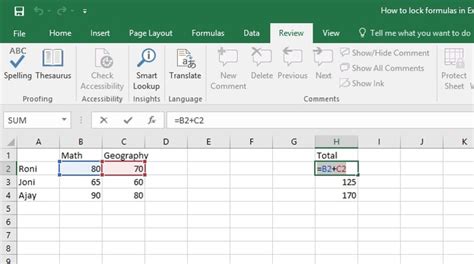
- Go to the Review Tab: Click on the Review tab in the ribbon to access the protection features.
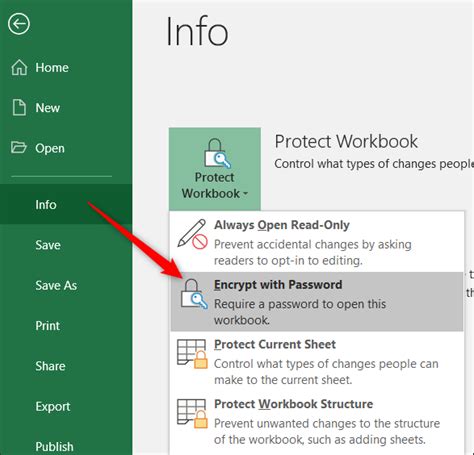
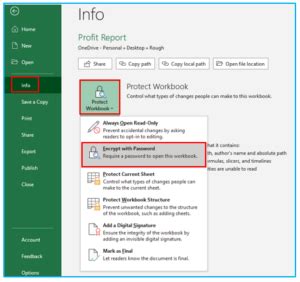
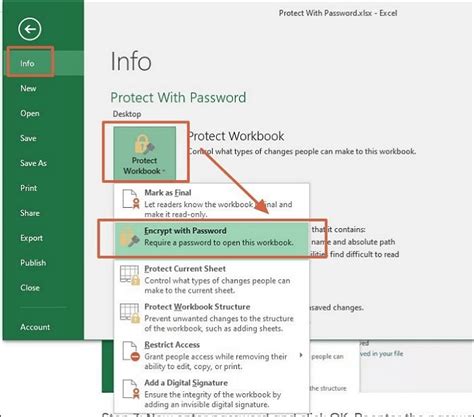
- Click on Protect Sheet: Click on Protect Sheet and then select Protect Workbook.
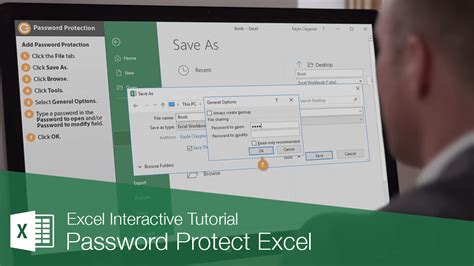
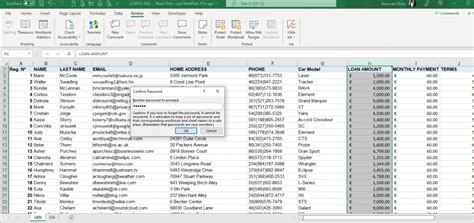
- Set a Password: Enter a password and confirm it to lock the sheets.
- Choose Permissions: Select the permissions you want to allow or deny, such as editing, formatting, or inserting new data.
- Apply Protection: Click OK to apply the protection to all selected sheets.
By following these steps, you can protect all sheets in your Excel workbook and ensure that your data remains secure and intact.
Best Practices for Protecting Excel Sheets
To get the most out of Excel sheet protection, follow these best practices:
- Use Strong Passwords: Choose passwords that are difficult to guess and avoid using easily accessible information, such as your name or birthdate.
- Set Specific Permissions: Customize permissions to suit your needs and ensure that users can only make changes that are necessary for their tasks.
- Use the "Allow Users to Edit Ranges" Feature: Specify which cells or ranges can be edited by specific users to enhance collaboration and control.
- Regularly Review and Update Permissions: Periodically review and update permissions to ensure that they remain relevant and effective.
By following these best practices, you can maximize the benefits of Excel sheet protection and ensure that your data remains secure and intact.
Common Challenges and Solutions
When protecting Excel sheets, you may encounter some common challenges, such as forgotten passwords or permission issues. To overcome these challenges, follow these solutions:
- Reset Forgotten Passwords: Use the "Forgot Password" feature to reset your password and regain access to your protected sheets.
- Troubleshoot Permission Issues: Review and update permissions to ensure that users have the necessary access to make changes.
- Use the "Unprotect Sheet" Feature: Use the "Unprotect Sheet" feature to remove protection from a sheet and make changes.
By following these solutions, you can overcome common challenges and ensure that your Excel sheets remain protected and secure.
Gallery of Excel Protection Features
Excel Protection Features


Frequently Asked Questions
How do I protect all sheets in Excel?
+To protect all sheets in Excel, select all the sheets you want to protect, go to the Review tab, click on Protect Sheet, and then select Protect Workbook. Set a password and choose the permissions you want to allow or deny.
What are the benefits of protecting Excel sheets?
+Protecting Excel sheets offers several benefits, including enhanced security, improved collaboration, and better data management. By locking your sheets, you ensure that your data is secure and that no unauthorized changes can be made.
How do I reset a forgotten password in Excel?
+To reset a forgotten password in Excel, use the "Forgot Password" feature to reset your password and regain access to your protected sheets.
In conclusion, protecting all sheets in Excel is a crucial step in securing your workbook and preventing unauthorized changes. By following the steps and best practices outlined in this article, you can maximize the benefits of Excel sheet protection and ensure that your data remains secure and intact. Remember to use strong passwords, set specific permissions, and regularly review and update permissions to ensure that your Excel sheets remain protected and secure. Share this article with others to help them learn how to protect their Excel sheets and workbooks.