Intro
Learn to insert yes or no in Excel using formulas, functions, and conditional formatting, simplifying data analysis with logical functions, dropdowns, and checkbox options.
Inserting a "Yes or No" option in Excel can be useful for creating interactive spreadsheets, surveys, or data collection tools. This feature allows users to select either "Yes" or "No" from a dropdown list, making data entry more controlled and efficient. Here's how to achieve this:
Excel provides several methods to insert "Yes or No" options, including using data validation, formulas, and even checkboxes. Let's explore these methods in detail.
Introduction to Data Validation
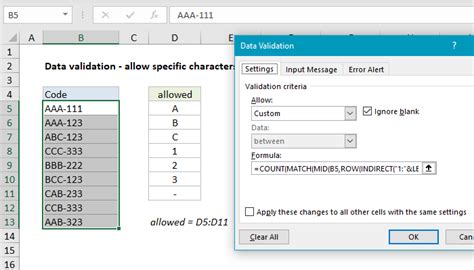
Data validation is a powerful tool in Excel that allows you to control what a user can enter into a cell. It can be used to restrict input to specific numbers, dates, times, or even text. For creating a "Yes or No" dropdown, we will use the "List" feature within data validation.
Using Data Validation for Yes or No
To create a "Yes or No" dropdown list using data validation, follow these steps:
- Select the Cell: Choose the cell where you want the "Yes or No" dropdown to appear.
- Go to Data Tab: Navigate to the "Data" tab in the Excel ribbon.
- Data Validation: Click on "Data Validation" in the Data Tools group.
- Settings: In the Data Validation dialog box, under the "Settings" tab, click on the "Allow" dropdown and select "List".
- Source: In the "Source" field, you can either type
=YES,NOdirectly if you want the list to appear exactly as "YES" and "NO", or you can select a range of cells that contain "Yes" and "No". For a more user-friendly approach, type="Yes,No"(including the quotes) to display "Yes" and "No" as the options. - Apply: Click "OK" to apply the changes.
Now, when you click on the cell, a dropdown arrow appears, allowing you to select either "Yes" or "No".
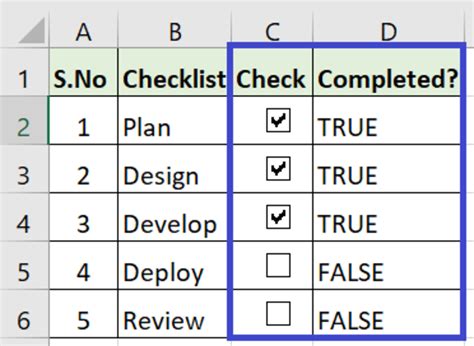
Using Checkboxes
Another way to insert "Yes or No" options is by using checkboxes. This method is visually different and can be useful for surveys or forms where a checkbox interface is more intuitive.
- Developer Tab: First, ensure the Developer tab is visible. If not, go to File > Options > Customize Ribbon, check the "Developer" checkbox, and click "OK".
- Insert Checkbox: Go to the Developer tab, click on the "Insert" button in the Controls group, and under the "Form Controls" group, click on the "Checkbox" icon.
- Draw the Checkbox: Click and drag on the worksheet to draw the checkbox.
- Right-Click: Right-click on the checkbox and select "Format Control".
- Checkbox Settings: In the Format Control dialog, you can change the checkbox's properties, including its text and behavior. To link the checkbox to a cell, click on the "Cell link" field and select a cell.
Using IF Function
For scenarios where you want to display "Yes" or "No" based on a condition, the IF function is incredibly useful.
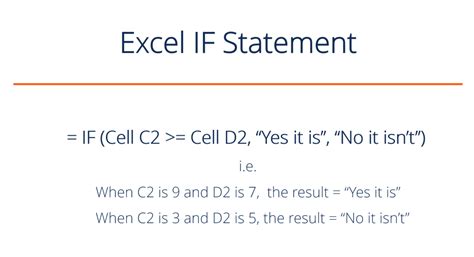
The syntax for the IF function is IF(logical_test, [value_if_true], [value_if_false]). For example, if you want to check if a value in cell A1 is greater than 10 and display "Yes" if true and "No" if false, you would use:
=IF(A1>10, "Yes", "No")
This formula can be adapted to various conditions and criteria, making it a versatile tool for conditional logic in Excel.
Practical Applications
The ability to insert "Yes or No" options in Excel has numerous practical applications:
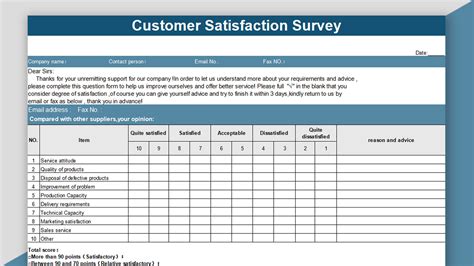
- Surveys and Feedback Forms: Creating interactive surveys where respondents can easily select "Yes" or "No" to questions.
- Data Analysis: Using "Yes or No" fields to categorize data for analysis, such as determining if a product meets certain criteria.
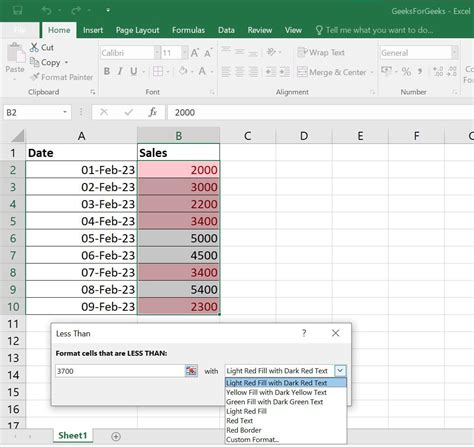
- Conditional Formatting: Combining "Yes or No" fields with conditional formatting to highlight cells based on the selection.
Tips and Variations
- Customizing Lists: You can customize the list in data validation to include more options or use different wording by simply editing the source field.
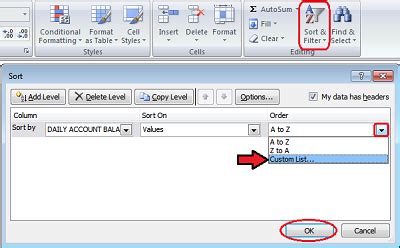
- Using Named Ranges: For frequently used lists, consider defining a named range and referencing it in the data validation source for easier maintenance and updates.
- Error Alerts: Data validation also allows you to set error alerts for invalid inputs, which can help maintain data integrity.
Embedding Images for Clarification


Gallery of Excel Tips
Excel Tips and Tricks Image Gallery

FAQs
How do I create a Yes or No dropdown list in Excel?
+To create a Yes or No dropdown list, use the data validation feature. Select the cell, go to the Data tab, click on Data Validation, and set the allow option to List. Then, in the source field, type "=Yes,No" to display "Yes" and "No" as the options.
Can I use checkboxes for Yes or No options in Excel?
+Yes, you can use checkboxes for Yes or No options. To do this, go to the Developer tab, click on the Insert button, and select Checkbox under Form Controls. You can then customize the checkbox's properties and link it to a cell.
How do I use the IF function for Yes or No conditions in Excel?
+The IF function in Excel is used as follows: IF(logical_test, [value_if_true], [value_if_false]). For example, to check if a value in cell A1 is greater than 10 and display "Yes" if true and "No" if false, you would use =IF(A1>10, "Yes", "No").
Final Thoughts
Inserting "Yes or No" options in Excel is a straightforward process that can significantly enhance the functionality and user experience of your spreadsheets. Whether you're creating surveys, analyzing data, or simply looking to make your spreadsheets more interactive, the methods outlined above provide flexible solutions. Remember, practice makes perfect, so don't hesitate to experiment with different approaches to find what works best for your specific needs. Share your experiences and tips in the comments below, and don't forget to share this article with anyone who might find it useful. Happy spreadsheeting!