Intro
Fix Show Changes Greyed Out in Excel by troubleshooting track changes, highlighting modifications, and resolving formula issues, to enable collaboration and version control features.
When working with Excel, it's often necessary to track changes made to a spreadsheet, especially in collaborative environments or when auditing is required. Excel provides a feature to show changes made to a worksheet, allowing users to see what has been modified, by whom, and when. This feature is particularly useful for maintaining version control and ensuring data integrity. Here's how you can use it:
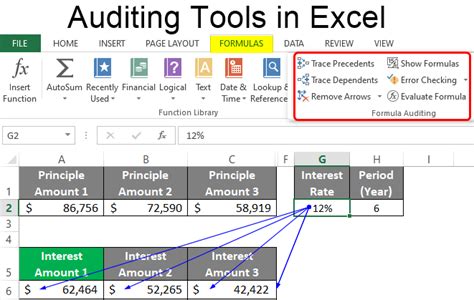
Excel's "Track Changes" feature, also known as "Change History," is part of the workbook's auditing capabilities. However, the specific steps to access and use this feature can vary slightly depending on the version of Excel you're using. Below are the general steps for Excel 2010 and later versions, including Excel 2013, Excel 2016, Excel 2019, and Excel for Office 365.
Enabling Track Changes
- Open your Excel workbook.
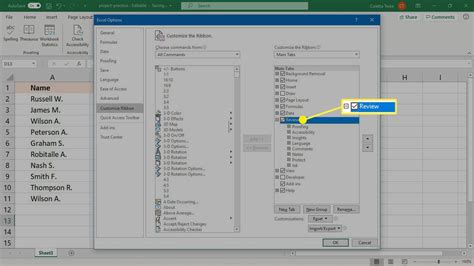
- Go to the Review tab on the Ribbon.
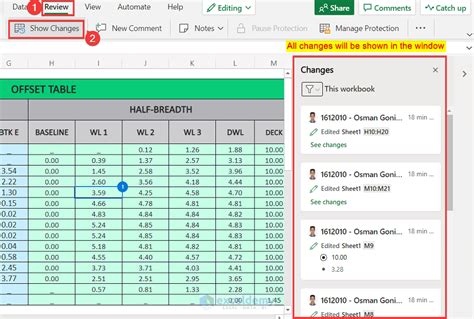
- Click on "Track Changes" and then select "Highlight Changes."
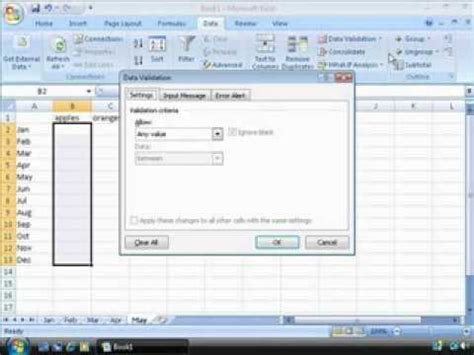
- In the Highlight Changes dialog box, check the box next to "Track changes while editing" and choose the options that suit your needs, such as highlighting changes on screen or listing them in a worksheet.
- Click OK to apply your settings.
Viewing Tracked Changes
Once changes are tracked, you can view them in several ways:
- On-screen highlighting: Changes will be highlighted directly in the cells where edits were made.
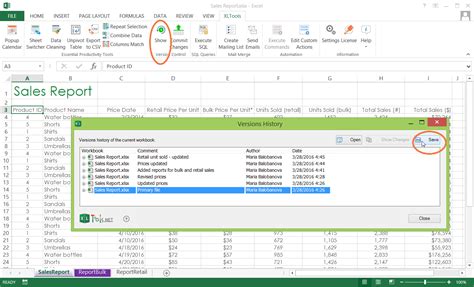
- Change history: You can view a log of changes, including who made the change, when, and what the change was.
To view the change history:
- Go to the Review tab on the Ribbon.
- Click on "Track Changes" and then select "Highlight Changes."
- In the Highlight Changes dialog box, make sure "Highlight changes on screen" is checked.
- Click on the "Highlight changes on screen" dropdown and select the types of changes you want to see (e.g., cells changed, inserted, deleted, or moved).
- To see the details of each change, select "List changes on a new sheet" and click OK. Excel will create a new sheet listing all tracked changes.
Accepting or Rejecting Changes
If you're reviewing changes made by others, you can accept or reject them:
- Go to the Review tab and click on "Track Changes" > "Accept/Reject Changes."
- Excel will prompt you to save the workbook before proceeding. Click OK.
- The Accept or Reject Changes dialog box will appear, allowing you to navigate through changes one by one.
- For each change, you can choose to accept or reject it. You can also move through changes using the "Accept" or "Reject" buttons.
Tips for Effective Use
- Regularly save your workbook when tracking changes to ensure that all edits are captured.
- Use Excel's built-in commenting feature to communicate with collaborators about specific changes or concerns.
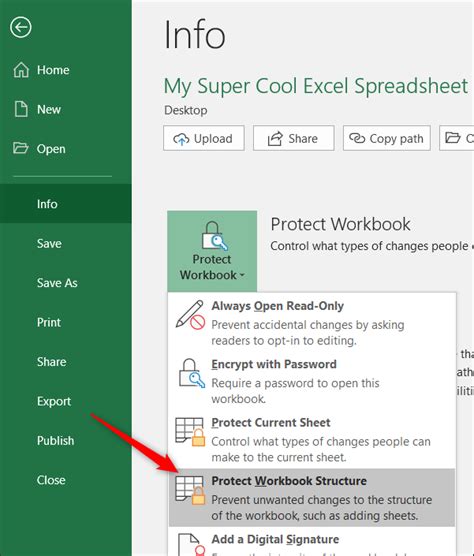
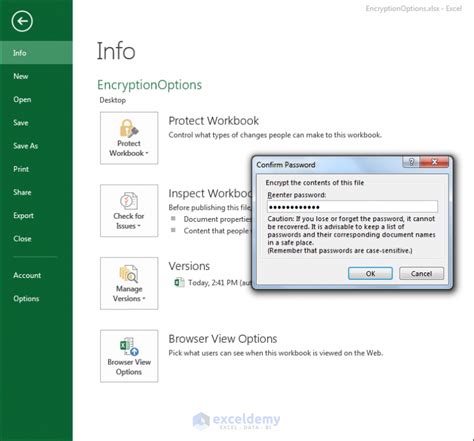
- Consider protecting your workbook with a password to restrict who can make changes and to ensure the integrity of your data.
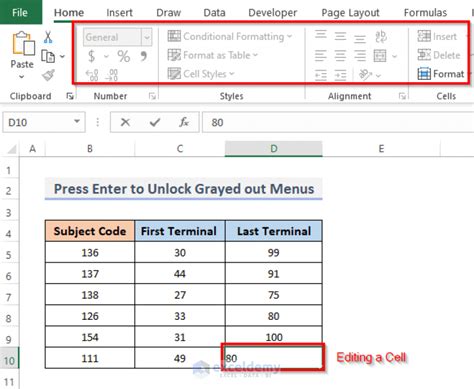
Greyed Out Options
Sometimes, options in the "Track Changes" or "Highlight Changes" dialog boxes might appear greyed out. This usually indicates that the feature is not available due to the workbook's current state or settings. Common reasons include:
- The workbook is not saved: Excel requires the workbook to be saved before enabling change tracking.
- Change tracking is already on: If change tracking is already enabled, some options might be greyed out until you disable and then re-enable the feature.
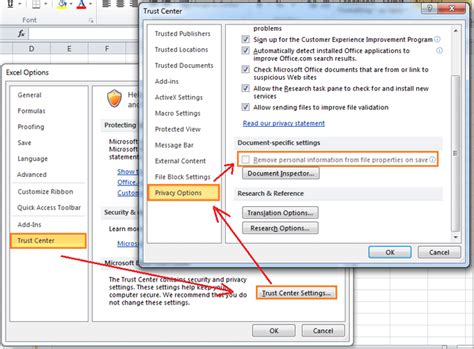
- Workbook protection: If the workbook is protected, certain features, including change tracking, might be restricted.
Conclusion and Next Steps
Excel's change tracking feature is a powerful tool for managing and auditing spreadsheet changes. By following the steps outlined above, you can effectively track, review, and manage changes in your Excel workbooks. Remember to regularly save your workbooks and consider implementing additional security measures, such as password protection, to safeguard your data. For more advanced tracking and collaboration needs, consider exploring other Microsoft Office tools, such as SharePoint or OneDrive, which offer integrated version control and real-time co-authoring capabilities.
Enabling and Using Track Changes
Viewing and Managing Tracked Changes

Accepting or Rejecting Changes
Tips for Effective Change Tracking
Resolving Greyed Out Options
Conclusion on Change Tracking
Next Steps in Excel Collaboration
Gallery of Excel Change Tracking:
Excel Change Tracking Image Gallery


How do I enable change tracking in Excel?
+To enable change tracking, go to the Review tab, click on "Track Changes," and then select "Highlight Changes." Follow the prompts to set up tracking.
Can I track changes made by specific users?
+Yes, Excel's change tracking feature allows you to see who made each change, making it easier to collaborate and manage contributions from multiple users.
How do I accept or reject changes in Excel?
+To accept or reject changes, go to the Review tab, click on "Track Changes," and then select "Accept/Reject Changes." Excel will guide you through the process of reviewing and deciding on each change.
We hope this comprehensive guide to showing changes in Excel has been helpful. Whether you're working on a personal project, collaborating with a team, or managing data for your business, understanding how to track and manage changes in Excel is crucial for maintaining data integrity and ensuring seamless collaboration. If you have any further questions or need additional assistance, don't hesitate to reach out. Share your experiences with Excel's change tracking feature in the comments below, and consider sharing this article with others who might benefit from learning more about this powerful tool.